SAP buffers and buffer refreshes

This blog will explain the SAP buffer setup and the SAP buffer refresh process.

Questions that will be answered are:

  • What is the use of table buffers?
  • Which tables are buffered?
  • How can I check on my productive system which buffered table is using a lot of memory?
  • How to force a buffer refresh in general?
  • How to force a buffer refresh for a specific table?
  • How to force a buffer refresh on a specific application server?

Background of table buffers

The primary reason of a table buffer is pretty simple: performance improvement.

SAP has a 3 tier setup of:

  1. Front end GUI
  2. Application server
  3. Database server

If data is read from the database server it is processed on the application server. This data is buffered on the application server. If a user asks the same data twice, the application server already has the data. Also very frequently read tables (like company code and plant data) are buffered on the application server.

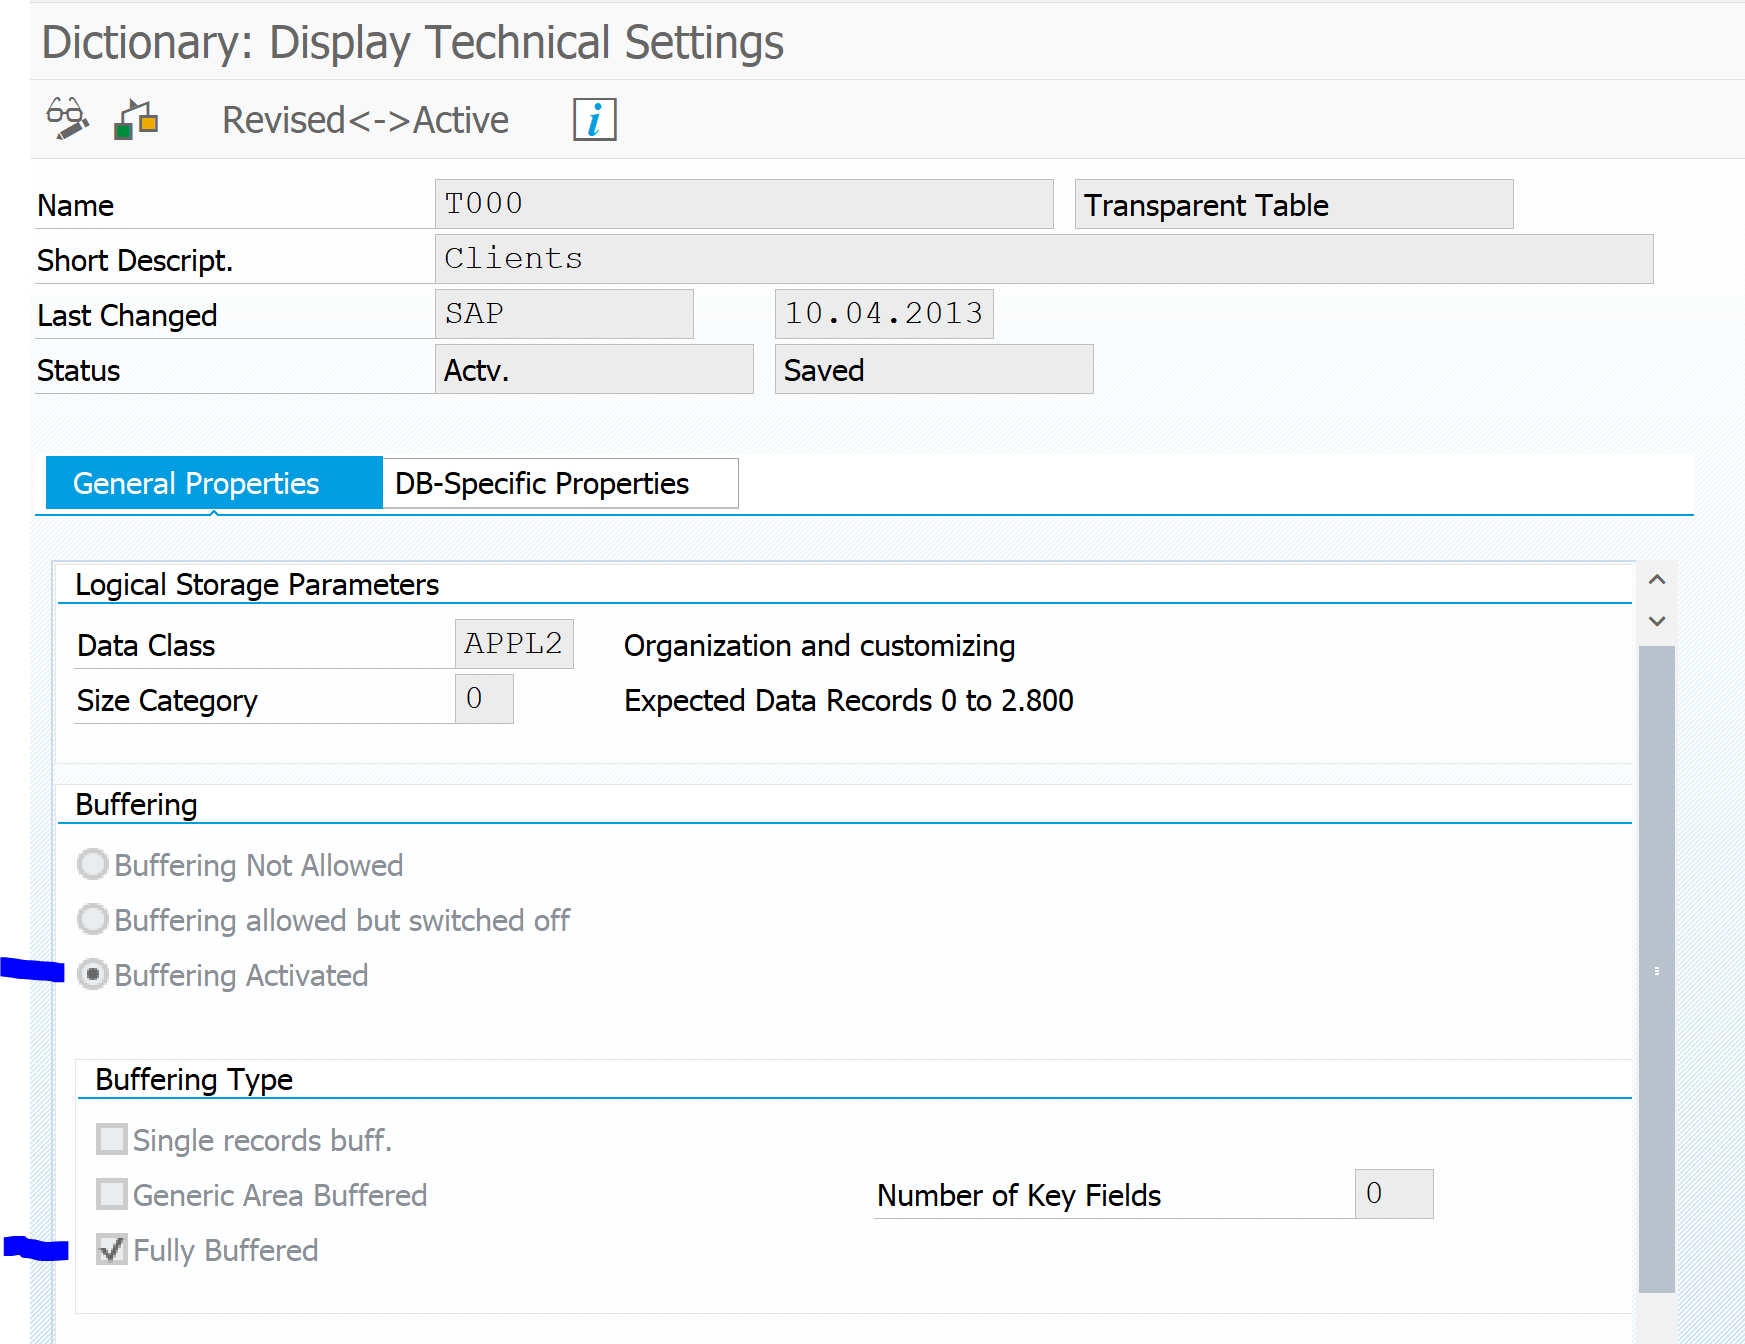
In transaction SE11 in the technical settings of a table you can see if a specific table is buffered or not, and the type of buffering. Example is for table T000, which is fully buffered:

When to set buffering?

Buffering is extremely useful on small and infrequently changing tables, which have a lot of read access. For these tables buffering will help a lot. That is why a lot of customizing table have buffering activated. You can do the same for your Z tables if they are used for customizing like purposes.

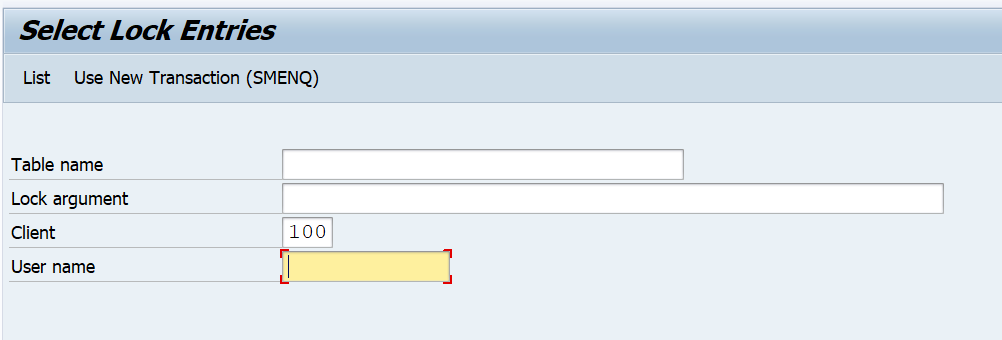
How to check buffering in productive system?

Follow the instructions from OSS note 2806927 – Remove table buffers to check table buffering in production.

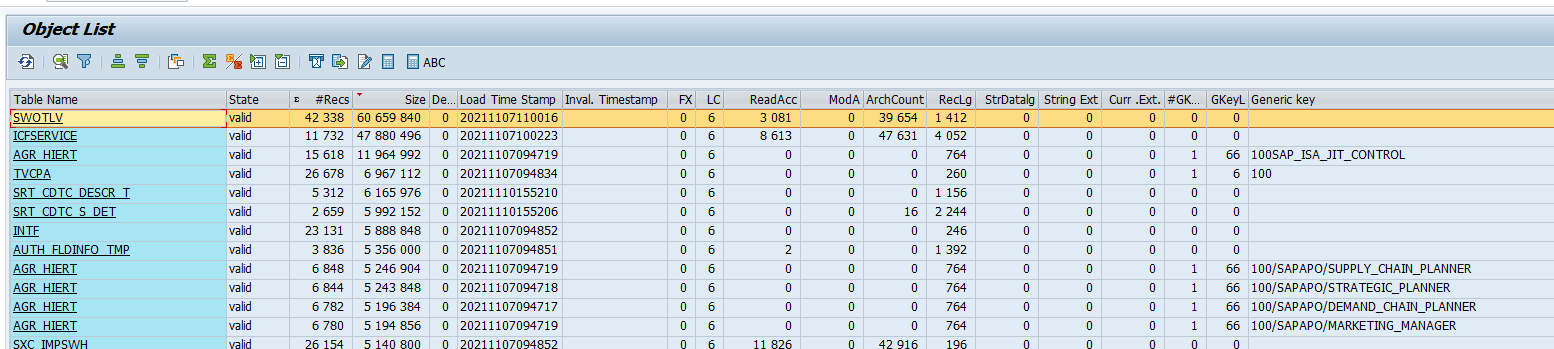
Go to transaction AL12:

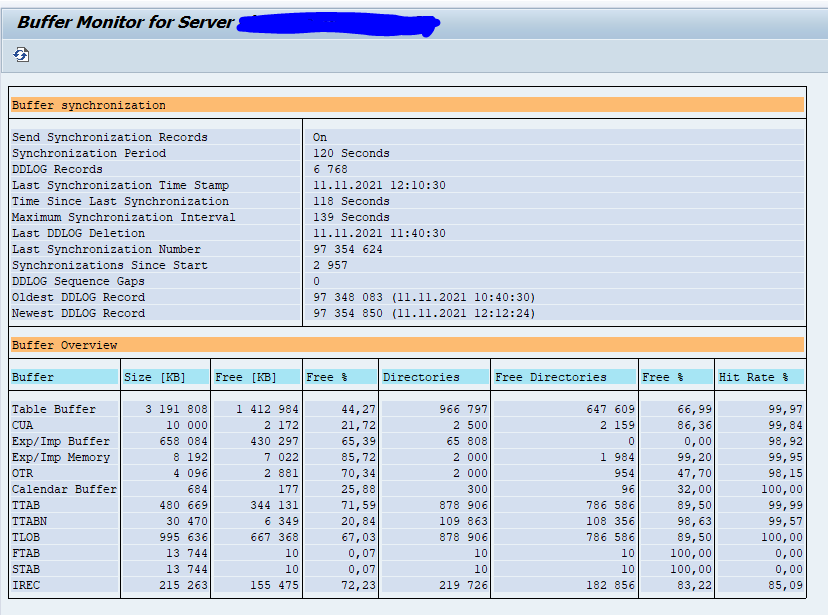
Then select menu option Monitor, Buffers, Table buffer, All Generic tables. Then sort by size:

How to reset table buffers?

In some specific case you might want to force a buffer reset.

For this reason you can enter specific commands (enter same way like transaction code or the famous /h for debugging):

/$TAB – Resets all the table buffers on the application server

/$TAB <table name> – Resets the TABLE buffers on the application server for that specific table (also consider program TOUCHTAB after transporting a table definition)

/$SYNC Resets the buffers on the application server

/$CUA Resets the CUA buffer of the application server (the CUA buffer is not for central user admin, but holds screen elements like menus, buttons, etc)

/$DYN Resets the screen buffer on the application server

/$ESM Resets the exp/imp shared memory Buffer on the application server

/$PXA Resets the program (PXA) buffer on the application server

/$OBJ Resets the shared buffer of the application server

ST02 buffer overview

You can use transaction ST02 to get an overview of the buffers:

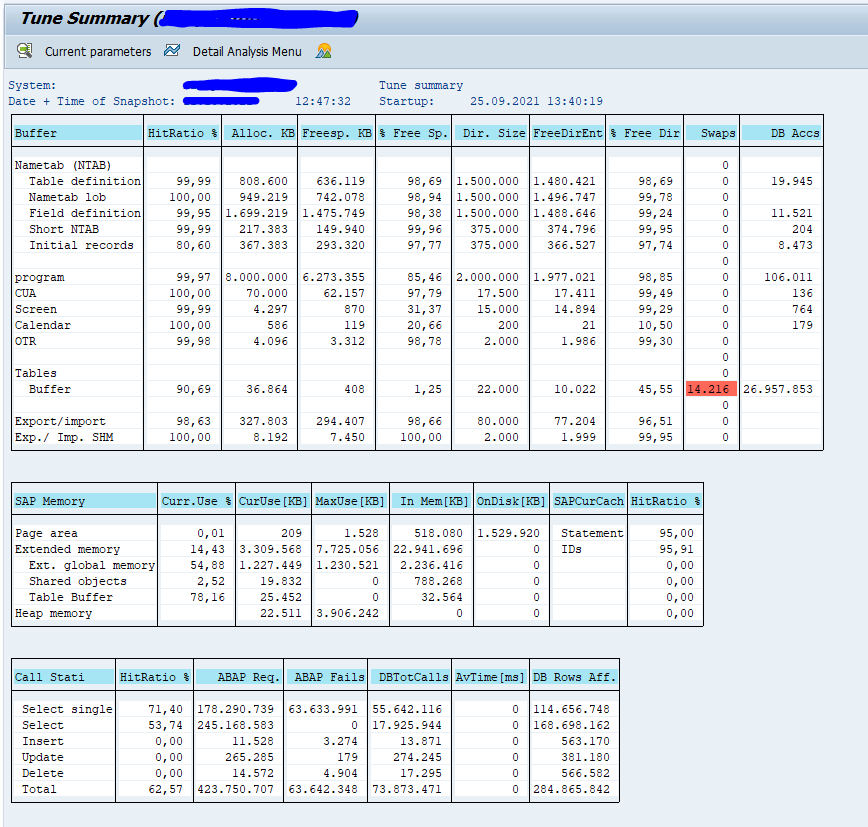
By clicking the button Current parameters you get an overview of the currently set relevant parameters:
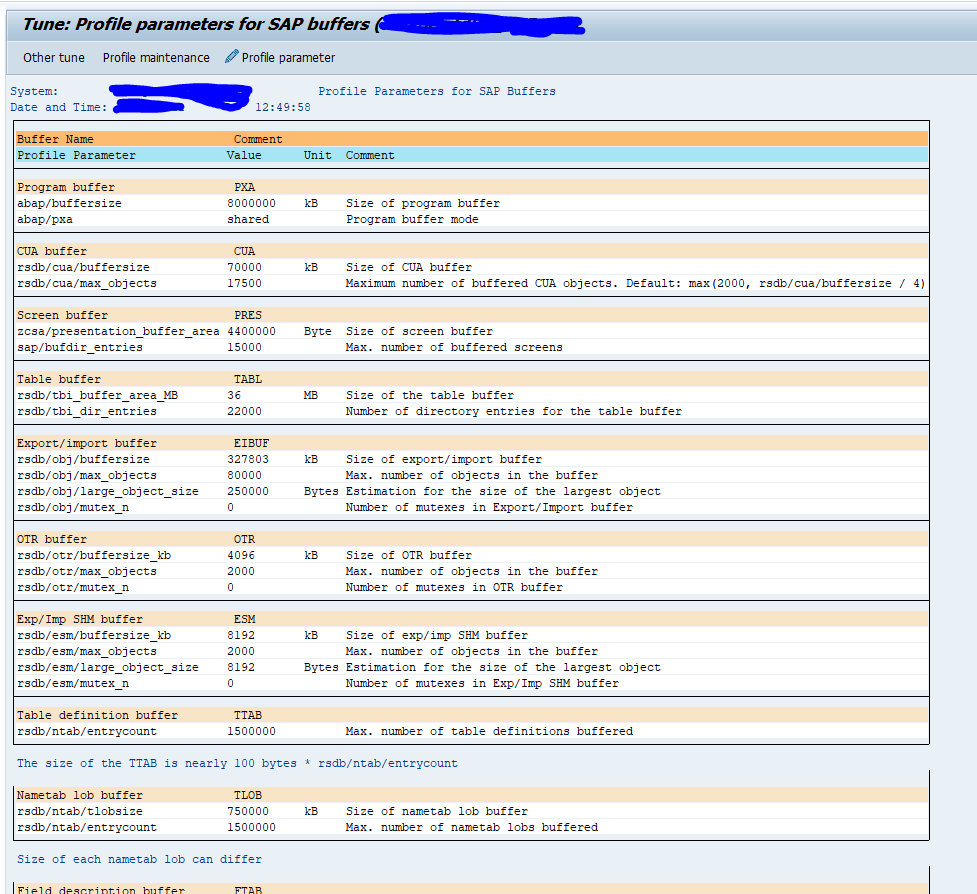
Explanation notes:

Other buffer and caching resets

There are other buffer and caching resets:

  • User buffer reset: go to transaction SU53 and select menu Authorization Values / Reset User Buffer
  • User role combination refresh: transaction PFUD, see dedicated blog.
  • FIORI buffers, see dedicated blog.

ABAP update administration

This blog will explain about the ABAP update administration. Questions that can be answered are:

  • How to check if the ABAP update process is active?
  • How to check and fix update errors?

Update administration

You can use transaction SM14 to goto the ABAP update administration:

Update errors

The update errors can be seen with transaction SM13 (do take care to have the right date selection):

Double clicking on the line will give you more information:

Double click again on the error for more information. This information can be used to find the OSS note to fix the issue in case of standard SAP failure. In case of Z code failure, you will have to go to you own ABAP developer to fix it.

Reprocessing

Reprocessing is sometimes possible, and in most cases not. After you have captured the information on a update failure you can delete it.

When reprocessing is possible, check first with the user. He might have posted the data already in a different way. Only when he did not post in different way, you can try to reprocess the failed update.

Alerting

You can set parameter (RZ11) rdsip/vbmail to 1 to activate mail sending. Parameter rdisp/vb_mail_user_list contains the mail addresses (separation by comma).

Automatic deletion

By setting parameter rdisp/vbreorg to 1 the automatic deletion of failed updates is activated. Parameter rdsip/vbdelete is the amount of days the SM13 entries are kept.

Background OSS notes

S4HANA setup FIORI manage KPI tiles

Inside S4HANA there is a very powerful FIORI tile called the Manage KPI and Report function. This blog will explain how to setup this FIORI tile and how to make sure it is working properly.

It is assumed you have already enabled your S4HANA system for FIORI (see this blog).

Note: this blog will only explain the S4HANA 1909 and higher implementation. Previous versions of this functionality have more tiles and setup work.

Activating the Manage KPI and report function

Goto transaction STC01 and select task list SAP_FIORI_CONTENT_ACTIVATION:

In the task list select the business role SAP_BR_ANALYTICS_SPECIALIST:

Now run the task list and wait. If you have issues, please read this blog.

Assign then activated PFCG role SAP_BR_ANALYTICS_SPECIALIST to your user ID.

Checking the KPI and report FIORI tile

Start the FIORI launchpad (transaction /UI2/FLP) and check that the manage KPIs and Reports tile is now available:

Click on the tile and you come into the first screen. Top left you can choose between KPI and Reports. We will first start with inspecting the KPI. We will use Purchase Order Changes as example:

Details of the KPI:

Here you can see the Data source: CDS view C_POITEMCHANGECOUNT.

On the visualize tab you can see a preview of the tile:

Now we will inspect the report:

Here you can see it is a Generic Drilldown on the datasource C_POITEMCHANGECOUNT. Click to open the details:

You can push the button Show Preview to get a preview of the report:

In the section application details you can see the details for the tile:

Very important here is the catalog it belongs to. In PFCG assign the correct business role to your user: SAP_BR_BUYER. You can find this role in the FIORI reference library documentation for this tile.

After the role is assigned, start the FIORI app finder and search for the app:

Now this tile should work:

Background information

There is an excellent OpenSAP course on this topic: link.

More background information can be found on the FIORI reference libary for the Manage KPIs and Report app:

S4HANA rapid activation of FIORI lighthouse apps

This blog will explain how you can execute a rapid activation of a set of FIORI lighthouse apps.

Questions that will be answered are:

  • Which apps can be used for rapid setup?
  • How to execute the rapid activation of FIORI lighthouse apps?

This blog assumes you have finished the basic activation of embedded FIORI on S4HANA, which is explained in this blog.

FIORI lighthouse apps

FIORI lighthouse apps are enabled for rapid activation. On the FIORI reference library site click on the Lighthouse scenario link to get a PDF full of all possible apps you can activate:

In the app finder you can also search for specific lighthouse apps:

Rapid activation of FIORI lighthouse app

We will take the following app as example to execute the rapid activation: app ID F1600A: Manage Purchase Contracts (Version 2):

In the implementation information scroll down to the authorization information section:

For now you can ignore the catalog and business group. Important here is the business role: SAP_BR_PURCHASER.

Go to transaction STC01 and select task list SAP_FIORI_CONTENT_ACTIVATION:

In the scope definition select the needed role SAP_BR_PURCHASER:

In the task list set the mandatory parameters process mode to co-deployment and Prefix to Z. Now start the task list execution and be patient. This might run up to 10 minutes.

This task list will now activate all ODATA services for the app group (not only for this single app, but the complete group!). It will activate all SICF nodes for the app group (yes, again the whole group). And it will generate the PFCG authorization role SAP_BR_PURCHASER.

If the task list is finished, assign the role SAP_BR_PURCHASER to your user ID.

Content activation for catalogs

For some scenarios it might be needed to activate catalog content. To do this, first apply OSS note 3339909 – Fiori Setup: Content Activation for Catalogs. This note delivers STC01 task list SAP_FIORI_FCM_CATALOG_ACTIVATION.

Testing

Start the FIORI launchpad (transaction code /UI2/FLP):

You see that the tile Manage Purchase Contracts is visible. Since we activated a complete group, also the other tiles are immediately visible.

Clicking on the Manage Purchase Contracts tile gives immediate result:

This shows we can activate complete group of apps that immediately work, with minimal effort.

Issue detection

You can use the FIORI app support function to quicly analyze an issue in your newly activated FIORI app. Read more in this blog.

In app extensibility

All the FIORI lighthouse apps are built for in app extensibility. This allows you to change the look and feel of a standard SAP app and to add custom fields to standard SAP app. Read more in this blog.

Transport and activation after transport

After transport everything is present, but in inactive state. You need to perform the activation after transport.

OSS note 2886433 – Fiori Setup: Activation of OData Services in Prod Systems with task lists contains a perfect PDF that describes how to carry out the activation in a productive system using the proper selections in the task list.

Embedded activation and system refresh

If you refresh your sandbox, quality or development system with production copy, read this note 3111069 – Task list clarification post System copy/System Refresh in Embedded deployment on activation of embedded FIORI after the refresh.

OSS notes

Background OSS notes:

Bug fix notes to apply:

Include usage data in S4HANA custom code migration FIORI app

With the new S4HANA custom code migration FIORI app you can include system usage data (from productive system) to see which code blocks are used and which ones are not.

This blog will give answers to the following questions:

  • How to collect usage data from productive system?
  • How to include the usage data in the S4HANA custom code migration FIORI app?

This blog assumes you have already setup the S4HANA custom code migration FIORI app. If you have not done this, follow the instructions in this blog.

Collecting usage data in production with transaction SUSG

General recommendations for the use of transaction SUSG can be found in OSS note 2701371 – Recommendations for aggregating usage data using transaction SUSG. SUSG assumes you have already activated the SCMON ABAP call monitor. If that is not done, read this blog.

In your productive system start transaction SUSG and activate the usage data aggregation:

If you don’t have sufficient authorizations, you might get this weird screen:

If you see this screen, first check your user authorizations.

SUSG performance impact

SUSG performance impact is negligible. SCMON might have an impact. See the blog on SCMON.

Background: 3100194 – Memory Requirement and Performance Impact of transaction SUSG.

SUSG installation

If SUSG does not start in your productive system it needs to be installed first. To install SUSG apply OSS note 2643357 – Installation of Transaction SUSG. This is a TCI based OSS note (see blog).

After the TCI note also apply these OSS notes:

Creating the snapshot

Now that the data collection and aggregation is activated, you will need to be patient. Let the system collect the data for the next few days. Now goto transaction SUSG and check the log that the aggregation went fine:

Now you can create a snapshot in the Manage Snapshots section:

Create the snapshot and download it to a file on your desktop or laptop. If wanted you can setup RFC connection as well.

The security and basis team normally does not like any RFC going from production system to non-production system. So the file option is normally the best way.

Loading the data into your upgraded S4HANA system

In your S4HANA system where your custom code analysis runs now start transaction SUSG and make sure it is active. Now you can upload the snapshot from the productive server you have downloaded in the previous step.

Please make sure that the OSS notes on both your productive system and your S4HANA system are identical. The notes have changes to file format of the download file. If the notes are notes identically applied, you will have file format upload issues. Recommendation is to apply all recent SUSG note to both your productive server and the S4HANA system.

S4HANA custom code migration app with usage data

Now you can finally launch the S4HANA custom code migration app. Create a new analysis. In the usage data part of the app, you can assign the snapshot you have uploaded in the previous section:

Now start the custom code analysis and let it run.

The end results of code being used or not can be seen in the column Usage Information in the Analyze Findings section:

Background information

More background on SUSG setup can be found on this blog.

Deletion of SUSG data

Deletion can be done after applying OSS note 3130631 – SUSG: Report to delete programs from usage data.

S4HANA setup FIORI my Inbox app

If you have followed all the instruction in the blog about embedded FIORI activation in S4HANA, you will find that the my Inbox app is still not working.

This is correct since extra steps are required to setup the FIOIR my inbox app. This blog will answer the following questions:

  • Which extra steps to perform to activate the FIORI my inbox app?
  • Where to find more background information on the FIORI my inbox app?

Basic setup of FIORI my inbox in S4HANA

After you have finished the embedded FIORI activation in S4HANA (see blog), you must follow the extra steps in OSS note 2902673 – Rapid Activation for SAP Fiori in SAP S/4HANA – Overview. This note refers to specific version like 2834415 – Composite SAP note: Rapid Activation for SAP Fiori in SAP S/4HANA 1909. In this note there is a special section on the extra steps to activate the myInbox.

Goto the following customizing tree entry:

Now setup an extra system alias, name can be freely chosen:

It is very important here to notice 2 things:

  1. The local GW (gateway) tickbox must be set
  2. The software version MUST be set to /IWPGW/BWF

In transaction /IWFND/MAINT_SERVICE activate the service TASKPROCESSING version 2 for the system alias you just created.

It is very important to take version 2 and not the version 1.

In SICF activate the FIORI inbox tile itself: CA_FIORI_INBOX.

In PFCG activate role SAP_BR_MANAGER and assign it to your user.

MyInbox app

Now goto the FIORI launchpad (/ui2/flp transaction) and the MyInbox tile should be visible with the number showing you the amount of workflows:

If you see the number zero, you might not have any workflows assigned to your user. See the blog on S4HANA workflow activation to make sure the workflow system is properly activated and instruction to generate some test items for you.

Background information

The best source of public information is the SAP wiki on myInbox.

Official SAP note: 2676990 – Release Information note for SAP Fiori My Inbox. (this note contains the list of patch notes for the My Inbox FIORI side).

Release information note, which refers to patch notes: 2221151 – Release Information note for SAP Fiori My Inbox 2.0.

Specific useful notes on how-to OSS note for my Inbox FIORI app :

SMENQ: new SAP enqueue management transaction

When you have installed and activated SAP enqueue server 2 (this will happen when you move to S4HANA), the transaction SMENQ is available to manage lock entries. This replaces transaction SM12.

Questions that will be answered in this blog are:

  • Where to find more information on SAP enqueue server 2?
  • What are the new functions in SMENQ?
  • How to solve lock overflow issues?

SMENQ transaction

When you start SM12 you see that a new button SMENQ is available if you have activated SAP enqueue server 2:

You can enter this way, or directly via transaction SMENQ:

From the start screen you can search for locks, just like SM12 can. The new functions are in the Server Administration button.

Enqueue server administration

From the start screen of SMENQ goto the Server Administration:

Now you can launch a lot of tool.

Interesting tool is the Functional Tests tool to quickly check the correct functionality of the enqueue server to be fully working:

Lock overflow issues

If you experience issues with lock overflow on standalone enqueue server 2, read OSS note 2917868 – ENQU, ENSA 2.0: Lock Table Overflow.

2942857 – ENQU 2.0: Maximum number of locks cannot be increased above 2 million.

Other issues

High wait times: 3250533 – High “Waiting Time for Lock Operations” statistic in Enqueue Server Administration.

Update pending: 2832507 – SMENQ shows replication status as “Active (update pending)”.

Trace file

ENSA trace file download is enabled via OSS note 2887346 – SMENQ: adjust the functionality.

Bug fix notes

Bug fix notes:

Background information

More background information on the functions of enqueue server 2 can be found at this blog.

Activating workflow in S4HANA

This blog will explain how to activate workflow in S4HANA. If you have to activate workflow in classic ECC system use this blog.

Questions that will be answered in this blog are:

  • How to activate workflow in S4HANA?
  • What do I need to do with the workflow activation in case of an upgrade to S4HANA?
  • Where to find more background information on workflow activation in S4HANA?
  • Why is WF-BATCH replaced with SAP_WFRT user?

Workflow activation in S4HANA

First make sure you have created system user SAP_WFRT. Start with assigning SAP_ALL to this user. You can replace it with lower rights after the activation is done properly according to OSS note 1574002 – WF-BATCH and SAP_WFRT Authorizations.

Start transaction SWU3:

Select the Edit Runtime Environment and press the button Execute Activity. This will activate all the actions below.

After it is done you can press the button Start Verification Workflow to check if the workflow runs properly. After 1 minute (it needs compilation in the background) start transaction SBWP.

All background information regarding SWU3 can be found in OSS note 2366252 – Transaction SWU3 explained.

Activating workflow after upgrade to S4HANA

After upgrading to S4HANA workflow will not work any more. You first need to create system user SAP_WFRT and redo the SWU3 setup.

Background user SAP_WFRT will replace background user WF-BATCH.

For more background on this replacement see oss note 2568271 – Change of workflow system user and workflow system jobs with S/4HANA On-Premise 1709 and oss note 2637240 – Error in SWU3 – System user ‘SAP_WFRT’ does not exist.

If you have issues with the workflow batch jobs after the upgrade, please check OSS notes:

After the user and RFC activation you need to schedule the new workflow jobs in SJOBREPO:

Read OSS note 3109917 – How to change the step user of workflow system jobs while keep the other technical jobs in job repository unchanged for instructions on the job user for workflow.

Explanation OSS notes:

Workflow and SNC

If you also use SNC, please follow the instructions in OSS note 3137350 – Workflow RFC destination no longer works after SNC activation carefully.

More workflow

For workflow tips and tricks: read this blog.

Setup of FIORI my workflow inbox: read this blog.

For deletion and archiving of workflow: read this blog.

Activating embedded BI in S4HANA

This blog will explain how to activate embedded BI in S4HANA.

Questions that will be answered are:

  • How to activate embedded BI in S4HANA?
  • Where to find more background information about embedded BI activation in S4HANA?

Setting up embedded BI in S4HANA

To start setup of embedded BI in S4HANA go to transaction STC01 and start task list SAP_BW_SETUP_INITIAL_S4HANA:

The task list will ask you to confirm that you have read OSS note 2303900 – Latest Information about BW Setup in S/4HANA Systems. You should really read the note before and apply the known issue notes listed in this note.

Then you need to set the BI client: best to use the same client as your data client. Withe BW content option, just choose all.

Now run the task list and be patient. If the task list finishes correctly you are done. You can use transaction RSA5 to check the content activation.

OSS note 2636754 – Configuration steps for embedded Analytics in ABAP based Applications contains detailed explanation of all the steps in this task list.

Bug fix OSS notes:

Full list is in OSS note 2303900 – Latest Information about BW Setup in S/4HANA Systems.

Known issues

EQ_RS_AUTOSETUP: you might run into an issue with this program.

First apply OSS notes 2704713 – Report EQ_RS_AUTOSETUP: improvements and enhancements and 3005612 – Report EQ_RS_AUTOSETUP: improvements and enhancements (2) to get the latest patches for this program. Then run the program EQ_RS_AUTOSETUP manually:

Transaction RSTCO_ADMIN: this one might not have gone right.

Re-install the content if required.

In case of issues with BGRFC supervisor destination: Use transaction code SBGRFCCONF and check the last tab that the supervisor destination is assigned. In systems with CUA there might be an issue with creating the supervisor destination. In this case follow the steps of OSS note 2775490 – Error in customizing while creating supervisor destination.

Other bug notes:

3283169 – Virtual time hierarchy 0YEA_QUA_MON is not activated when running task list SAP_BW_SETUP_INITIAL_S4HANA

Background information

Good background information can be found at:

The configuration of embedded analytics is also part of the SAP best practices:

Download the full configuration guide.

S4HANA standard batch jobs

In S4HANA standard jobs are scheduled in a different way.

This blog will answer the following questions:

  • How to see then new standard jobs via transaction SJOBREPO?
  • Where to find more information on more advanced functions?
  • Which background OSS notes can I read on the S4HANA stand batch job repository?
  • I have done a change to SJOBREPO and it is not visible? (it takes up to 1 hour!)

Viewing the job repository

Start transaction SJOBREPO to view the job repository:

The jobs running are different per release. Check the corresponding note. Example for S4HANA 2020: 2992214 – Jobs in the Technical Job Repository (SJOBREPO) in SAP S/4HANA 2020.

Use transaction SWF_JOBREPO_SLG1 to see logs of potential job issues.

To assign a standard user to job steps use transaction SJOBREPO_STEPUSER to set standard job step user:

See OSS notes

Checking the activation status of SJOBREPO

With program R_JR_UTIL_1 you can check the current status of SJOBREPO or activate it:

See OSS note 2790150 – Automatic Job Scheduling is switched off.

Activation and monitoring

In SJOBREPO, more background information can be found by clicking the button Monitor help:

A very important remark is made here that it can take up to 1 hour before changes to SJOBREPO are visible in the monitoring overview. This is a very annoying feature.

Advanced functions in SJOBREPO

All the advanced configuration functions of the S4HANA job repository can be found as PDF attachment to OSS note 2190119 – Background information about S/4HANA technical job repository.

Activation of server group for technical job repository

Apply OSS note 3057980 – Targetservergroups in SJOBREPO in Release 7.55 to get the function for server groups for the technical job repository.

Scope dependent jobs

In customizing you can activate scope dependent jobs:

See also OSS note 3085988 – Technical job is not getting schedule in S/4HANA SJOBREPO because the job is showing as ‘Not in Scope’.

Background OSS notes

Useful background OSS notes:

Bug fix notes:

Exit mobile version