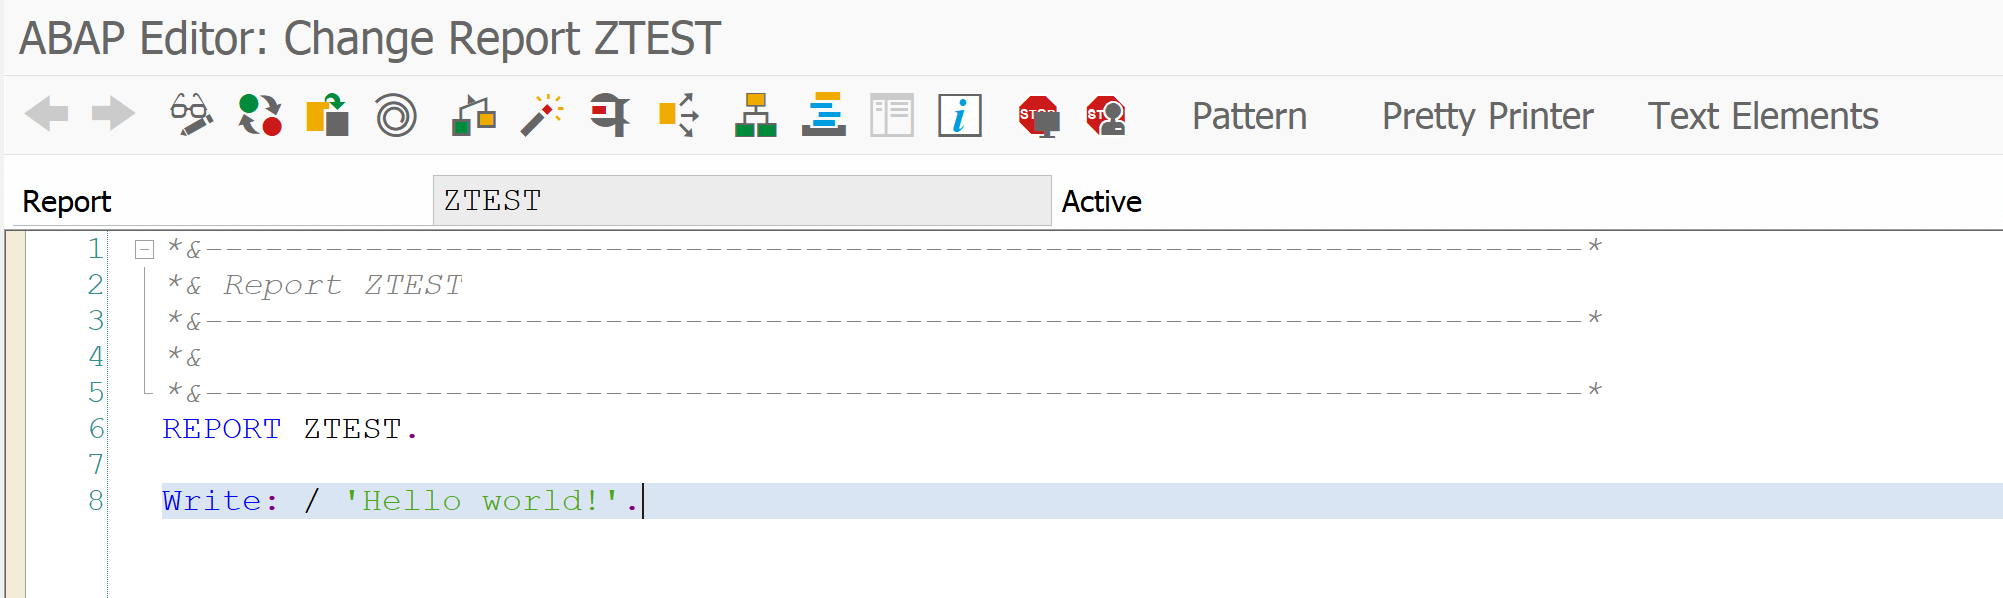
Follow the steps explained in this blog to set up a new custom check. We will use these steps to set up an extra SCI class to check if the AUTHORITY-CHECK statement is added in ABAP code or not.
New SCI check coding
Step 1: create the ZCL_CI_SCAN_AUTH class
In SE24 copy class CL_CI_TEST_FREE_SEARCH to ZCL_CI_SCAN_AUTH. In the attributes of the copied class set C_MY_NAME as variable to ‘ZCL_CI_SCAN_AUTH’. Also set the error code MCODE_0001 to ‘Z001’.
Step 2: redo the CONSTRUCTOR
Goto the constructor of the new class and overwrite the existing code with this code snippit:
Clean ABAP is the ABAP variant of the clean code principles. All background on clean ABAP code can be read in this blog.
This blog will explain how to upload the ABAP coding for the Clean ABAP ATC variant in your system and activate it.
Load ABAP Git code
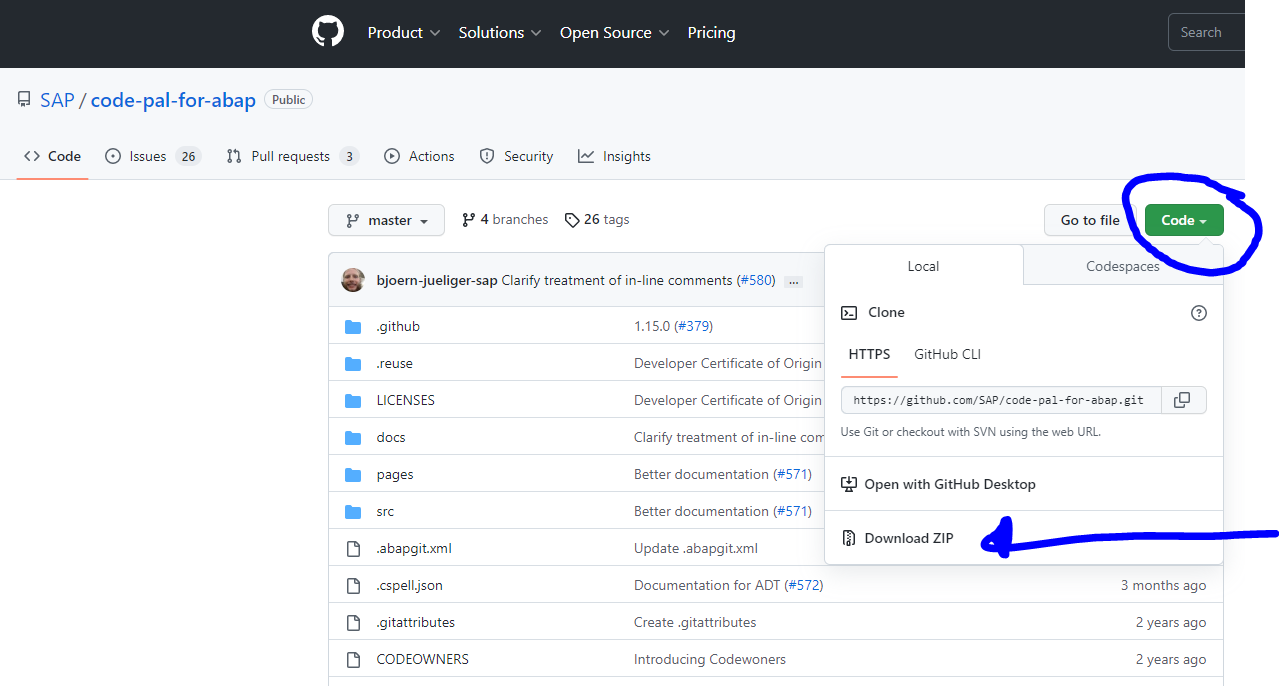
To load the ATC variant code for clean ABAP you first need to install the ABAP Git code. Follow the instructions in this blog to do so. Simplest is the offline variant.
Select the button Code and choose the option Download ZIP.
Upload the package
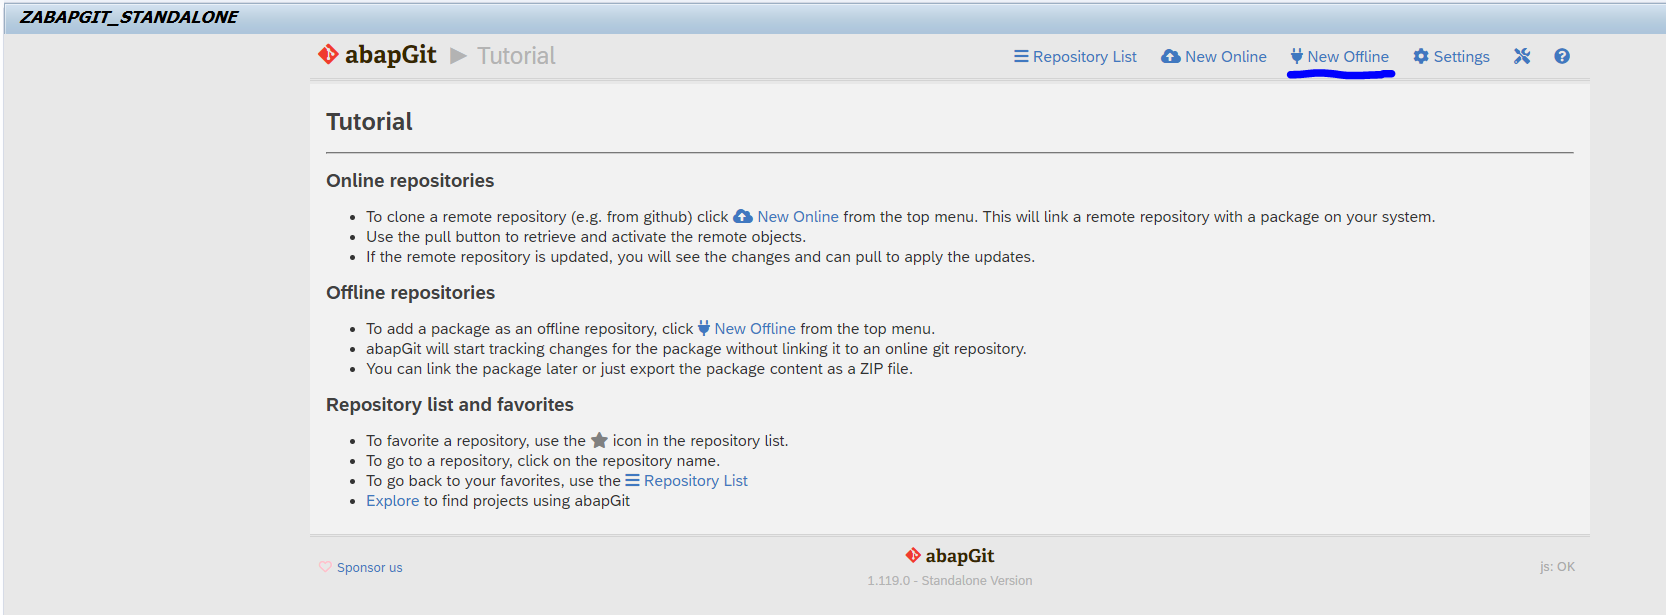
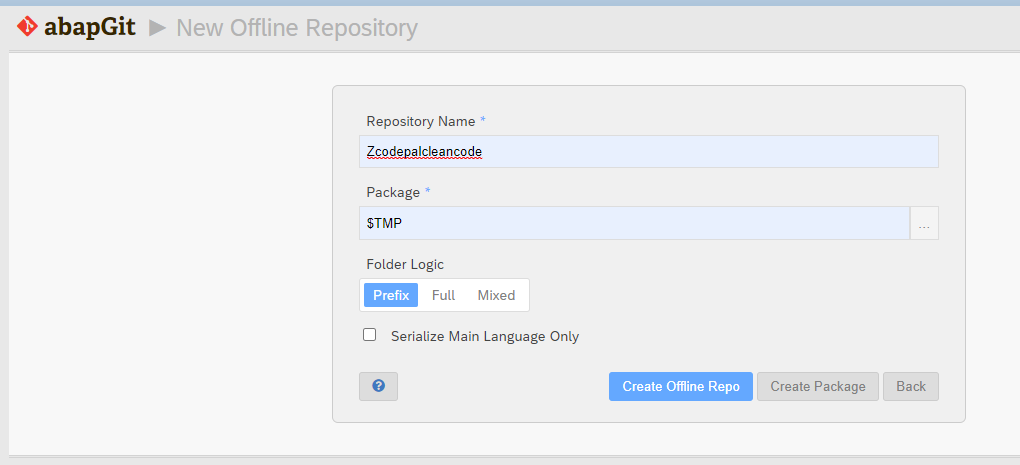
Now start the ABAP git that you loaded in your first step. Choose the option New Offline:
Give the repository a name and select a package:
Then push the button Create Offline Repo.
Now select Import Zip:
Import the file you downloaded in step 2 from the code pal site.
Next step is the Pull zip:
You might get a screen with differences. Do not select anything there, only press Ok.
Then wait until all the Y objects are pulled into the system. This might take 5 to 10 minutes.
Activating the SCI checks
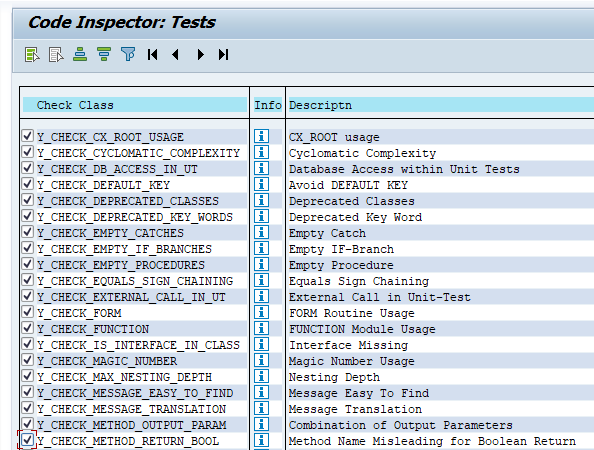
Now start transaction SCI. Select menu option Code Inspector, Management of, Tests. Select all the newly load Y checks for Clean ABAP code:
Important now: Save them!
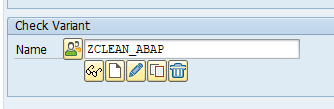
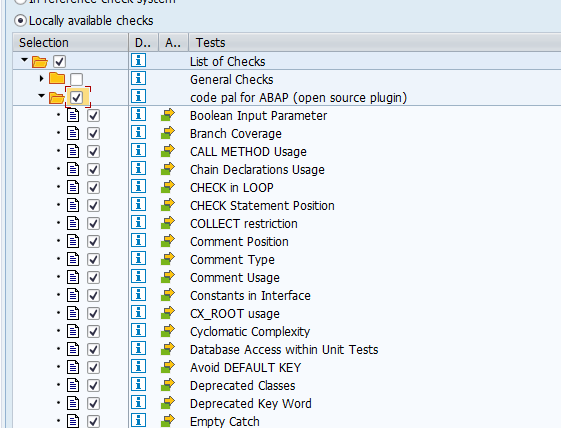
Now you can create a global SCI variant:
Select all the Clean code ABAP checks and save the variant:
You might get weird issues upon saving for other items, like for example missing CL_CI_CATEGORY_TOP. In that case, go to transaction SE16 -> look for table SCITESTS -> and look for CL_CI_CATEGORY_TOP if there is no entry. Enter the table SCITESTS and click "Create Entry", add CL_CI_CATEGORY_TOP entry and save.
Test and usage
Take a program you want check. Then select menu option Program, Check, ABAP Test Cockpit with….:
Select the ZCLEAN_ABAP SCI check we created above. Run the checks.
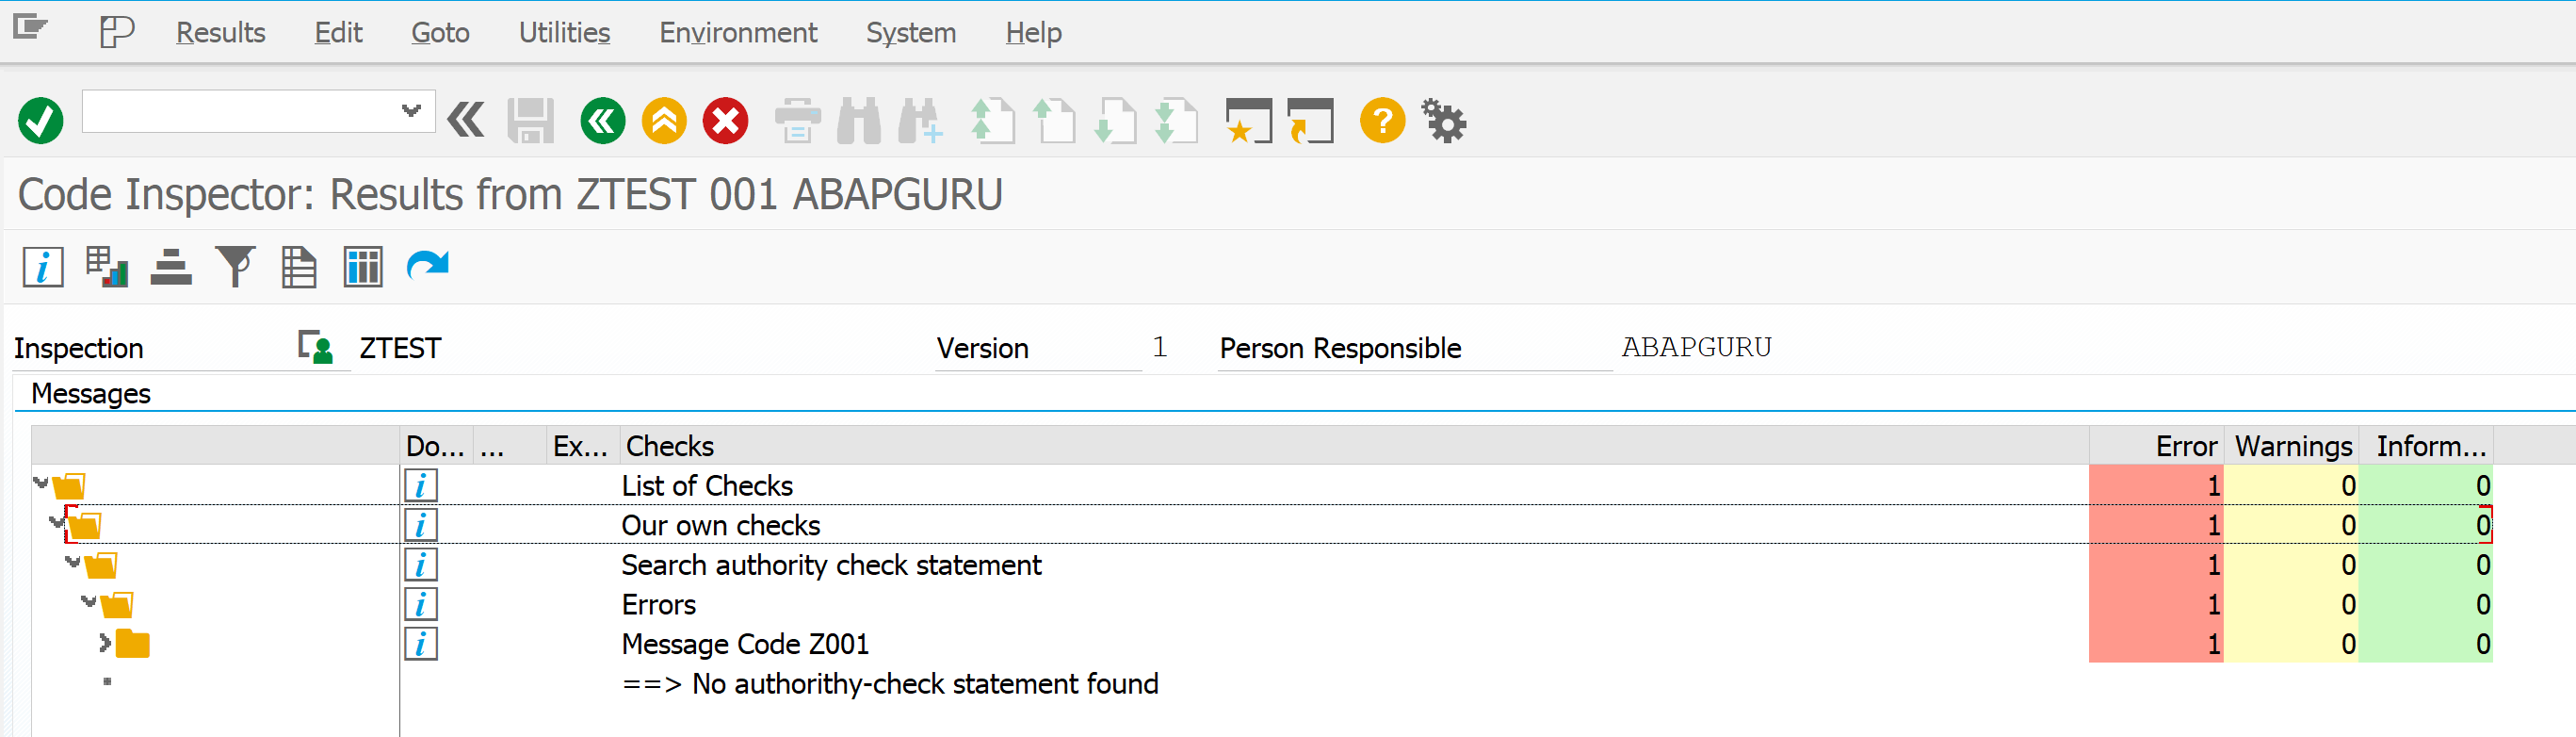
Results:
Tip: click on the blue line to jump to the Clean Code site exactly explaining about the issue.
Clean ABAP Eclipse plug-in: ABAP cleaner
To speed up clean ABAP in practice, you can install the clean ABAP cleaner plug-in. Read this blog on how to do this.
Custom code can use standard SAP code and SAP objects. Some of these objects might technically exist, but are in an unreleased status. This might mean SAP will not give support on them, or might remove them in a future upgrade.
Also when you want to move to the BTP ABAP cloud, you cannot use the unreleased code.
Questions that will be answered in this blog are:
How can I scan my custom code for use of unreleased standard SAP objects?
SCI and ATC are very powerful code scanning tools (see blog and blog). Unfortunately you cannot apply it to standard SAP and add-ons.
Analyzing standard SAP code is the responsibility of SAP, and they take good and secure code (since they provide good code, it is weird they don’t allow everybody to scan their code…). Unfortunately a lot of add-on providers do not.
The blog will explain how to scan code of standard SAP and mainly on add-ons.
Questions that will be answered are:
What is the background on not being able to scan standard SAP and add-on code?
Can I truly scan the code of a new OSS note 7 days?
How can I work around these restrictions and still scan the code of an add-on?
Background
The background of not being able to scan standard SAP code is explained in OSS note 1986391 – Using SLIN/SCI to check SAP standard objects. This note also explains you can scan OSS notes and transports for 7 days. After that time it is no longer possible. Unfortunately this rule also applies to add-ons.
Why run SCI on add-ons?
Why would you want to scan add-ons? Add-ons come with various quality levels. Ranging from very well written with much attention to performance and security. Some add-ons are full of performance issues and full of security leaks. Some are even allowing full dynamic read SELECT and UPDATE statement without any authorization check. This is heaven for a hacker!
The below method is meant for scanning these poor add-ons using the SCI tool for performance, robust coding and security.
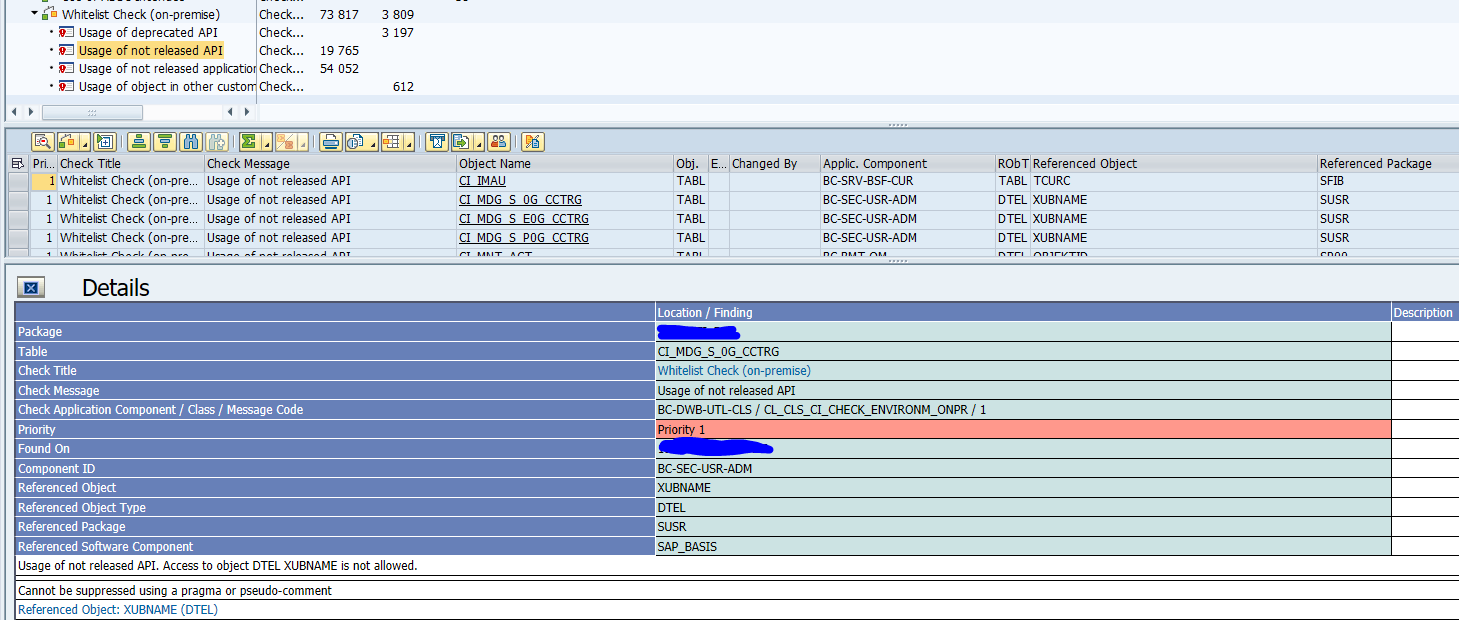
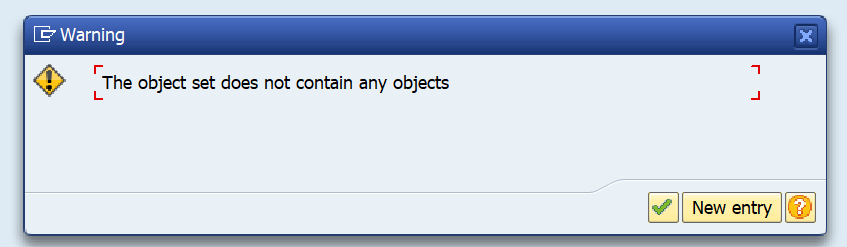
When you run the SCI tool on an add-on by selecting package or development object, you get the message that it does not contain any objects:
This is because your selection is first scanned for standard SAP and add-on objects. These are removed. So the result set is empty.
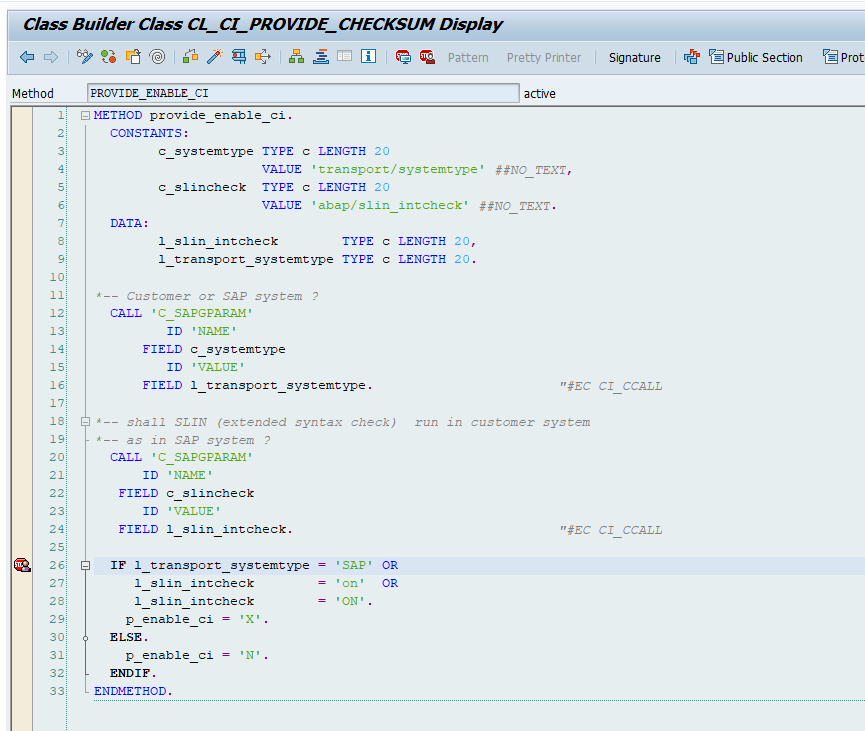
Goto transaction SE24 and select class CL_CI_OBJECTSET. Now select method BUILD_TADIRSET and display the code:
Put a break-point as statement if ENABLE_CI ne ‘X’.
Now start the SCI tool again. If the debugger stops at this statement, use debug and replace to change the content of ENABLE_CI to ‘X’. Now the skipping of SAP and add-on objects is not done. SCI will scan the code. It will still not use SLIN. But these are minor checks.
In newer versions, you might get to change the break-point to different code point:
The SCI tool is great for analyzing custom code based on SAP delivered checks. For specific reasons you might want to built in your own specific checks that cannot be setup using the out-of-the-box SCI tool.
This blog will answer following questions:
When to setup custom check and when not?
How to setup custom check?
How does my check show up in the SCI and ATC results?
How to document the checks so it really fits into the standard framework?
How to influence the behavior of the checks and the settings for the checks?
When not to set up a custom SCI check?
If you want to do one of the following things, don’t set up custom check:
Change the priority outcome of a check (example from warning to error): use the option to change message priorities for this.
Search for specific string: use the Search functions options in SCI (they can even search trough comment blocks)
How to set up a custom SCI check?
Setting up the new category
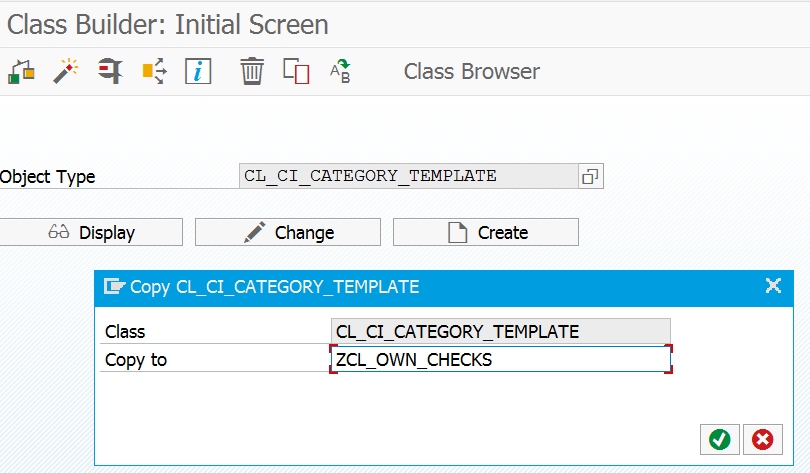
First thing to do is to setup a new category. This will act as a placeholder for your checks.
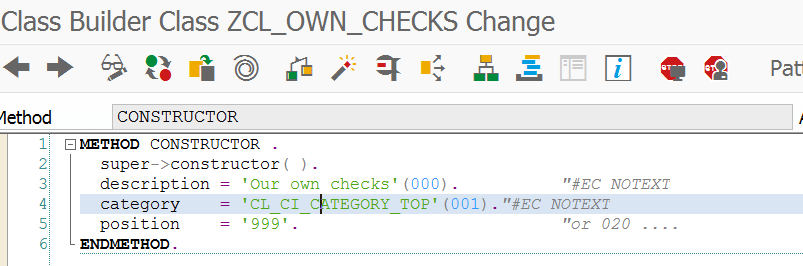
To do this goto SE24 and copy the example class CL_CI_CATEGORY_TEMPLATE to your own Z implementation.
In the copy go to the CONSTRUCTOR method and adapt the description to your needs:
Important here is not to forget to double click on the 000 message and to create the message text: from here the framework will read the description. The quoted description is just for yourself to be able to read the code better.
Implementing the check
Per check you want to have, you need to have an implementation. There are two options here:
Copy one of the two templates (CL_CI_TEST_ROOT_TEMPLATE or CL_CI_TEST_SCAN_TEMPLATE)
Copy one of the existing SCI checks (they all start with CL_CI_) that already resembles the check you want, and modify where needed to make it your own check
The second option is easier to start with.
Hint: first take a good look at the Attributes of an existing check. Some have none (simple check), some have a few tick boxes, and for some you can have a full multiple selection as input. By using a multiple selection which you can fill in the SCI tool, you can avoid hard coding of your checks.
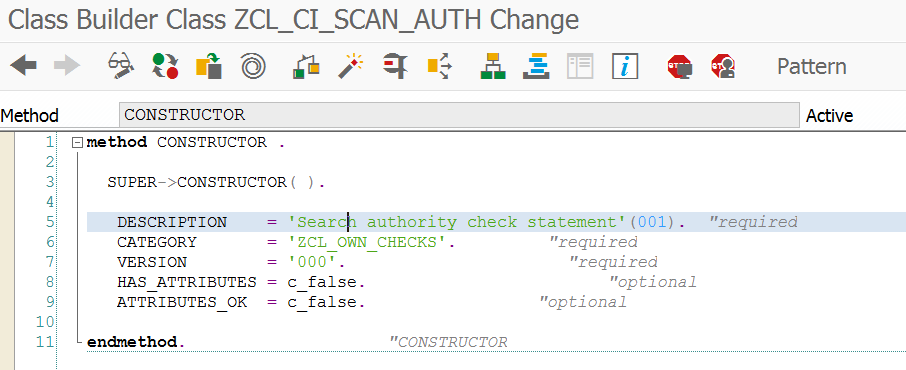
After the copy is done you have to go to the CONSTRUCTOR of your own check:
Important here is not to forget to double click on the message and to create the message text: from here the framework will read the description. The quoted description is just for yourself to be able to read the code better.
The CATEGORY has to refer exactly to the category class you have already created.
On the class level attributes make sure the always present attribute C_MY_NAME has the initial value of the class name of the check you have made.
Depending on the source class check of template you have copied more constant attributes need to be checked or changed.
The actual implementation of the check is to be done in the RUN method. The advantage of copying template or existing check will be obvious in this part, since the complex coding of scanning through source code or fetching other elements like table attributes is already there. You just need to modify when you want a check to fire.
Firing a check happens within the RUN method by invoking the INFORM method. This can be invoked as many times as needed. If not invoked then the check is passed (result zero).
The inform will pass the following to the SCI report tool:
Name of the test (your Z test set in the C_MY_NAME constant attribute you set above)
Point to the code line and statement where your check fired off
Severity level (error, warning, information)
Activating your category and check
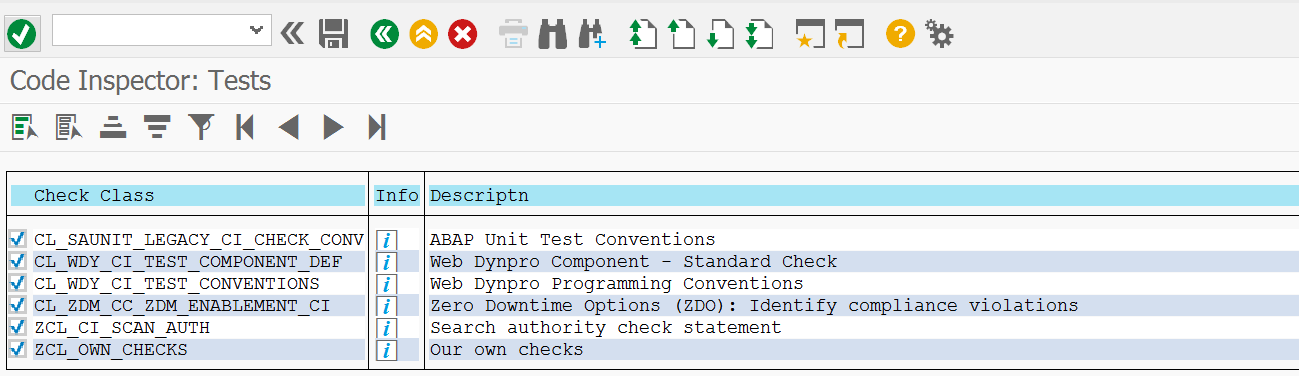
To activate your category and check go to transaction SCI and select the menu Code Inspector / Management of / Tests.
Your test will be fully at the bottom since they are Z checks.
Activation of both category and check will not work in one shot.
First activate the category by selecting it and pressing Save. Next activate the custom check by selecting it and press Save.
The text in the description is taken from the text element in the DESCRIPTION that you have made in the CONSTRUCTOR.
Testing the check
After the activation the test is available in SCI. You can make new SCI variant for testing your check. Write a small test program where you are sure the check will fire off. Then run the SCI tool with your check variant to see that your check fires off properly. Now solve the issue and rerun the SCI tool to make sure the check does not fire off any more.
Embedding in SCI and ATC
If your tests all have passed, don’t forget to activate your check in your global SCI variant.
By updating the global SCI variant used in the ATC tool, your check is automatically done as well in the ATC global and local runs.
Finalizing the checks by proper documentation
To make your check look like standard SAP ones you need to spend some time on online documentation of the checks.
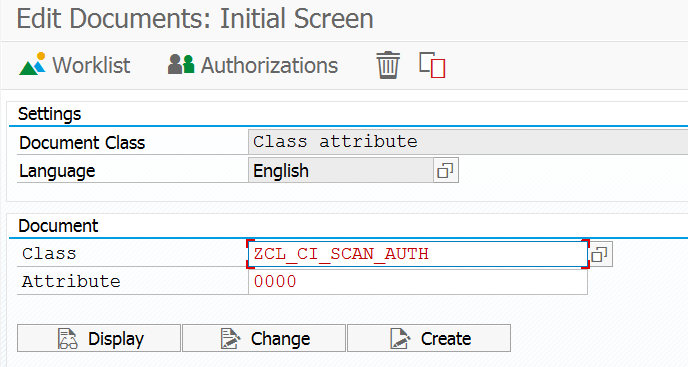
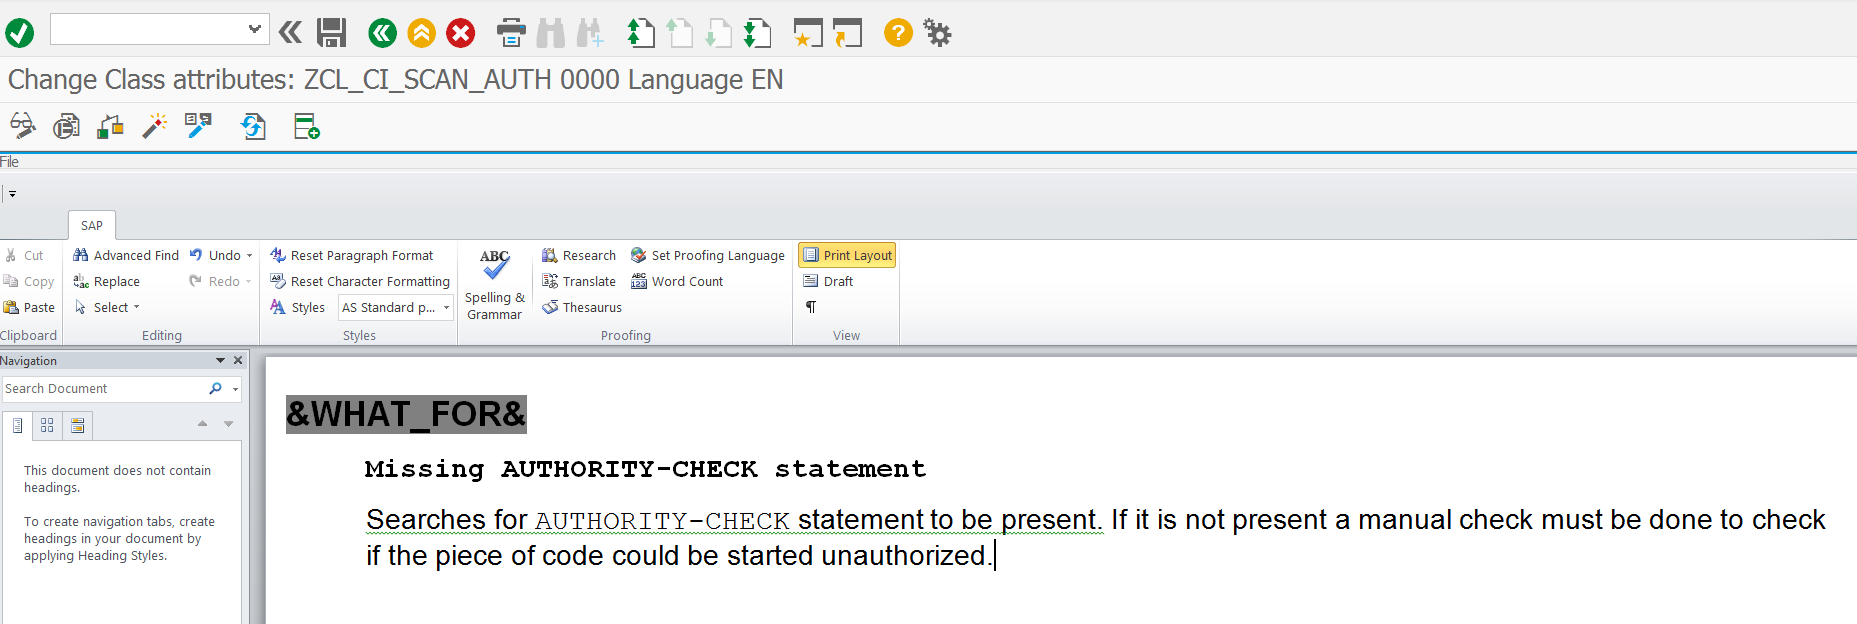
First start to document your custom check. To do this start transaction SE61 to create the help text. Switch the Document Class field to Class attribute. Then in the document field put in your Z class for the custom check and for attribute fill out 0000.
Press create and enter your specific help text:
Hint: copy text from standard SAP help text that you like: this saves you lot of time in the lay-outing
Save and activate and your help text is done.
Now you can setup the help text for you own category.
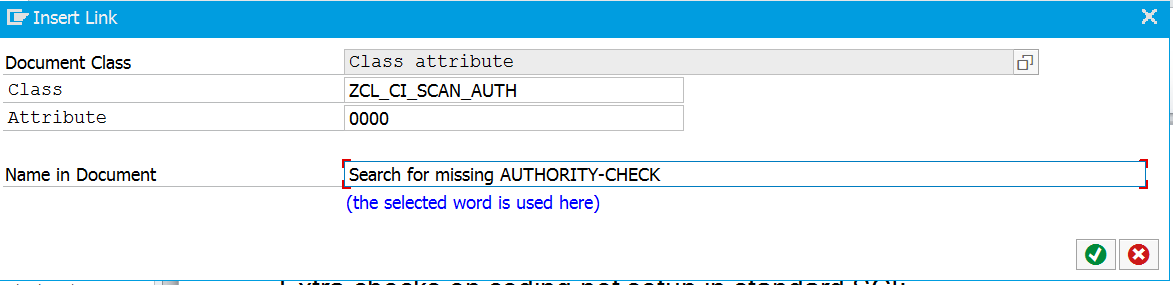
The basic principle of help text is the same, but now you want to hyperlink in the category text to the detailed check help text. This is bit tricky if you don’t know how. To do this select the menu entry Include / Link. The following screen will appear where you can search the referenced check and set up a text for the description:
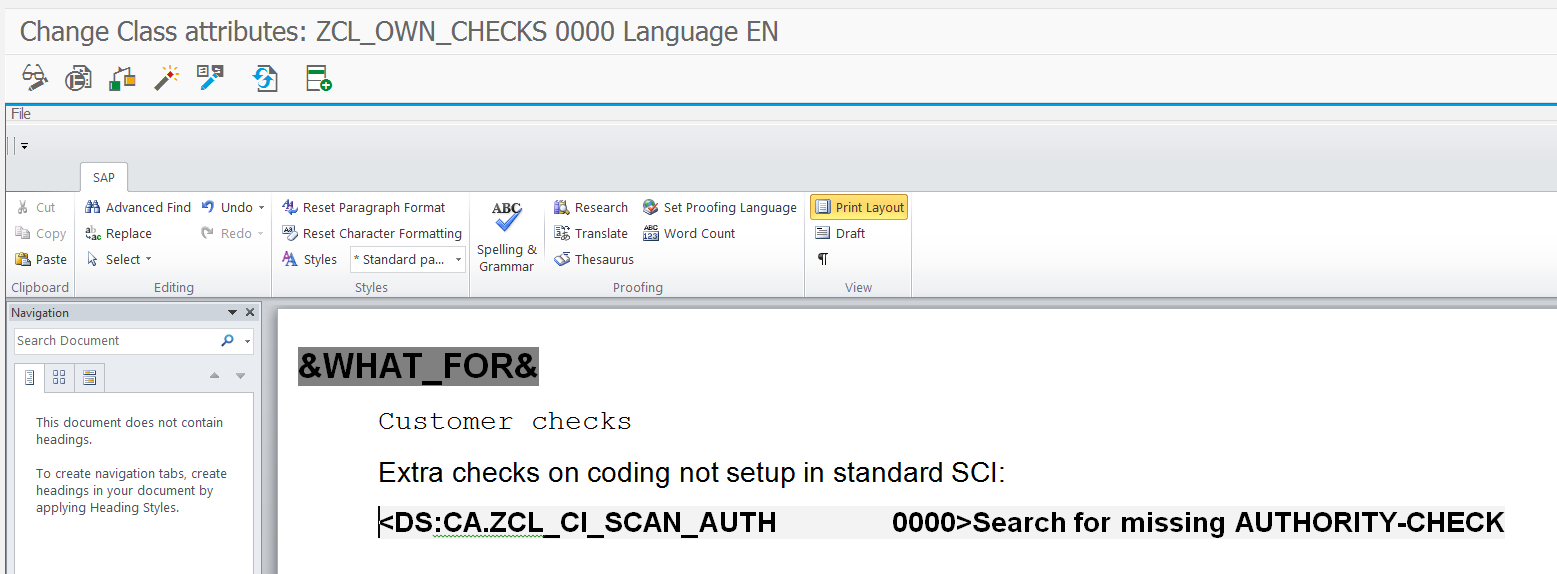
The end result in the editor is bit ugly since the above nice input screen is translated into technical terms:
In the category help text you can list now all you checks in this way.
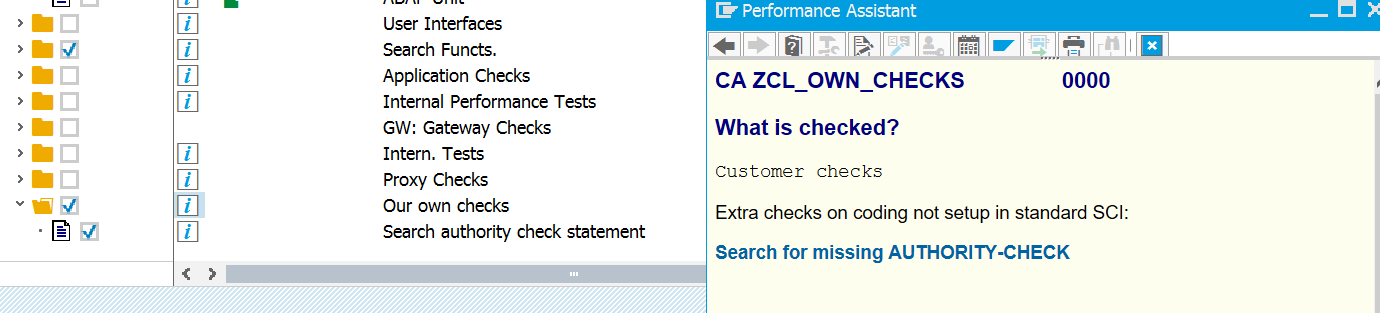
End result in the SCI tool help icon will look like this:
The detailed check appears light blue like hyperlink: and it is! If you click it you jump from the category help text straight to your custom check help text.
How to activate the attributes?
You can have attributes for your own check which you can fill out on the SCI screen, and that will be passed to your test.
For this feature to work, you must do following:
Set the HAS_ATTRIBUTES flag to true in the CONSTRUCTOR
Implement the IF_CI_TEST~QUERY_ATTRIBUTES method to define the attributes (tick boxes, fields, multiple selection options) and the text of the attributes
Implement both the GET_ATTRIBUTES and PUT_ATTRIBUTES methods
Hint: by copying right SAP SCI check class that resembles your wanted check, you also will also copy the elements above. Just need to modify it to your own needs.