This blog will explain the steps need to make the SAP workflow engine to work. If you have to set up the SAP workflow engine in S4HANA, please read this dedicated blog.
Questions that will be answered are:
- How to execute the automatic workflow configuration?
- What are common issues with workflow configuration?
- How to test the automatic workflow configuration?
- What other settings are to be done for custom workflow building?
Automatic workflow configuration
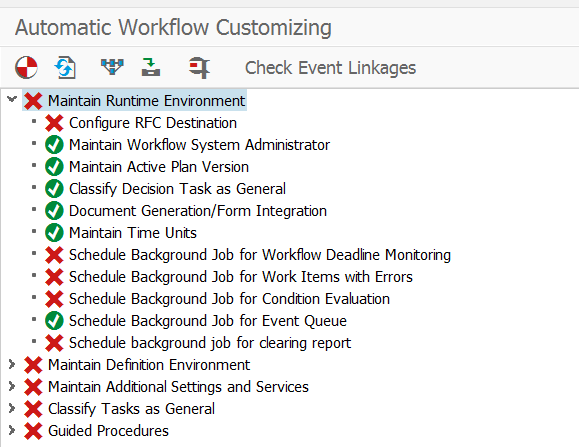
To setup workflow configuration start transaction SWU3. This brings you to the Automatic Workflow Customizing screen.

If the system is new then you see most of the icons are red. Hit the Automatic Customizing button.
Depending on your version all actions might be completed. In this step in the background the user WF-BATCH is created along with the RFC connection WORKFLOW_LOCAL_<CLIENT>.
In the newer versions of SAP netweaver this automatic step might end up with this status:
Zooming in on the RFC connection issue:
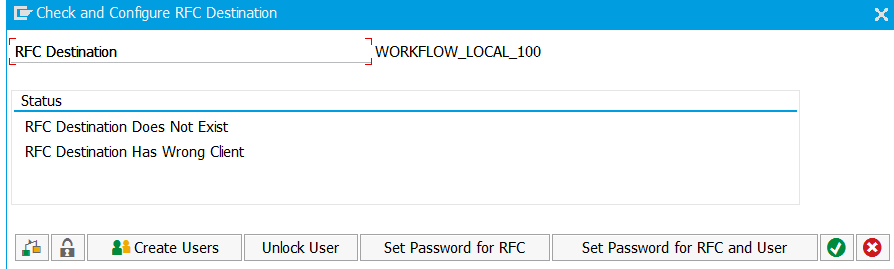
You will see as analysis that the user WF-BATCH is not yet created. In the newer SAP versions SAP expects you to create WF-BATCH first, before you run the automatic workflow configuration. If you have done the auto configuration and get this message, just create WF-BATCH user in SU01. Then restart SWU3 and repeat the step for automatic customizing. It will be correct:

Testing the workflow setup
On the SWU3 screen hit the Start Verification Workflow button (if needed accept the event linkage activation). Be patient now for at least 5 minutes, since in the background normally a lot of code is compiling. Then go to the inbox to check if you validation workflow was properly launched. In S4HANA the button is no longer there on the SWU3 screen to jump to the inbox. You still can use the inbox button on the SAP start screen or use transaction code SBWP.
In the inbox you should see an item. Open it and make a decision:
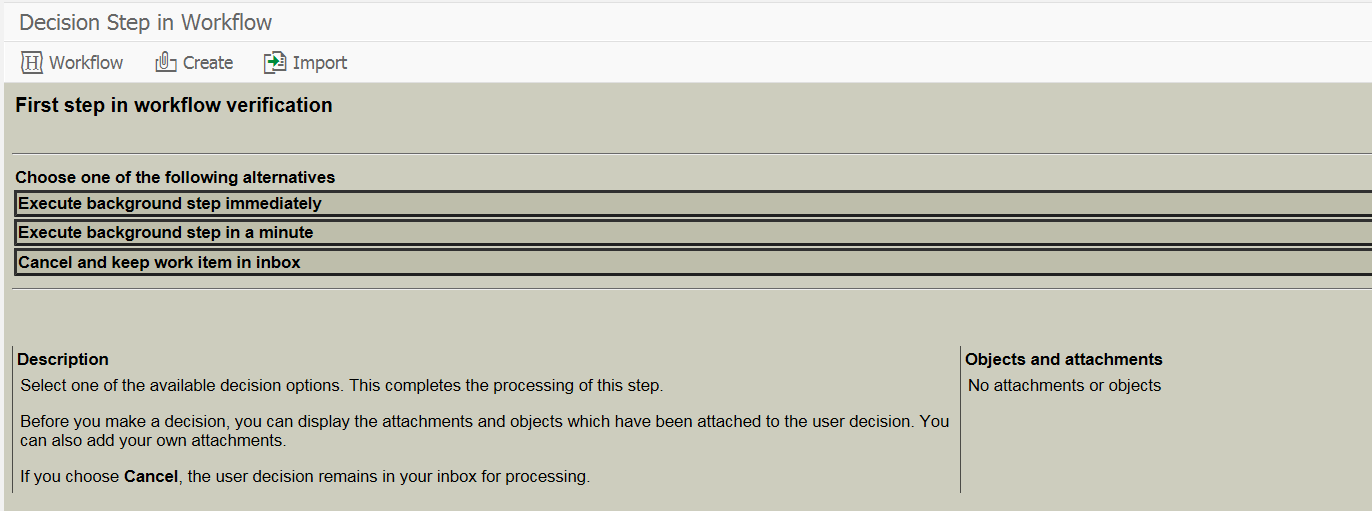
This will end the verification.
Common issues
Most common issue is to execute the automatic customizing without sufficient authorizations.
Best practice from SAP basis: execute SWU3 directly after installation with SAP_ALL still attached to your user ID. Then only hand over the system to the authorization team. After activation, you can remove SAP_ALL and provide the authorizations as explained in OSS note 1574002 - WF-BATCH and SAP_WFRT Authorizations.
For further troubleshooting and more background information on SWU3 SAP has released OSS note 2366252 – Transaction SWU3 explained.
Further explanation OSS notes:
- 3075703 – SWU3 Classify Task as General customizing fails
- 3196199 – In SWU3, which nodes need to have green lights?
- 3324015 – How to reverse the configuration of “Classify Tasks as General” in SWU3
Settings for workflow development
For custom workflow development you need to execute one additional step in SWU3 to maintain the Prefix Numbers:
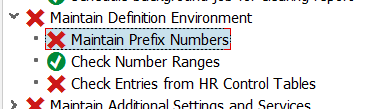
In the number range screen add the 900 series for custom developed workflows:
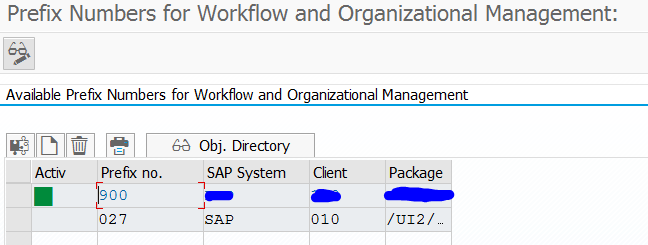
This setting will be transported, so you only execute this action on development system.
More workflow
For workflow tips and tricks: read this blog.
Setup of FIORI my workflow inbox: read this blog.
For deletion and archiving of workflow: read this blog.
One thought on “Workflow initial configuration (before S4HANA)”