Activating and using the S4HANA custom code migration FIORI app

This blog will explain about the S4HANA custom code migration FIORI app. Questions that will be answered in this blog are:

  • How to set up the S4HANA custom code migration app?
  • How to run the S4HANA custom code migration app?
  • How do the results of the S4HANA custom code app look like?

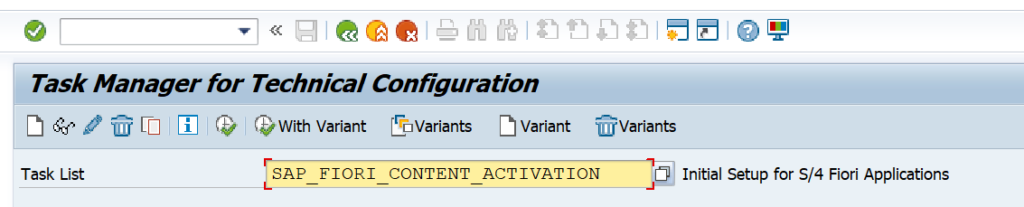
Activation of the S4HANA custom code migration FIORI app

The custom code app official specification can be found on the FIORI reference library.

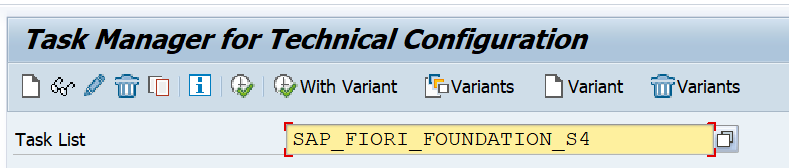
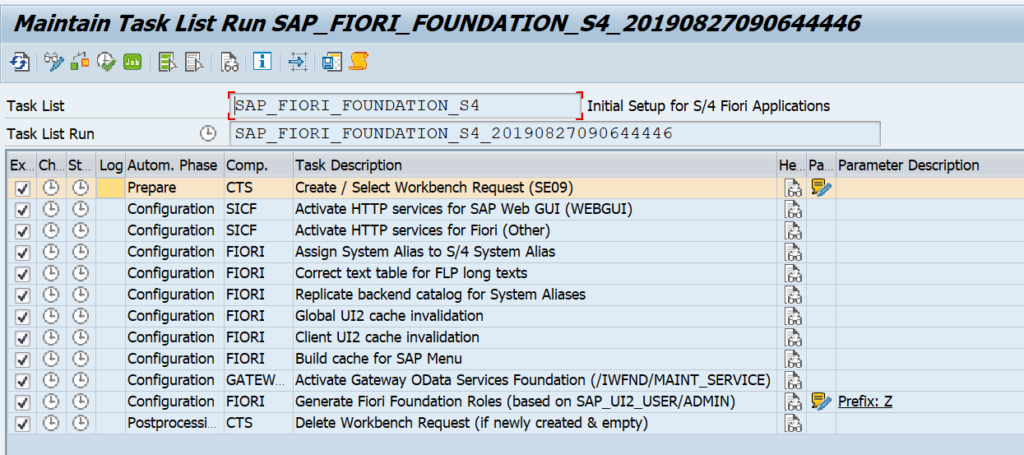
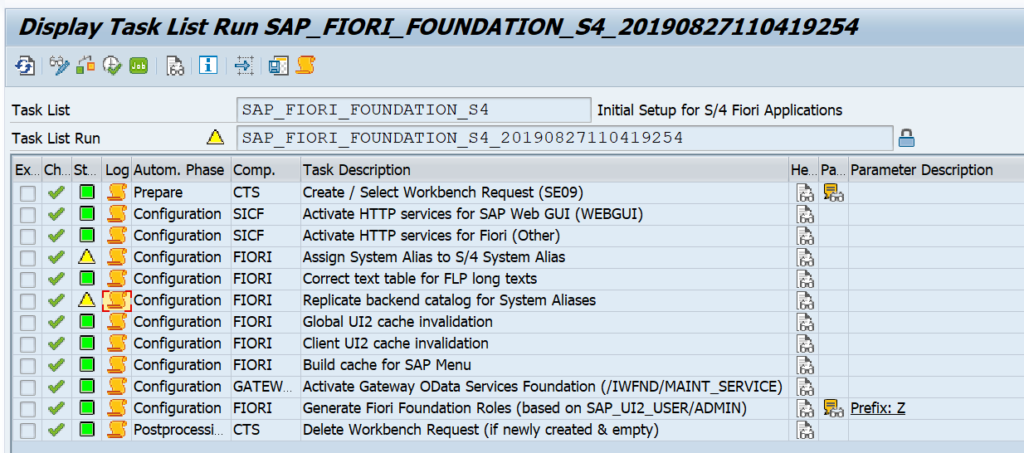
First make sure the basis setup of embedded FIORI in general are done on your S4HANA system. See this blog for background.

And make sure the ATC settings for S4HANA code migration are done. See this blog for background.

All the prerequisite notes for the tool itself are listed in OSS note 2436688 – Recommended SAP Notes for using S/4HANA custom code checks in ATC or Custom Code Migration app.

Next step: in transaction PFCG create a new role (for example Z_CUSTOM_CODE_APP). Add catalog SAP_BASIS_TCR_T as a launchpad catalog:

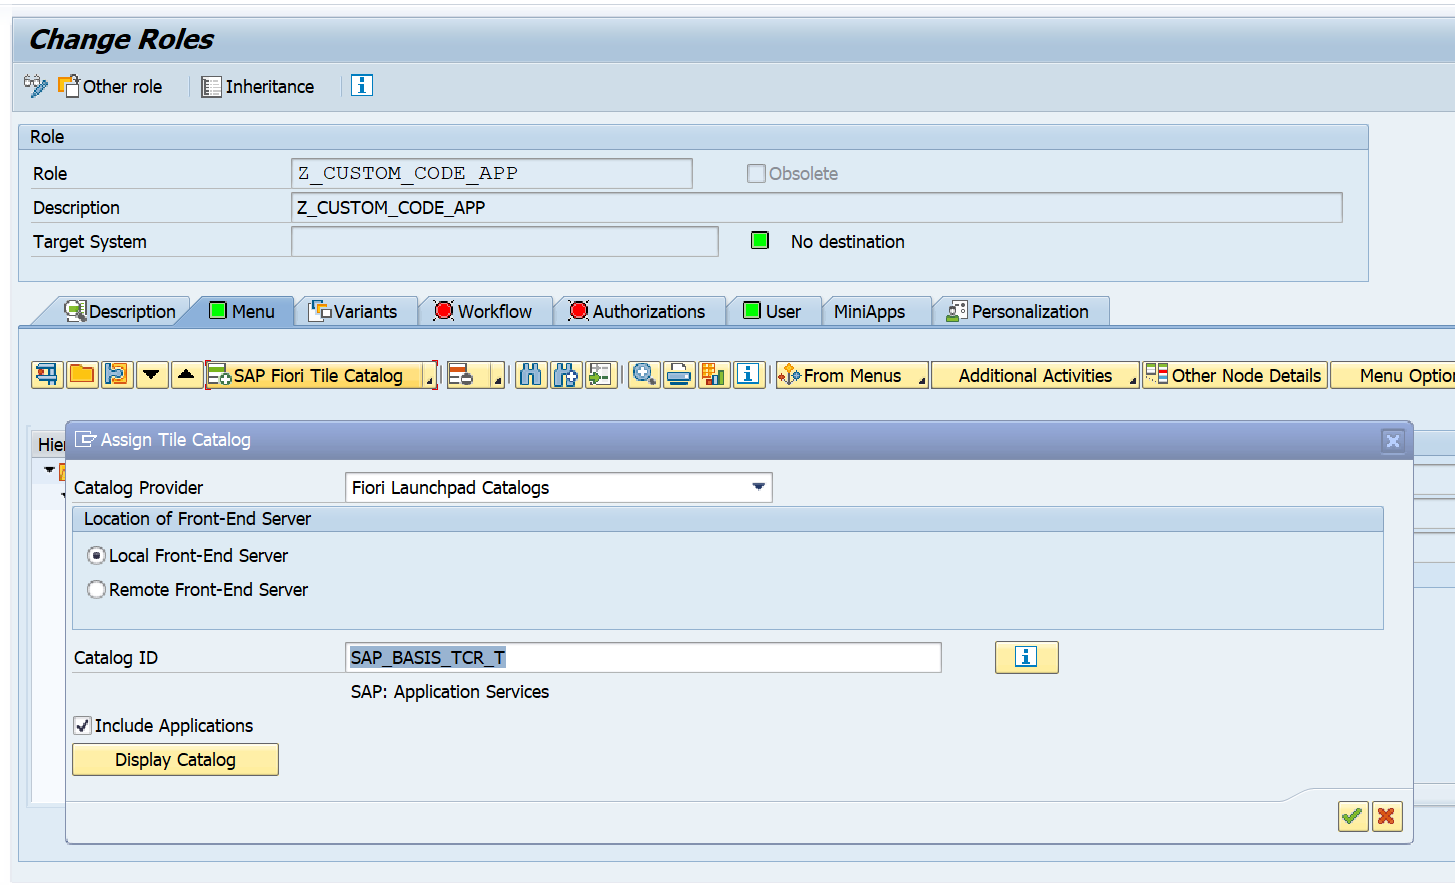
Save and activate the role. Assign the users to the role.

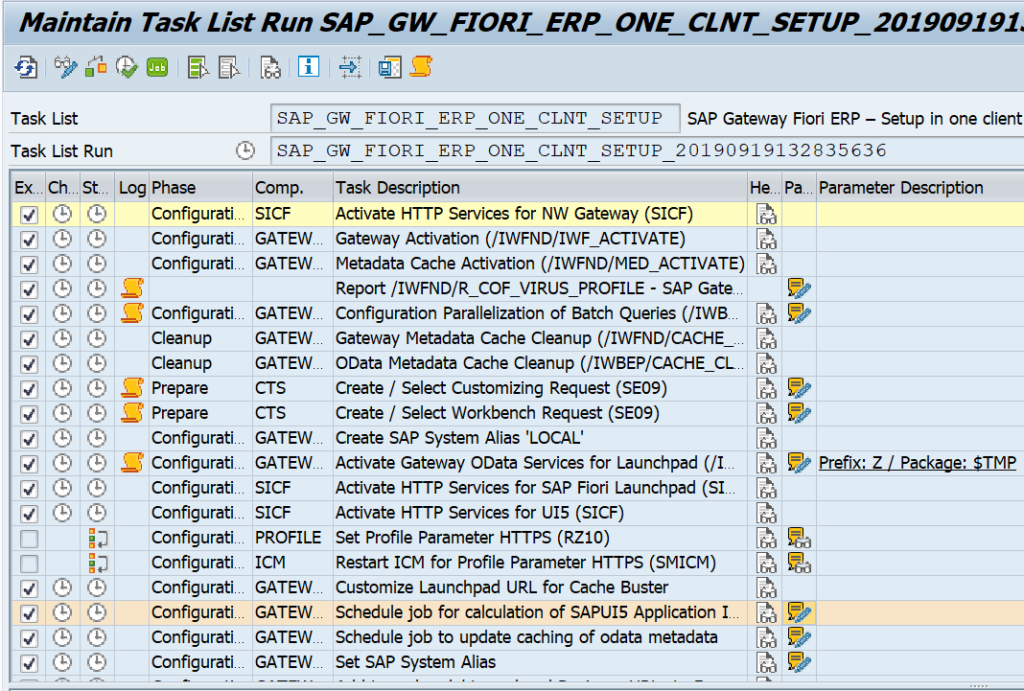
In transaction /IWFND/MAINT_SERVICE add the following services (and activate them):

Component External Technical Name
Custom code migration projects SYCM_APS_C_PROJECT_CDS
Analysis of SAP S/4HANA custom code check findings SYCM_APS_C_ATC_FIND_ALP_CDS
Custom code scoping by request entry points SYCM_APS_C_SCP_BY_EP_CDS

Custom code scoping by packages SYCM_APS_C_SCP_BY_PK_CDS

In transaction SICF activate the following nodes:

NW_APS_CCM_PRJ

NW_APS_EXT_LIB

NW_APS_LIB

The core activation actions are now done.

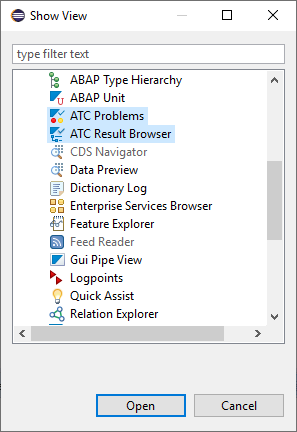
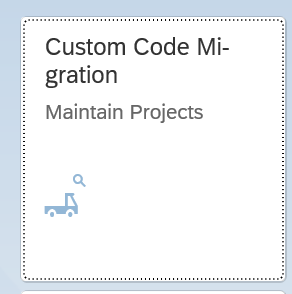
Start transaction /UI2/FLP to start the FIORI launchpad. You will not find the tile. Change the homepage and add the following tile from the catalog:

Before starting, make also sure that in ATC setup the RFC object providers are setup:

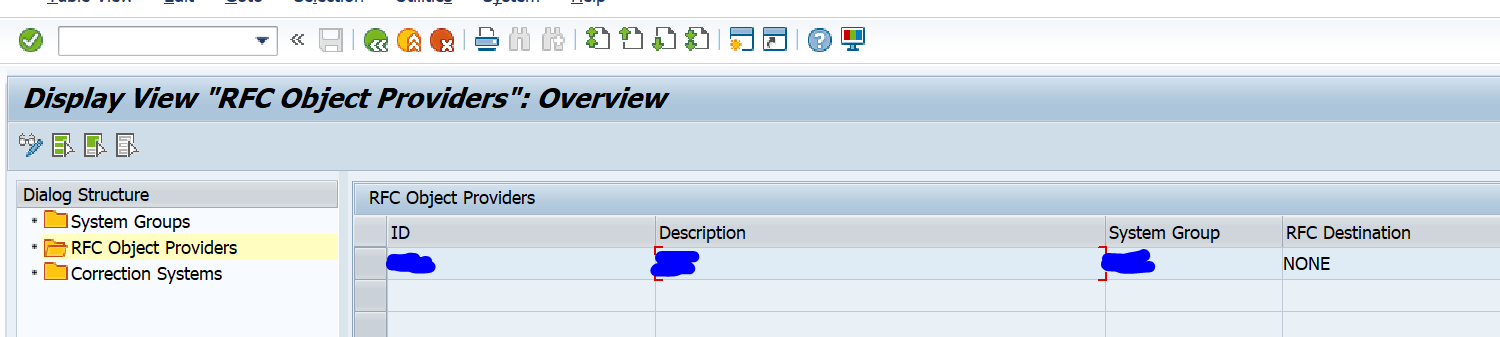
You can name the ID, description and group ID the same if you want. Make sure to use RFC destination none.

Creating a project in the app

Now you can start creating a project in the app. Click on the + symbol to add a project;

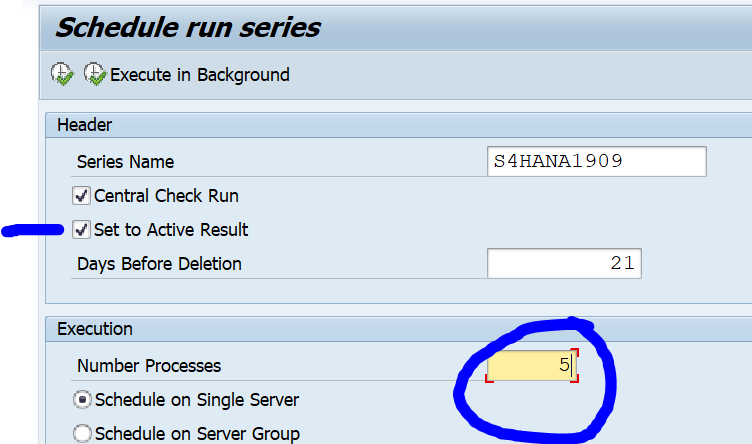
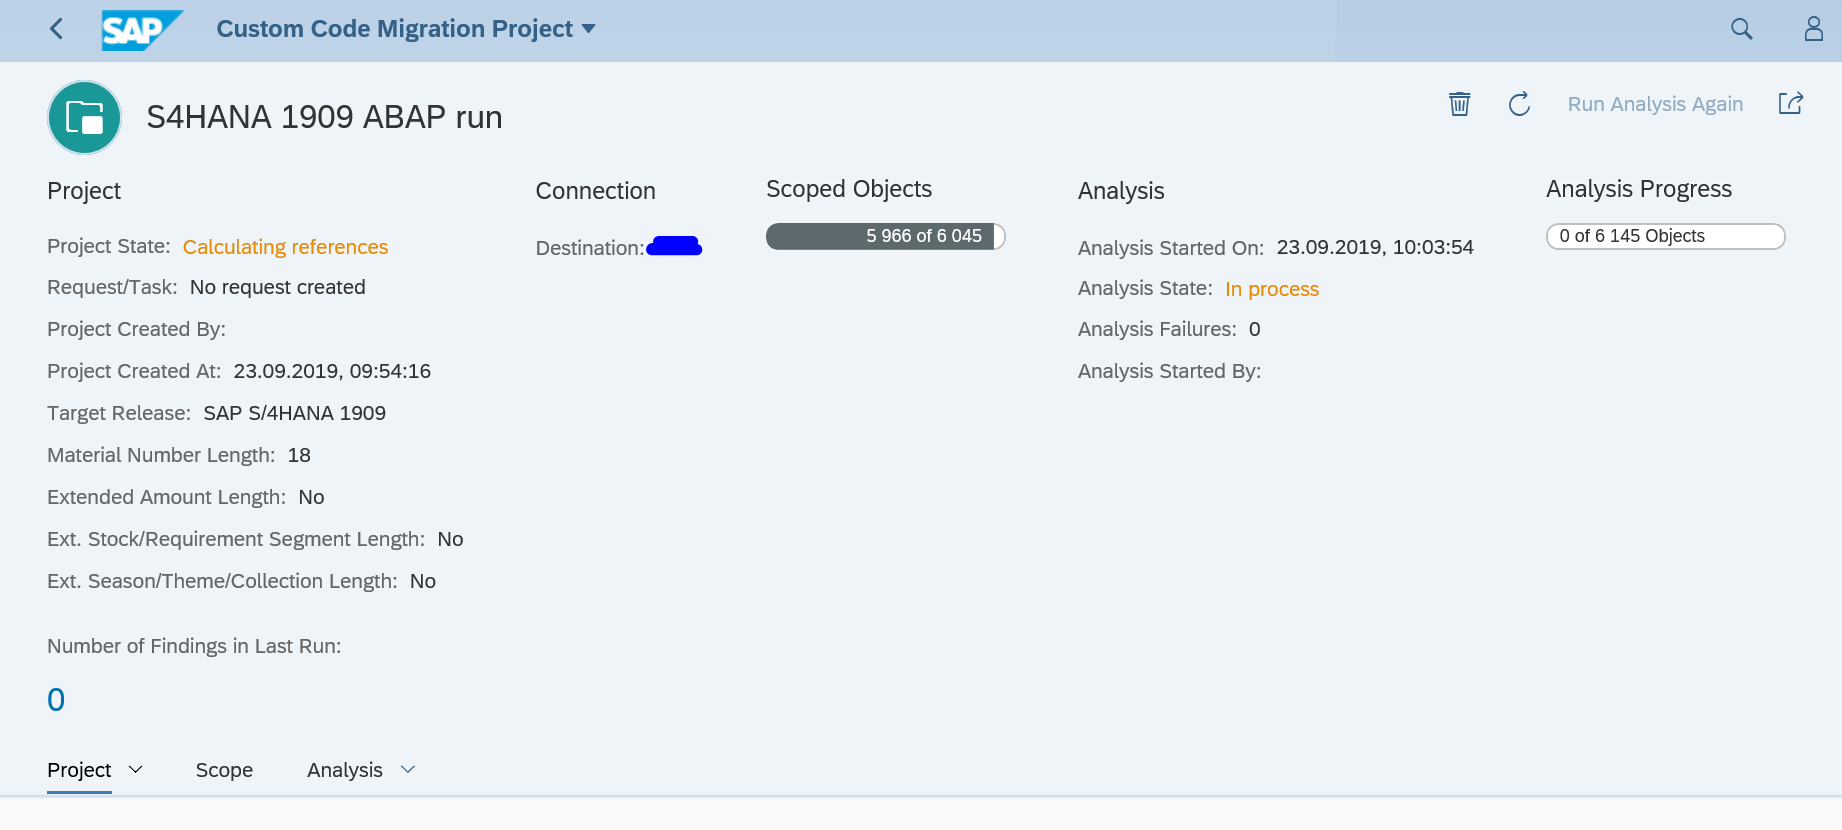
In the destination fill out the system you have put into the ATC object provider configuration. Than save the project and let it run. In the background the full ATC check is now carried out. This can take some time. You can refresh the project to see the status:

Scoping the results

In the scope block you can exclude packages by clicking on the Change scope button:

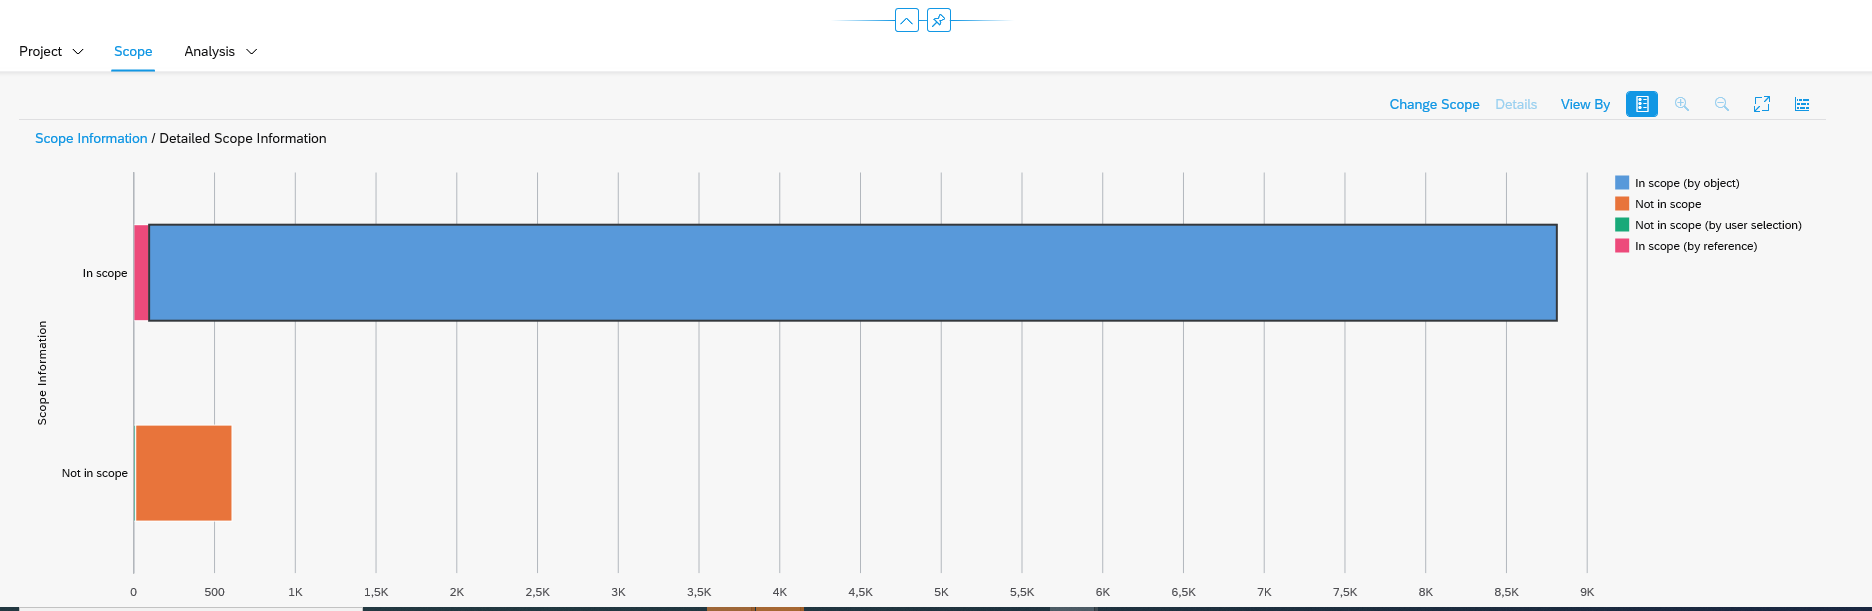
Packages that might be excluded:

  • Z packages from SAP
  • Z packages from 3rd party tools

Analyzing the results

When the run is done, you can now analyze the results on the Analysis tab:

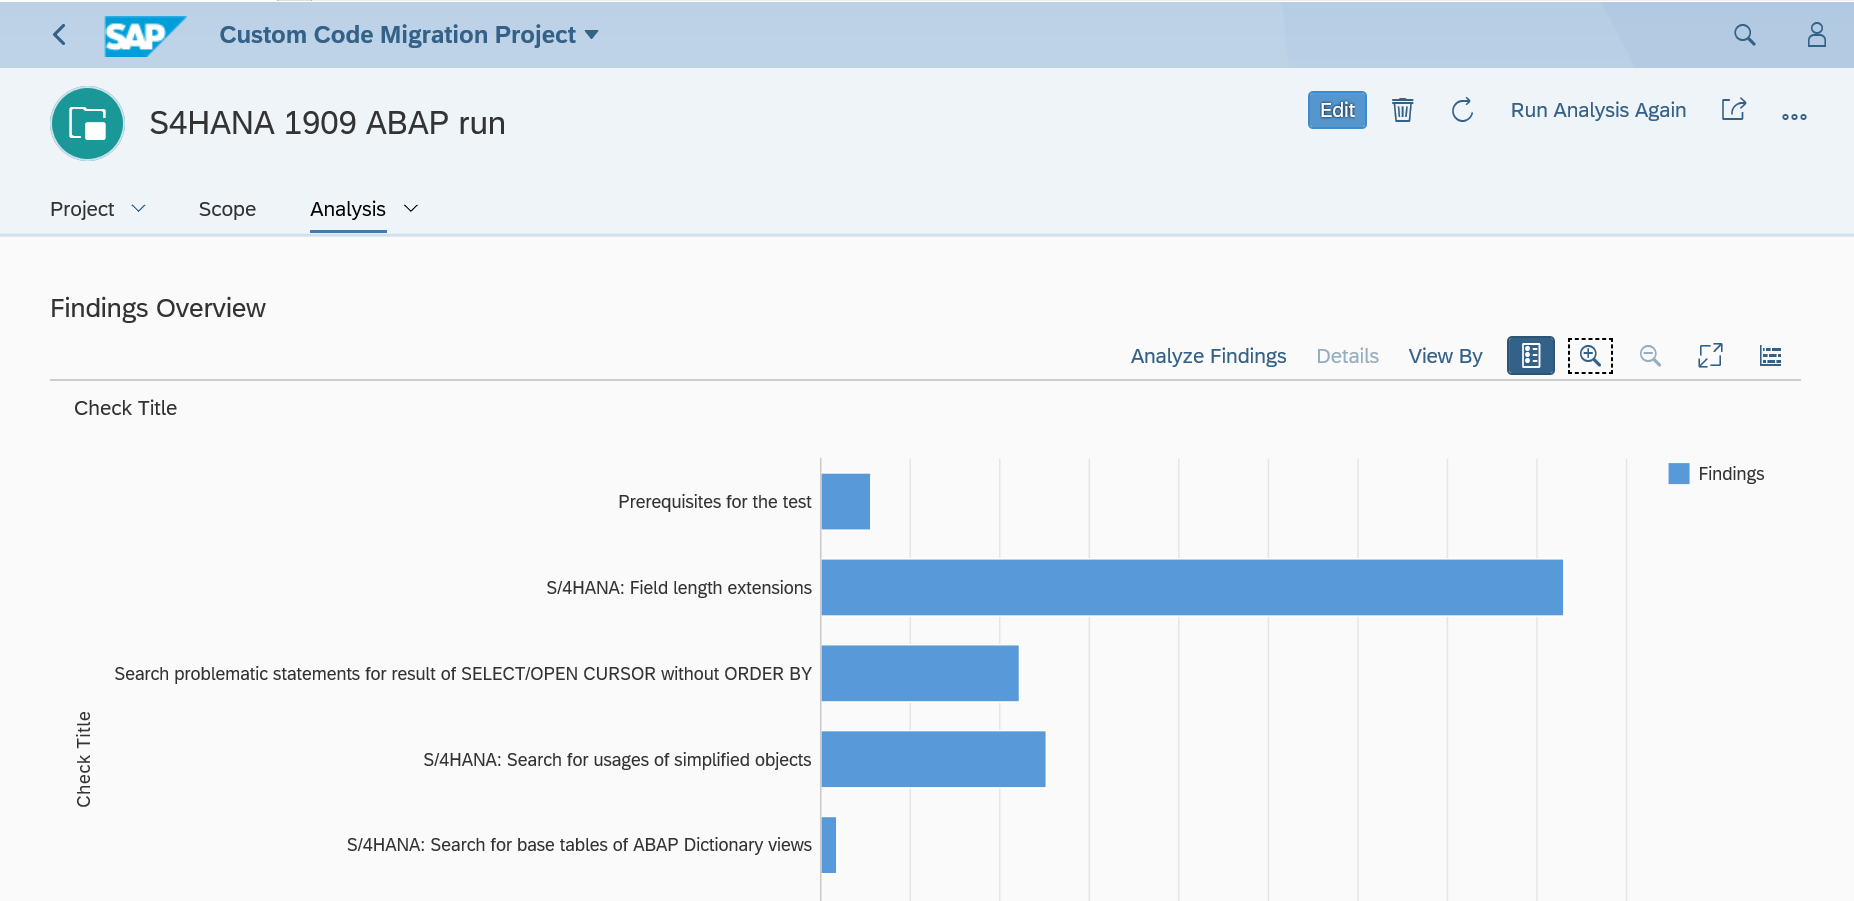
A bit below on the Analysis tab is the burn down chart:

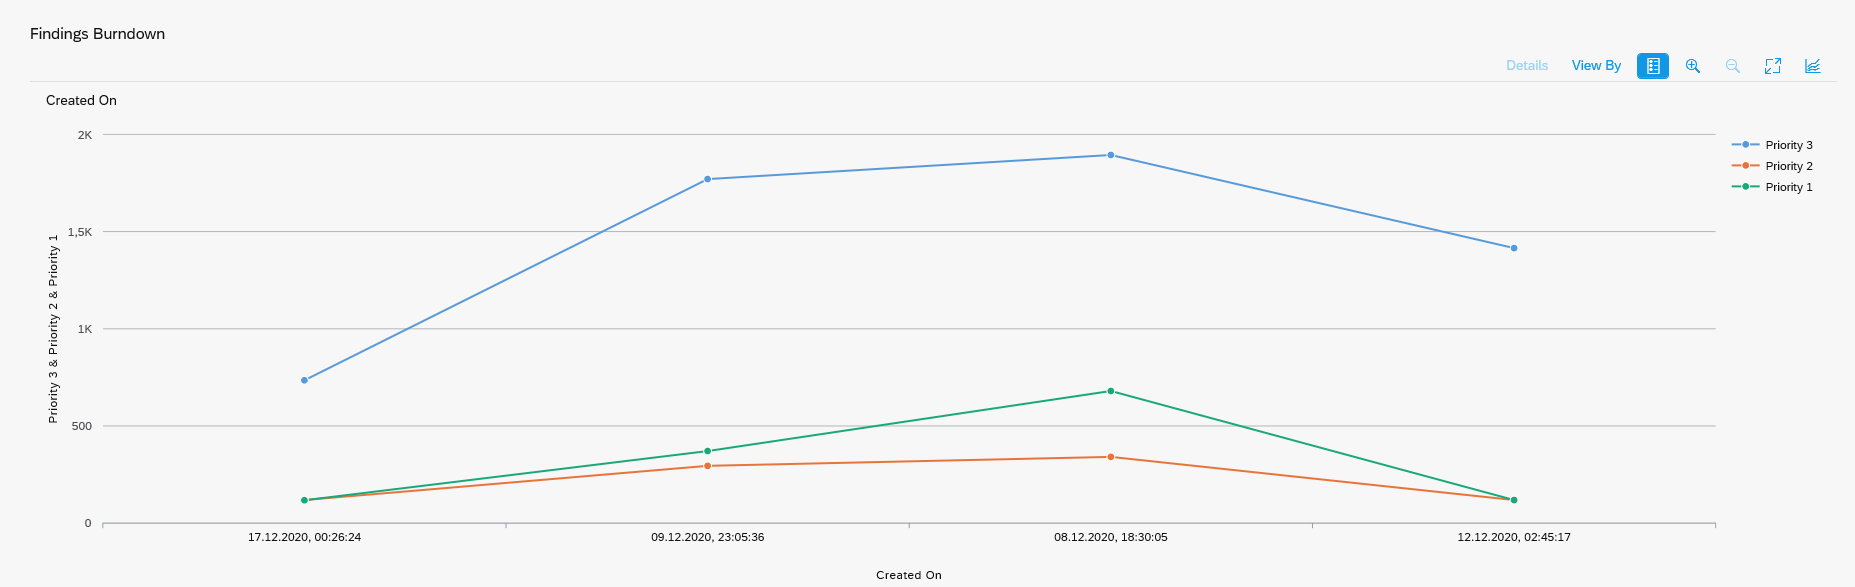
For the burn down chart you need to run the custom code run again on several days. Check for tool issues and solve them. Solving tool issues makes the amount of issues go up as you can see on the sample screen above.

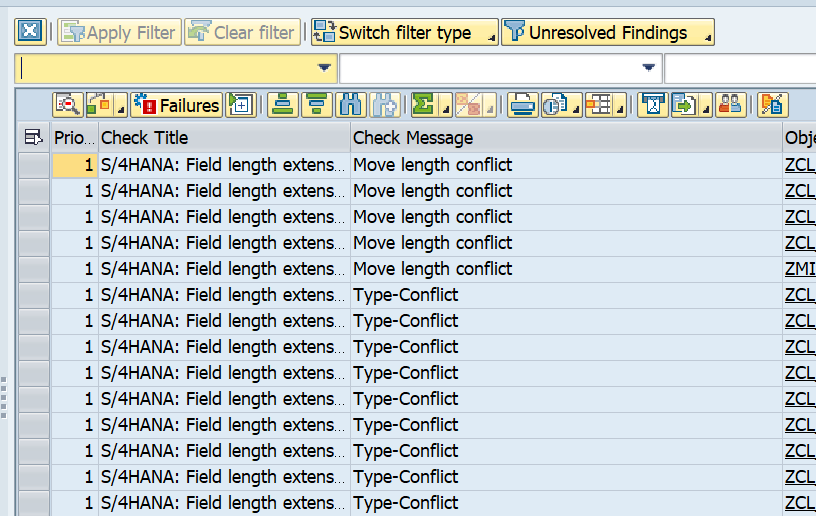
Important here is that you have to press the Analyze Findings button to go into the detailed analysis overview:

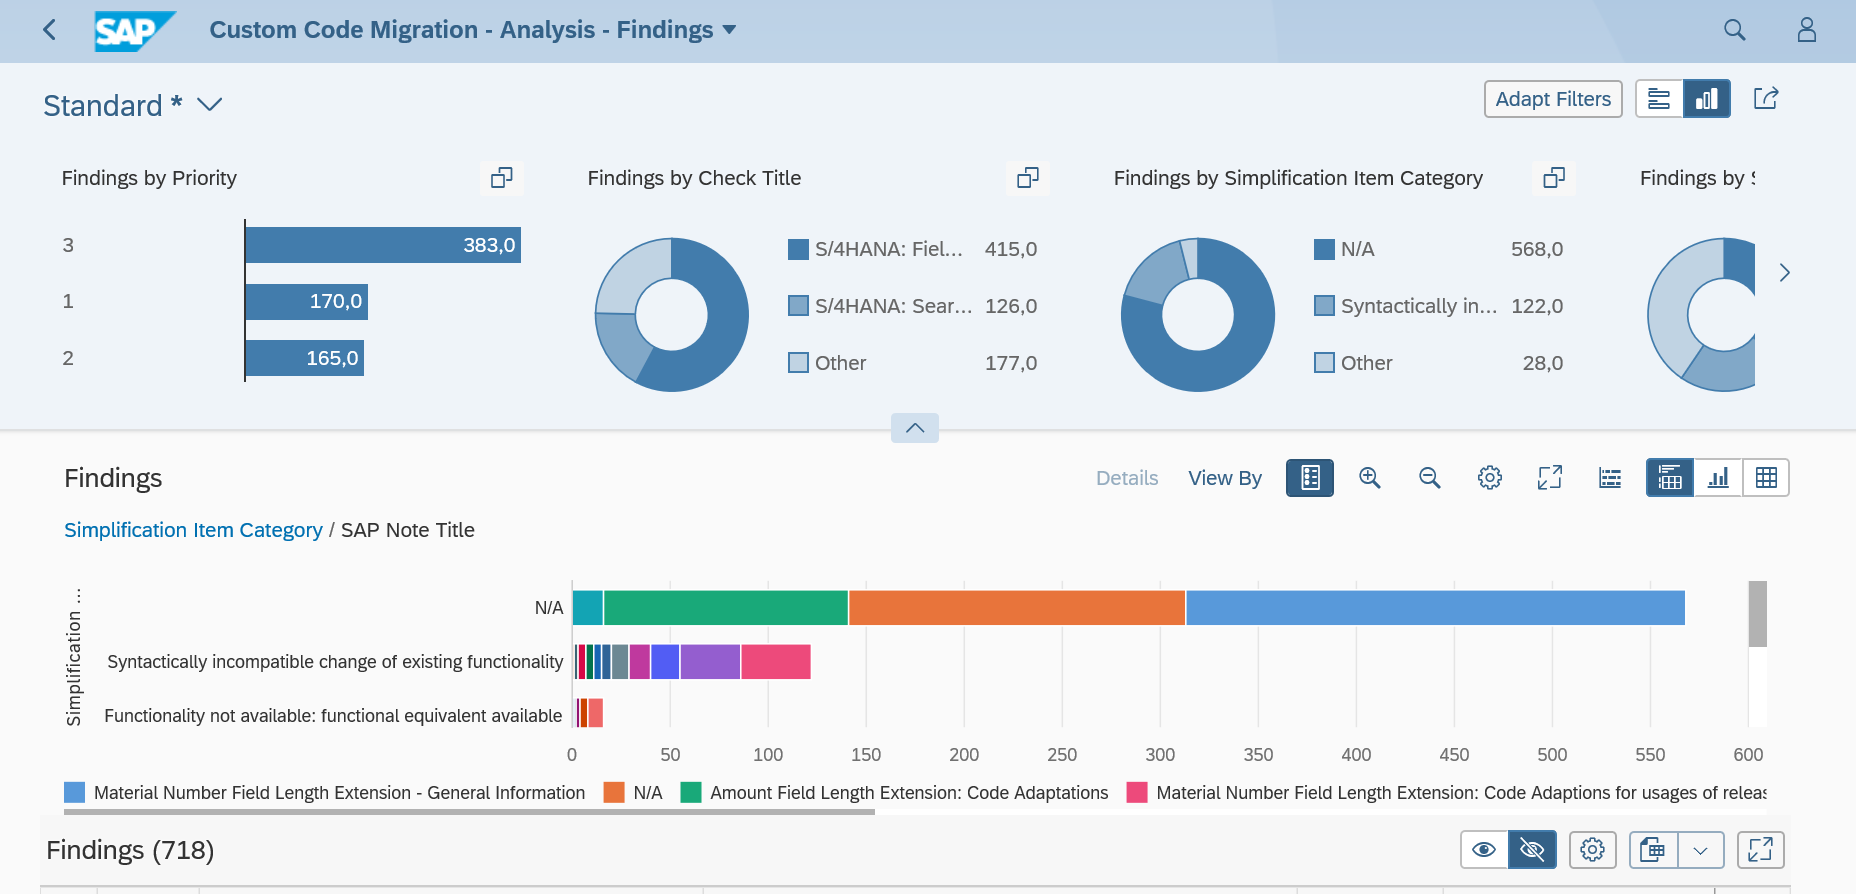
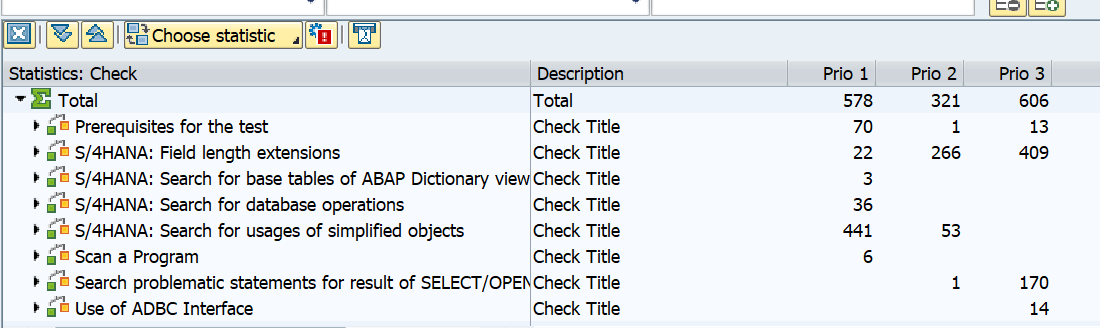
On the top are the graphical overviews. In the bottom is the detailed list:

You can use the download to excel button for further processing.

During the custom code clean up you can redo the same project, by rerunning the analysis. Or you can decide to run a new project.

Link to Eclipse

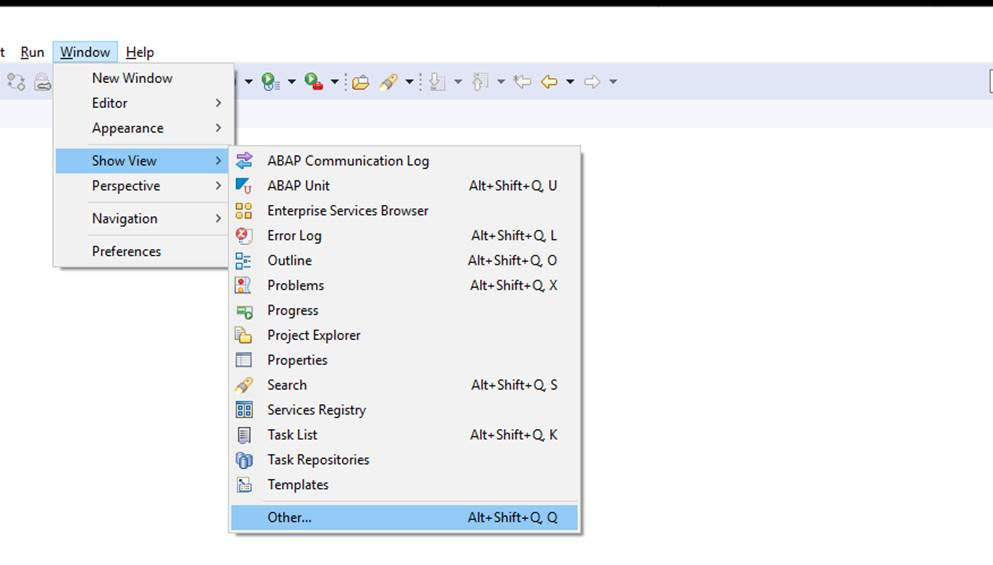
For the link to Eclipse to work, each developer must allow this on his Eclipse settings. Follow the instructions in OSS note 2934945 – “Open in ABAP in Eclipse” in Custom Code Migration APP.

Including usage data from productive system

You can also add actual usage data from a productive system in the custom code management app. See this blog.

Known issues and bug fixes

For UI bugs check OSS notes:

Activating S4HANA embedded FIORI

In S4HANA FIORI tiles are used a lot to replace traditional SAP GUI transactions.

This blog will explain how to setup the basic embedded FIORI activation and how to activate business roles for demo purposes.

Questions that will be answered in this blog are:

  • How to set up embedded FIORI in S4HANA?
  • How to activate business roles and its tiles?
  • Where can I find more background information on the activation?

Basic activation

We will start with the basic activation. Start, via transaction STC01, task list SAP_GW_FIORI_ERP_ONE_CLNT_SETUP:

Fill all the parameters and let it run. Fix any issue that pops up.

When this is done in STC01 select task list SAP_FIORI_FOUNDATION_S4 (background note of this task list 2712785 – Fiori Setup: Initial Setup for Fiori Applications S/4):

Go into the details:

Fill out the parameters and start the task list. Be patient and let it run.

End result should be all green:

Now the basics are done. You can start to launch the embedded FIORI UI with transaction code /UI2/FLP.

If you have issues with login, please check this OSS note 2773732 - Fiori Logon page loads incorrectly in SAP_UI 752 or S/4HANA 1709.

The launchpad will be empty since you have no roles and tiles attached to your user.

Content activation of business roles

In the FIORI reference library you need to search for the role you want to activate.

Before activating roles, please make sure you have enough shared objects memory (RZ11 parameter abap/shared_objects_MB). Otherwise you wait very long to get this error:

To activate content role start transaction STC01 and select task list SAP_FIORI_CONTENT_ACTIVATION:

Task list look like below:

In the select SAP business roles for FLP content activation select the wanted business roles:

You might be tempted to select all or a lot: don't. Only select 2 to 5 maximum each time. The unpacking and activation is an intensive long running process.

Now let the task list run (be patient). If the task list run is completed, assign the generated PFCG BR roles to your user ID. Now start FIORI launchpad with /UI2/FLP and the tiles should be visible and working.

Search setup

Most FIORI apps use the S4HANA embedded search function. See this blog for setup of search.

FIORI notification setup

For setting up FIORI notifications, read this dedicated blog.

Background information

Not all tiles will work via this procedure. Some tiles have exceptions or additional work to do. The additional work and generic background information of S4HANA embedded content activation can be found in OSS notes:

Similar notes exist for different older versions. The generic OSS note is 2902673 – Rapid Activation for SAP Fiori in SAP S/4HANA – Overview.

A good background blog on embedded FIORI content activation is this blog.

Other OSS notes:

Setting up S4HANA custom code adjustments

You have just upgraded to S4HANA in your sandbox or development system. SPAU and SPAU_ENH processing are done. Next step is the S4HANA custom code adjustments.

Questions that will be answered in this blog are:

  • How to import the SCI variants for S4HANA custom code adjustments?
  • How to import the latest simplification database into your system?
  • How to run the S4HANA custom code adjustments in ATC tool?
  • How to enable quick fixes in Eclipse?

Importing the SCI variants

Goto transaction SCI and select the option Utilities and then Import Check Variants. This action will import the required variants. Check that the variants are present now.

In case you don’t want to do the field length extensions checks, choose the variant with _NO_FLE at the end.

1909: 2925563 – Check variants for S/4HANA custom code checks without field length extensions.

2020: 2959341 – Check variant for SAP S/4HANA 2020 custom code checks.

2021: 3090106 – Check variant for SAP S/4HANA 2021 custom code checks.

Otherwise: in the SCI variant, you can leave everything as delivered out-of-the-box with the exception of the material length option. If you keep the material field business wise to 18 (which most customers do), you need to change the variable from 40 to 18.

You can apply the bug fix notes listed in 2436688 – Recommended SAP Notes for using S/4HANA custom code checks in ATC or Custom Code Migration app.

Setting up the simplification database

Follow the instructions of OSS note 2241080 – SAP S/4HANA: Content for checking customer specific code, to download the latest content for the simplification database.

Use transaction SYCM to upload the file. Select option Simplification Database and then Import from ZIP File.

Running the ATC tool

Now you can start to setup the ATC tool. For details see this blog.

The ATC variant to run should like like this:

Important here:

  • Select the desired S4HANA readiness check SCI variant
  • Set the package to Z* to select your custom code
  • Tick the box for Calculate quick fix proposals

Now you can start the ATC run:

Set the results to Active to see all the results in Eclipse as well. Pending on your system size lower the default number of processes from 10 to for example 5.

If you run into ATC tool issues for the S4HANA custom code adjustments run: first increase memory parameter rsdb/obj/buffersize in RZ11 to at least 150 MB. Then run again.

Processing the results

The ATC tool will now give a lot of results:

The results from the ATC tool can be distributed to more members by changing the Contact Person. To do this select one or more findings and right click on the Contact Person column, and select the option Change Contact Person.

The basic order of processing the results:

  1. Check simplification OSS note
  2. Fix code
  3. Apply relevant pragma (directly or in Eclipse via quick fix)
  4. Apply exemption

For the exemptions: you can raise them, but different person needs to approve them.

When you are using Eclipse, you might run into issue with exemption request. See OSS note 2815887 - ATC: No Possibility to Request Exemptions in Eclipse for the fix.

Statistics from the ATC runs

If you run the ATC tool weekly, you can use it to track the progress. In the ATC results screen there is a specific button Statistics View:

Default sorting is by type of issue to be solved:

This view can also be sorted on Contact Person. This will enable you to check the progress of each developer with his or her work list.

Using quick fixes with Eclipse

Using quick fixes with Eclipse is a fast way of going through the list. The Eclipse list is based on Contact Person and active results. So you only see in Eclipse the results for your user account.

In Eclipse first select the appropriate views:

Now you can start processing. You will get online help and you can apply the quick fix proposed automatically in stead of keying it in by hand.

You might run into an initial bug with a dump, which is solved by applying OSS note 2647710 - Simple transformation: Inconsistent ST loads. 

The quick fixes are updated with both bugs and new functions. Please check out the new versions of the following OSS notes:

Nice blog on the quick fixes: follow this link.

To enable ABAP backend for Eclipse: follow this link.

Using the S4HANA custom code migration app

You can also use the S4HANA custom code migration app. After completing the setup above and activating the S4HANA embedded FIORI (see this blog), you simply follow the steps in this blog for the setup.

ABAP clones

In the past copies of standard SAP might have been made. These are so called clones. You can use the clone finder tool to detect the clones. Consider to delete the clones completely. Most of the times the clone is no longer required. This will save you work on the code migration. How to run the clone finder tool can be read in this dedicated blog.

Use of unreleased standard SAP objects

Developers might have been using standard SAP objects, which formally have an unreleased status, and might no longer be supported by S4HANA. Read this blog to find out how you can scan your custom code for use of unreleased standard SAP objects.

Further background information

More information can be found:

SAP spool tips & tricks

SAP spool is used for printing.

Questions that will be answered in this blog are:

  • How to check for spool number range overflow?
  • How can I archive a print list?
  • How can I avoid large spool outputs in background jobs?
  • How can I setup LOCL printing?
  • How to delete old spools?

Spool number range and status

If your spool system for printing is getting out of numbers, the printing stops and even endangers your complete system. The signal is shortdump COMPUTE_BCD_OVERFLOW as described in OSS note 2208342 – Shortdump COMPUTE_BCD_OVERFLOW.

Checking spool number range can be done via program
RSPO_SHOW_SPO_NUM . Background is in OSS note 2635724 – Monitor or Display Spool Range Limit and Status.

To solve spool number range issues follow the instructions in OSS note 48284 – System cannot generate any more spool requests.

Print list archiving

You can store a print list in the data archive. For setup see this blog.

Avoiding large spool in background job output

If you have a batch job with large spool output and you never look at it, you can also setup device type NULL to immediately delete the output. This way the spool system is not filled up. For setup see this blog.

Transaction SPOOL

Transaction SPOOL contains links to most important spool transactions. See this dedicated blog.

Setup of LOCL printing

For setup of LOCL printing, read this dedicated blog.

Spool error for LOCL printing

When a user is trying to use the LOCL printer as printer for background job, off course the background job cannot reach the printer and will throw an error message:

See OSS note 2244868 – Front-end printing spool request is not printed. Solution: go to SP01 and print the print towards a printer defined in SPAD as background printer.

Delete old spool requests

Run programs RSPO0041 and RSPO1041.

Notes: