The SAP audit log records transactions, program executions and much more. But it cannot answer questions that are more sensitive. For example, how can you proof that your employee did or did not see a bank account number, or a basic salary pay? Here is where the RAL read access logging function will help. It will record if a user did have display access to a sensitive field (and the value shown to the user). It can be used to proof a user did see. Or when there is no logging (and the logging is setup correctly), help the employee to proof he/she did not see any sensitive data.
This blog will explain the technical setup. Please do check carefully any privacy, legal, HR and other implications of switching on this functionality.
The product is in most cases part of the Netweaver license. Do check with your SAP account manager.
Questions that will be answered in this blog:
- How to setup up RAL from the basis technology side?
- How to create a RAL recording?
- How to activate RAL?
- How to use RAL monitoring?
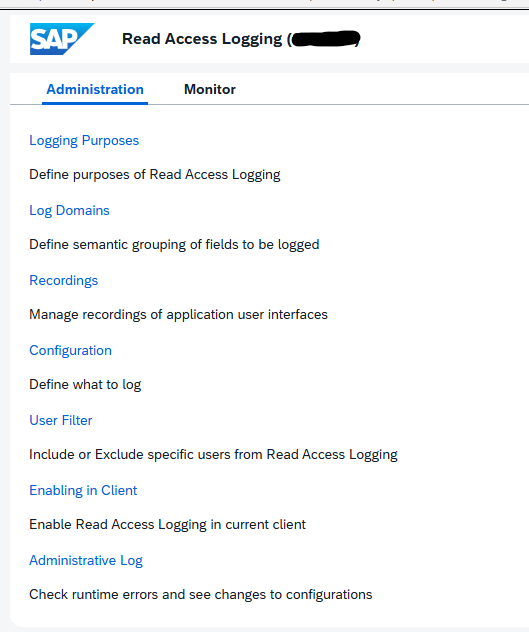
RAL technical setup
Activate in SICF transaction the following services:
- SRALCONFIG
- SRALMANAGER
- SRALMONITOR
- SRALUTIL
If needed set in RZ11 the parameter sec/ral_enabled_for_rfc to 1.
Now start transaction SRALMANAGER:
Choose the option Enabling in Client:
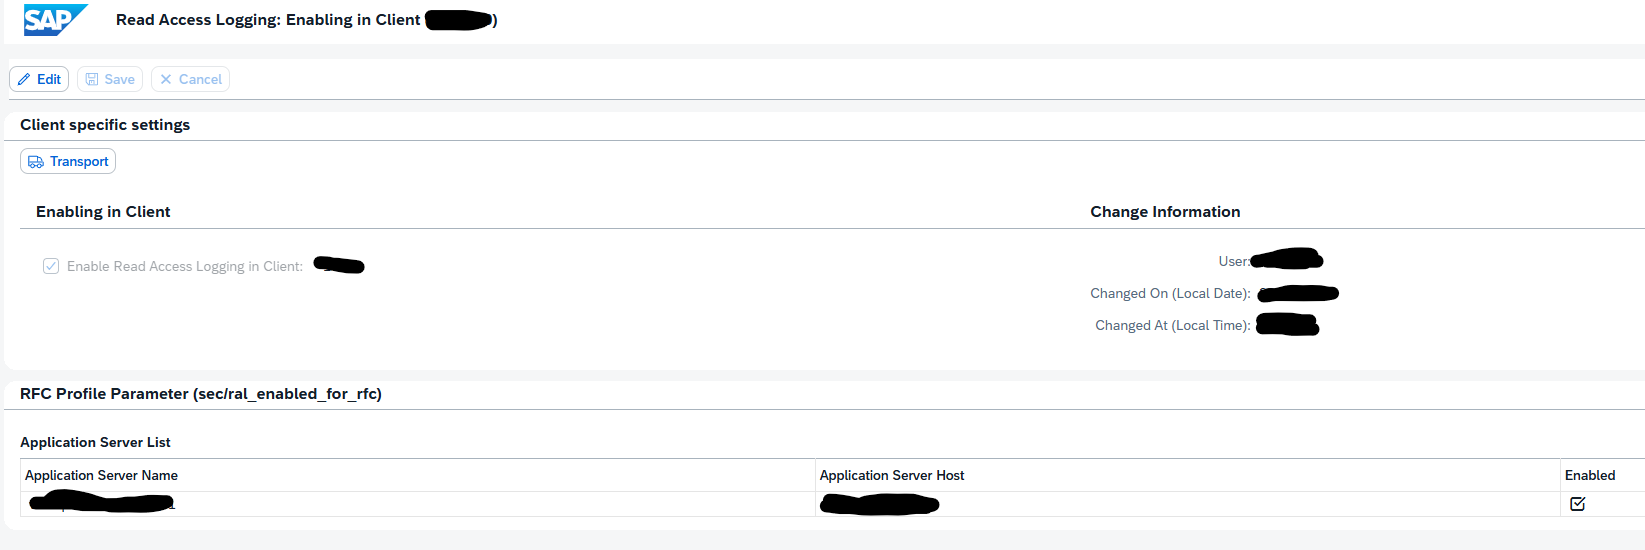
Press change, enable, and Save.
You can run program SRAL_CHECK_PREREQUISITES to see if all activations are done correctly (oss note 2158630 – RAL: Program to check prerequisites).
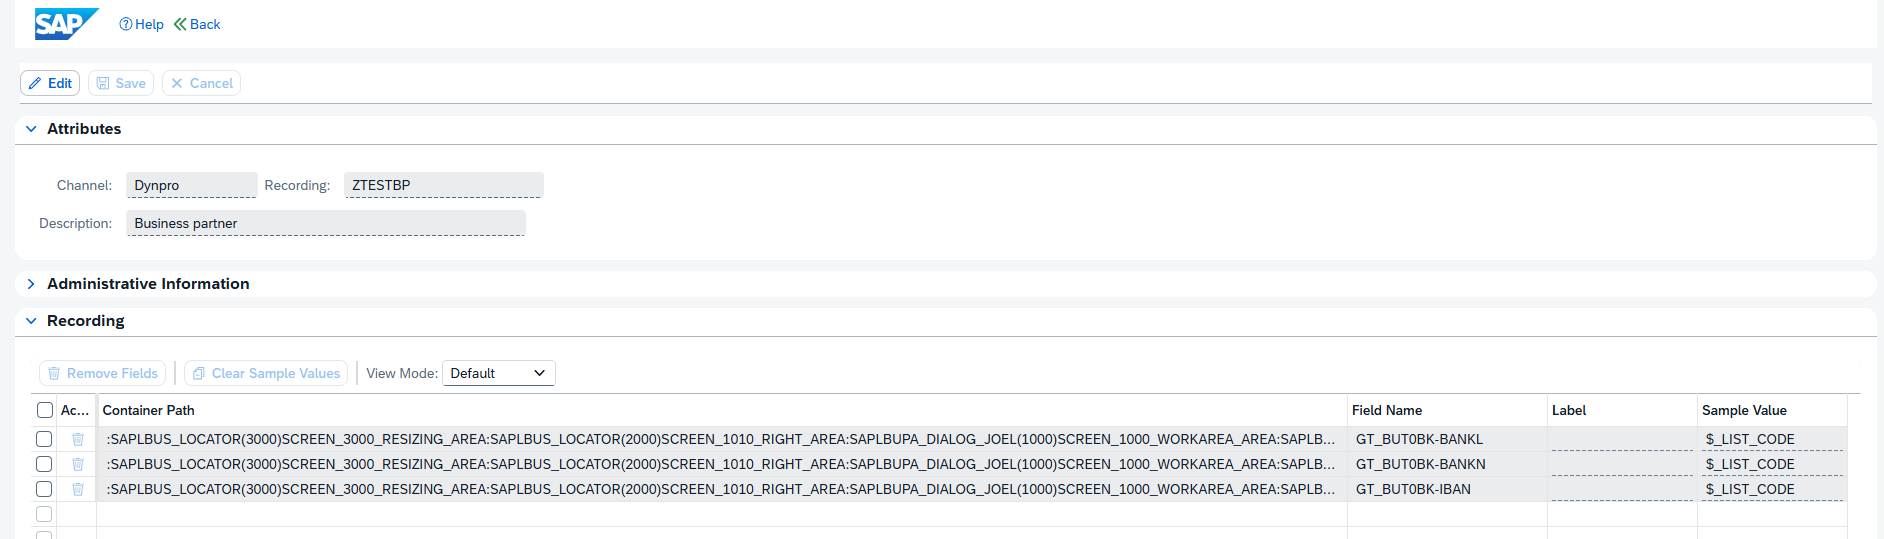
Create a RAL recording
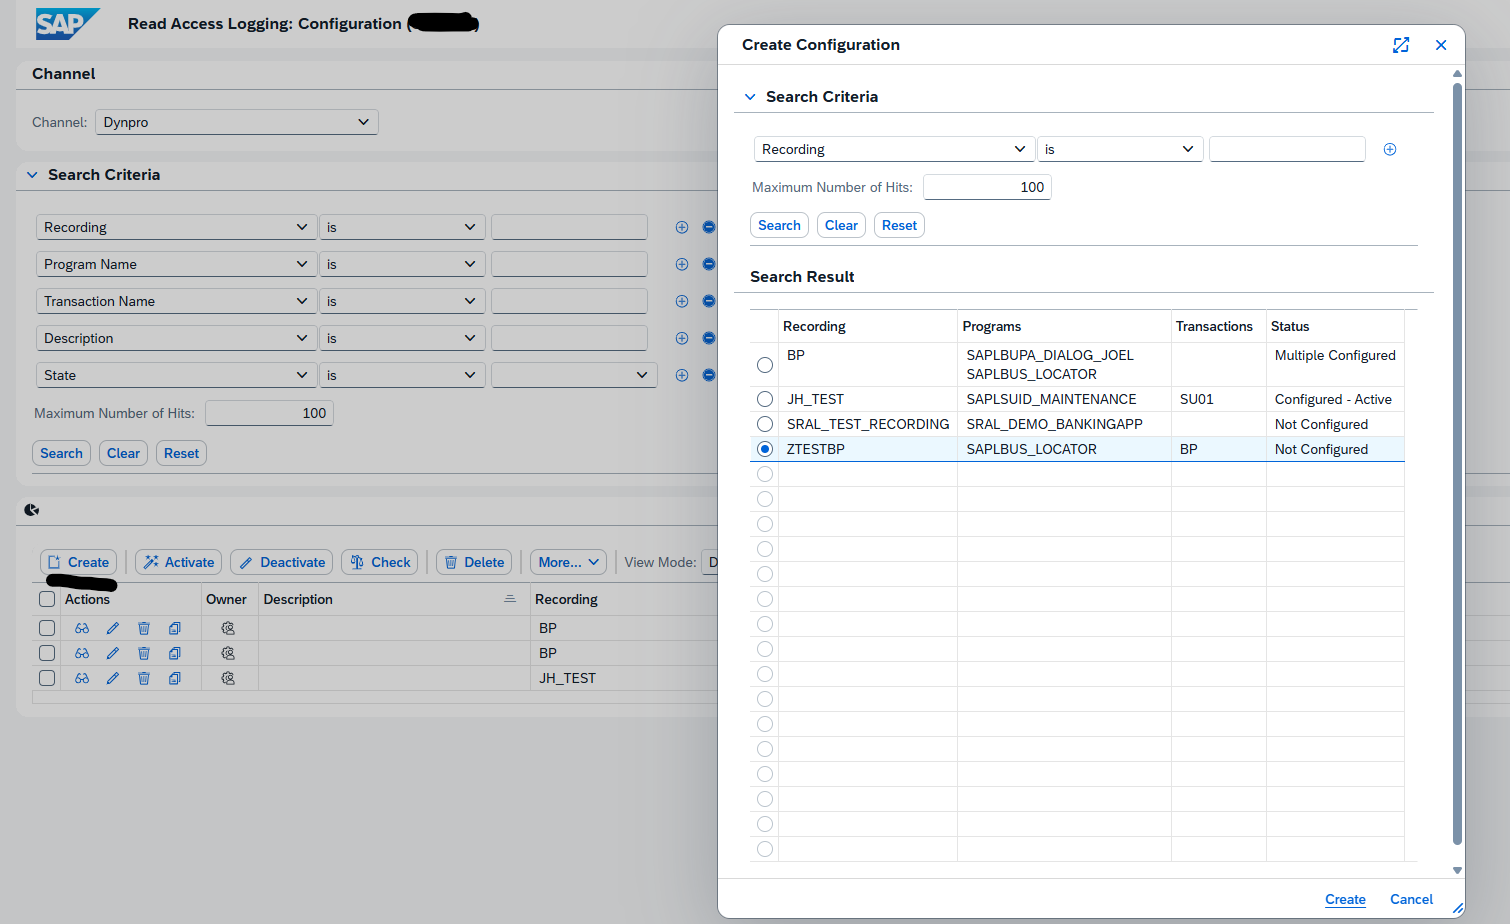
A recording is needed to indicate which fields need to be added to the read access log. In transaction SRALMANAGER, choose recordings and then create a new one:
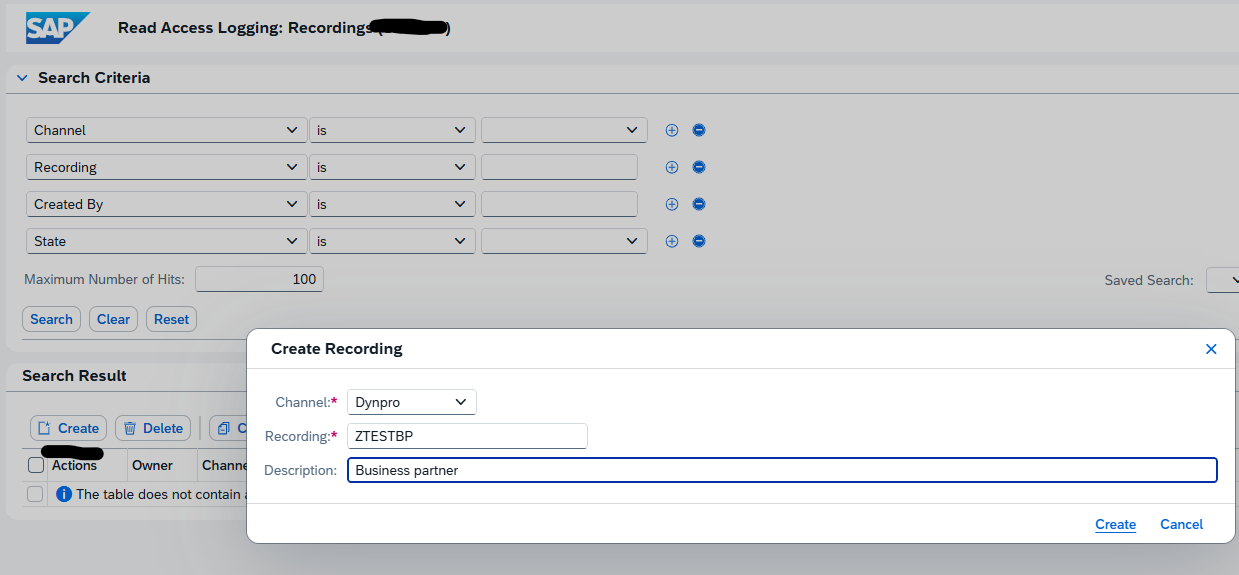
We use the example ZTESTBP for business partner.
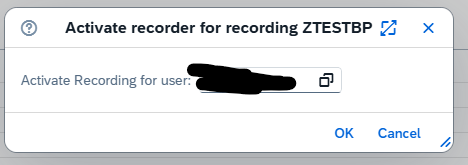
In the line for the recorder there are 3 buttons:

First one is to display.
Second one to start the recording.
Third one is to add the recording user.
Start the recording:
Now important: keep the web session open.
Go to the SAP GUI and execute your transaction. When you want to add a field to the RAL logging, select the field, press CTRL, right click and select the option “RAL: record field” or use the CTRL+L shortcut.
If you do not add fields the recording is empty!
When completed go back to the RAL admin web screen and press the icon to Stop the recording.
Now you can display the recorded fields:
Create a RAL configuration
We can now use the recording to create a configuration. In the transaction SRALMANAGER choose configurations and create a new one:
In the new complex screen, create a new log group. Then drag and drop from the field list on the bottom left to the target fields:
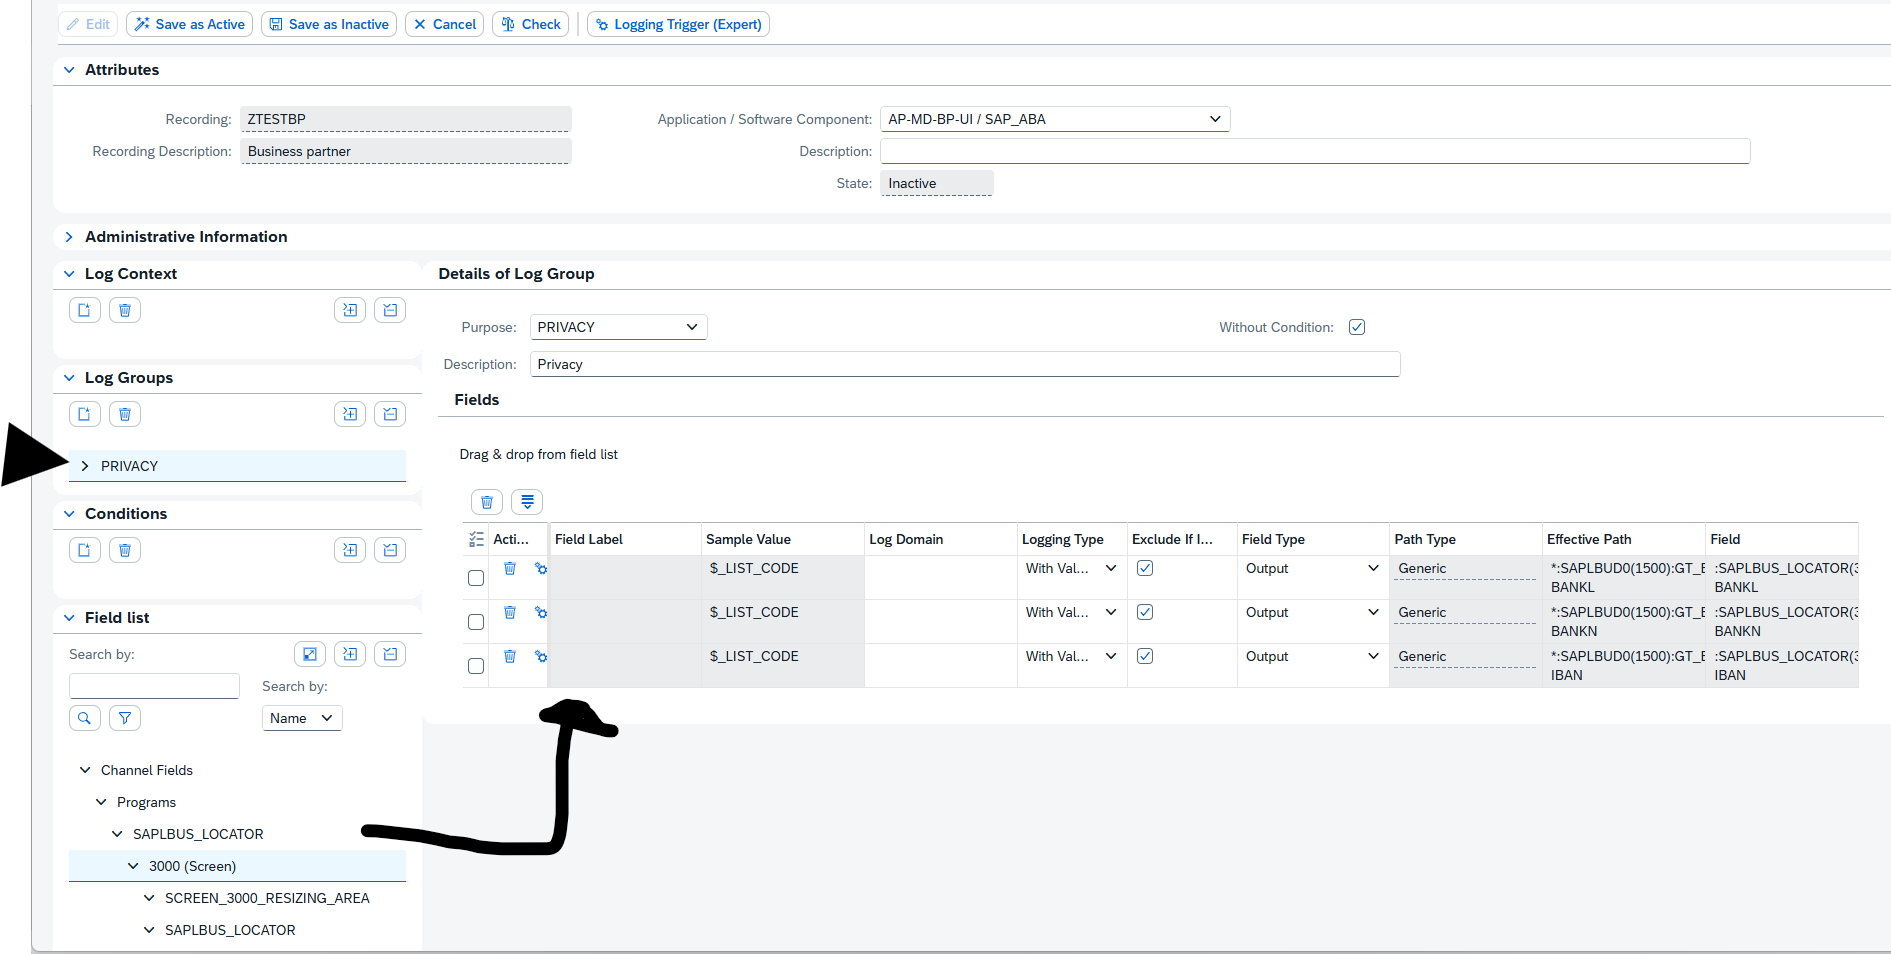
Then first Check the consistency and when ok, activate the configuration:

Using the RAL logging database
In the administration use the second tab for monitoring, or use transaction RALMONITOR to jump directly to the monitoring database. Important here: select the RAW database first! Then select your criteria:
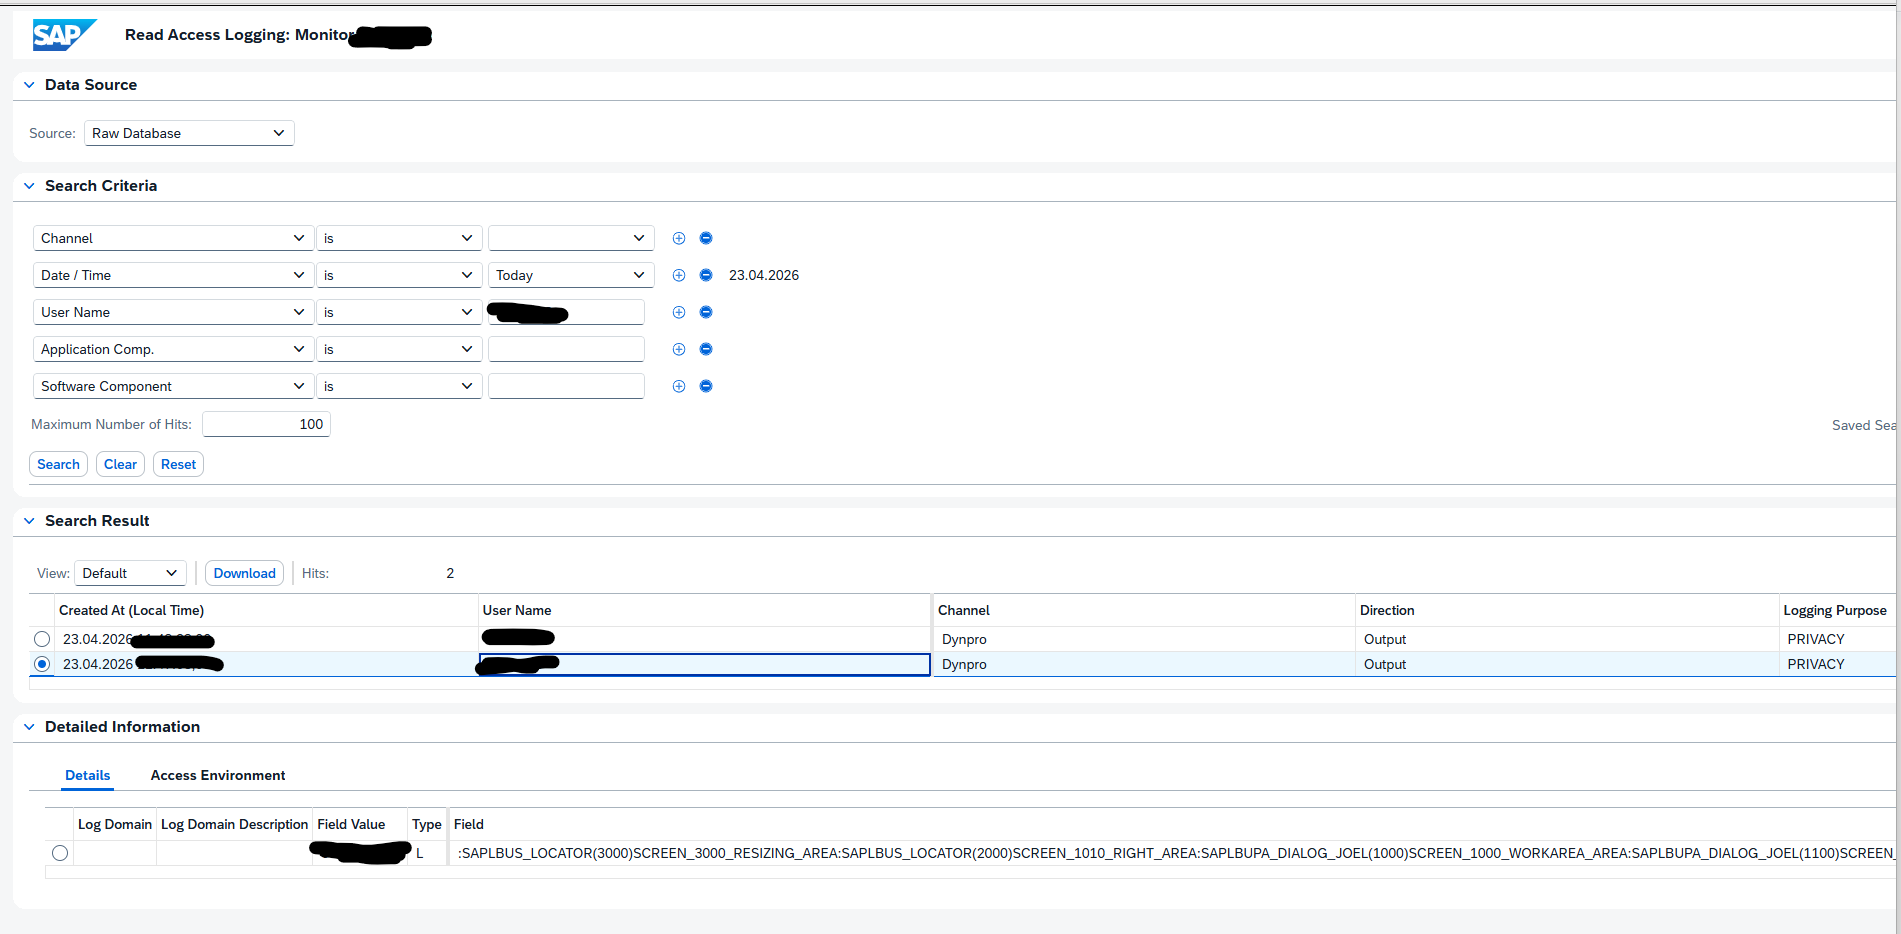
In the search results you can select the details. In the Field Value at the bottom, you can see the actual value that the user has seen on its screen.
RAL and performance
In the help file there is this warning:
Using RAL requires system resources. This can have a strong impact on your system performance, depending on the number and type of logs.
So activate only what is required.
SAP background and references
RAL help file: Read Access Logging | SAP Help Portal.
Background on recording function: Read access logging(Recording functionality) – SAP Community.
Background on dynpro: Read Access Logging – Dynpro Configuration Step-by… – SAP Community.
Background OSS notes:
- 2818528 – Restrictions for monitoring transaction SE16 using Read Access Logging (RAL)
- 3579353 – Activation of Read Access Logging (RAL) Configurations via Transport does not work on target: transporting results into de-activation on target. Manual activation needed after transport.
- 3720162 – RAL: Missing API to read logs from the expanded database: demo report SRAL_READ_LOGS_SAMPLE and class CL_SRAL_SIMPLE_READER to extract RAL data.
Bug fixes: