Integrate SO10 text in webdynpro

This blog will explain how to integrate SO10 standard text in webdynpro. It will also show how to use this to integrate it into page on the right after logon (see also this blog).

Setup SO10 text

Start transaction SO10 and create text for logon:

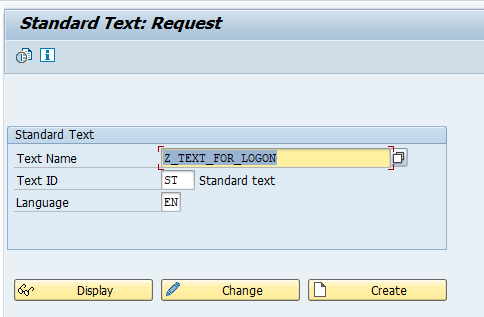
Now enter the text and save it:

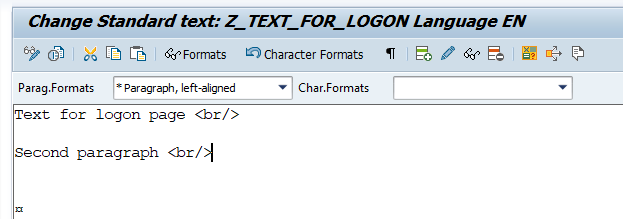
We have entered text (as explained in SO10 blog). Important: add the <br/> tags to create the line break.

Setup webdynpro screen

We will now setup webdynpro screen into which we will integrate SO10 text above.

Go to SE80 and create webdynpro Z_LOGON_INFO and go to the main view context and create this structure:

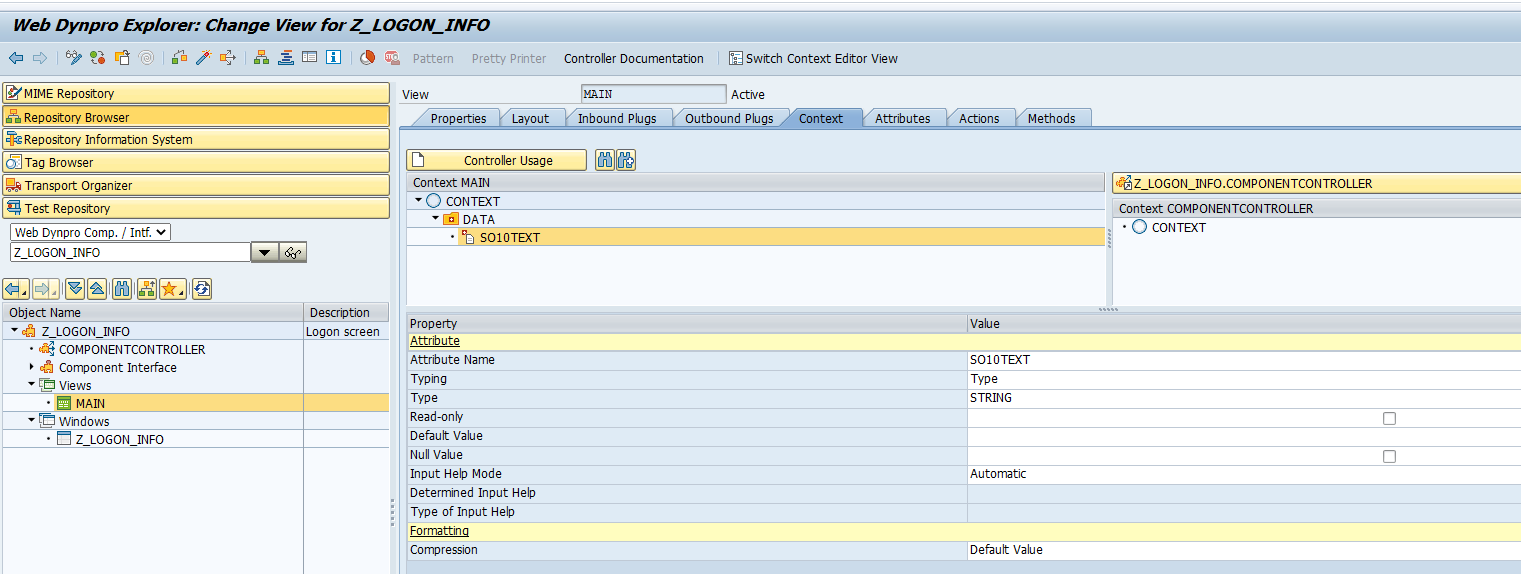
This is the data container for the string to show on the screen.

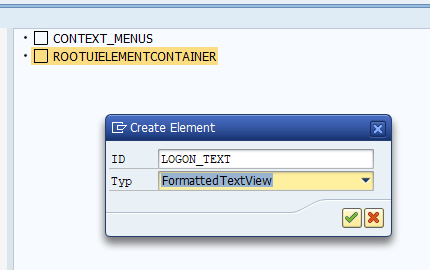
In the Layout View add element for logon text of type FormattedTextView:

Bind the text from the data element:

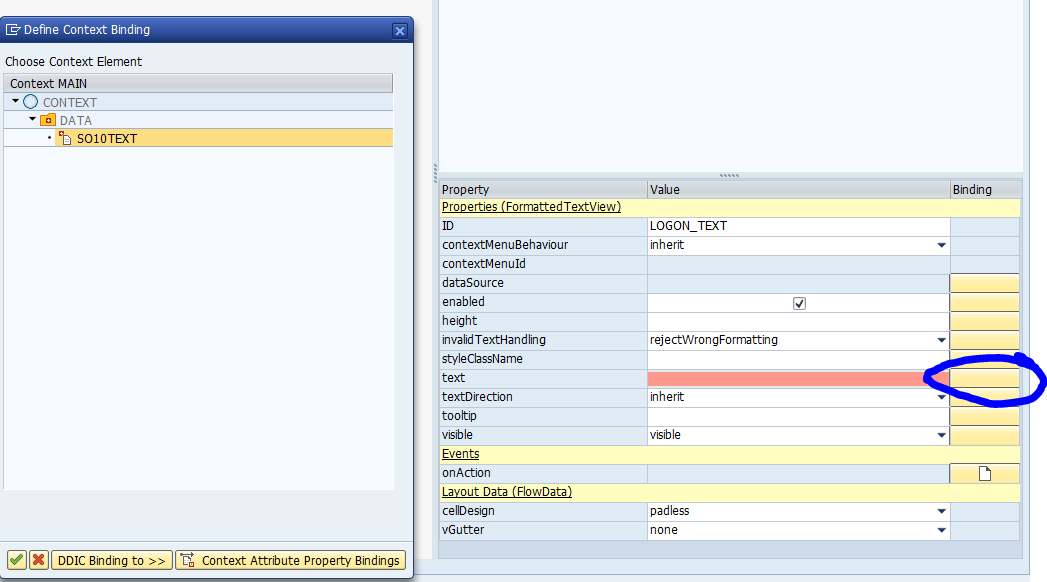
And map the data source:

In the view go to the methods and fill the WDDOINIT method:
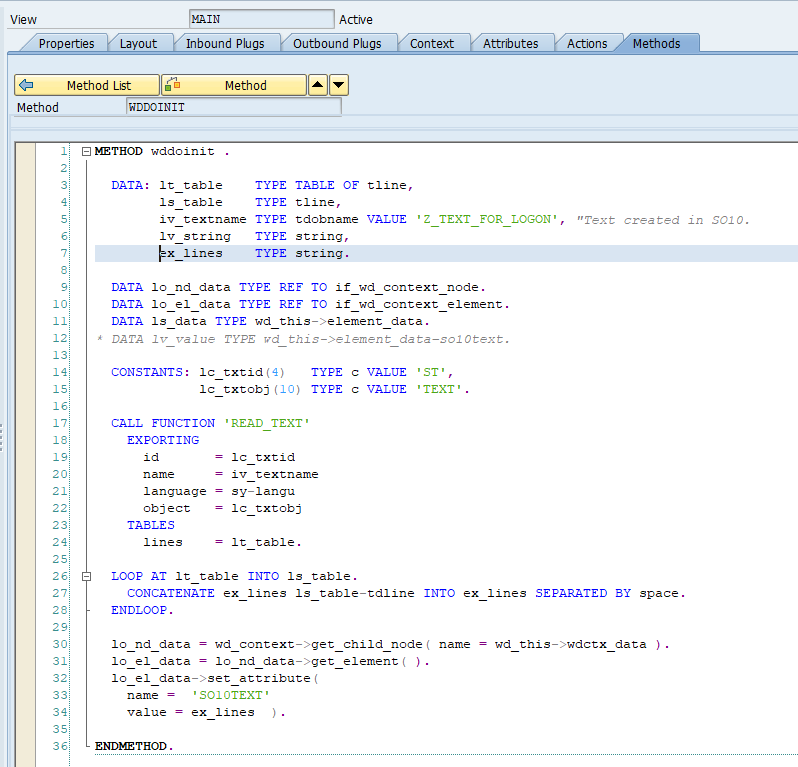
Full code:

METHOD wddoinit .

  DATA: lt_table    TYPE TABLE OF tline,
        ls_table    TYPE tline,
        iv_textname TYPE tdobname VALUE 'Z_TEXT_FOR_LOGON', "Text created in SO10.
        lv_string   TYPE string,
        ex_lines    TYPE string.

  DATA lo_nd_data TYPE REF TO if_wd_context_node.
  DATA lo_el_data TYPE REF TO if_wd_context_element.
  DATA ls_data TYPE wd_this->element_data.

  CONSTANTS: lc_txtid(4)   TYPE c VALUE 'ST',
             lc_txtobj(10) TYPE c VALUE 'TEXT'.

  CALL FUNCTION 'READ_TEXT'
    EXPORTING
      id       = lc_txtid
      name     = iv_textname
      language = sy-langu
      object   = lc_txtobj
    TABLES
      lines    = lt_table.

  LOOP AT lt_table INTO ls_table.
    CONCATENATE ex_lines ls_table-tdline INTO ex_lines SEPARATED BY space.
  ENDLOOP.

  lo_nd_data = wd_context->get_child_node( name = wd_this->wdctx_data ).
  lo_el_data = lo_nd_data->get_element( ).
  lo_el_data->set_attribute(
    name =  'SO10TEXT'
    value = ex_lines  ).

ENDMETHOD.

The code calls with function module READ_TEXT the text set into Z_TEXT_FOR_LOGON and binds it to the SO10TEXT element. Remark: the formatted text in webdynpro now processes the </BR> settings.

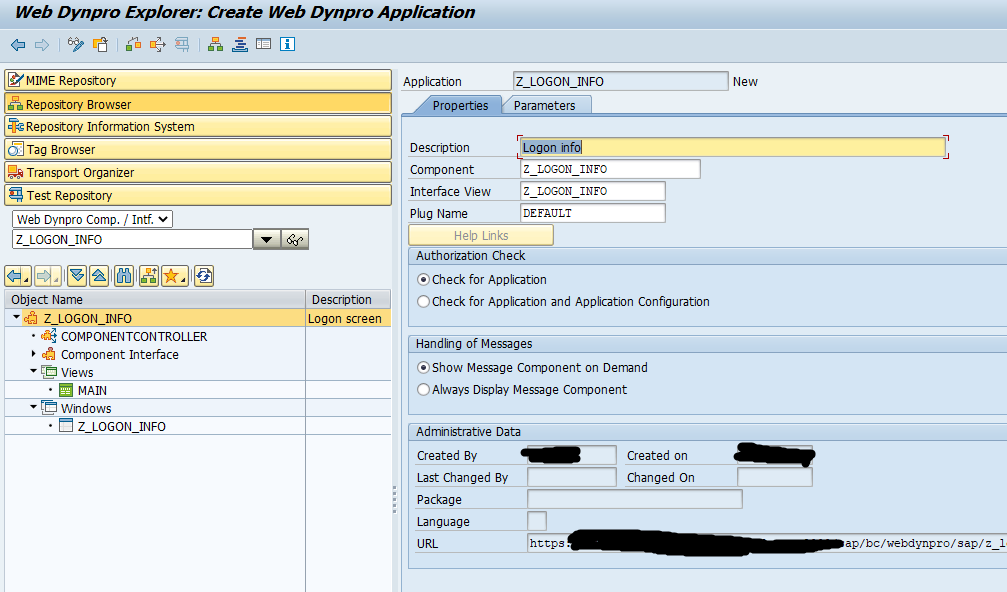
And create the webdynpro application:

And test it:

Restrictions

The formatted text is processed by class CL_WD_FORMATTED_TEXT. See help.sap.com on this. Restrictions are listed (like no use of commands), and list of allowed tags.

Adding URL

Adding a URL to the standard text and show it in webdypro is not possible (as far as known). To add a URL, add to LinkToUrl item in the webdynpro.

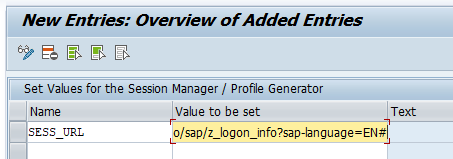
Insert as launch page

Now we follow the instructions from the blog on the logon text. Start transaction SM30_SSM_CUST and set the parameter SESS_URL:

Now log on again:

S4HANA conversion DTV tool (data transition validation)

When you are running S4HANA conversion, this will include financial data conversion. For compliancy reasons the FICO business will demand you run reports before and after the conversion to show that the data is converted ok.

To structure these checks the DTV tool (data transition validation tool) was developed by SAP.

How to install the DTV tool

Master note for the DTV tool is 3117879 – DTV Tool – Central Note.

DTV tool can be used for S4HANA 2021 and higher as target system. There is no installation needed there.

For the source system you need to be on the right support package or install via TCI delivery note 3103342 – DTV Tool Initial Delivery.

Technical reference blog from SAP: link.

How to run the DTV tool

Start of the tool is transaction code DVF:

The detailed steps are described high level in this SAP blog.

All detailed steps (including how to setup connections to source system) are explained in the SAP help file for the DTV tool.

FIORI app support

FIORI app support is a nice tool. With the tool, you can get support on app issues.

The tool can help with:

  • Getting specific version information for a FIORI app
  • Checking if the SICF services are active
  • Checking if the ODATA services are active
  • Checking for authorization errors

This blog will explain these topics and will explain how the setup of the function works.

How to use the FIORI app support

In any FIORI app (not the main launchpad), click on your person icon:

And open the app support from the menu:

Now the app support screen will first open with the version information:

Clicking on Front end server shows the front end server status for this app:

In this case you can already see there are issues with the backend:

You can download the logs by pressing the Download Logs button:

By clicking on all the checks and logs, you can quickly detect where any issue of the FIORI application might be.

How to setup the FIORI app support

FIORI app support needs to be setup. First activate these 2 SICF services;

  • /default_host/sap/bc/bsp/sap/sui_flp_app_sup
  • /default_host/sap/bc/ui5_ui5/sap/sui_flp_app_sup

And activate this ODATA service: sui_flp_app_sup_srv.

Start transaction /UI2/FLP_CONF_DEF to check this entry is present (and if not present, create it):

Now use transaction /UI2/FLP_CUS_CONF to check that this entry is set to active. If not, create the entry and set it to active:

Another option is via business catalog.

For both methods: read the SAP help file.

SAP references and OSS notes

SAP blog on FIORI app support: link.

Help file on App support: link.

S4HANA migration cockpit as successor of LSMW

LSMW is the old legacy system migration workbench. In S4HANA this is now replaced by S4HANA migration cockpit.

This blog will explain the basic configuration required to get the migration cockpit going.

Warning: in between versions SAP also released LTMC transaction. This will become obsolete. See OSS note 2988692 - SAP S/4HANA Migration Cockpit – Information about different versions.

Activation of the S4HANA migration cockpit

First action is to activate the S4HANA migration cockpit FIORI app. Reference data for the app can be found on the FIORI reference library. To activate run STC01 task list SAP_FIORI_CONTENT_ACTIVATION for business role SAP_BR_CONFIG_EXPERT_DATA_MIG. See this blog for full details on activation.

Checking the correct activation

After the activation add the SAP_BR_CONFIG_EXPERT_DATA_MIG role to the correct user ID’s. Now start the FIORI launchpad and you should be able to see the Data Migration tile:

Then you can create data migration projects:

How to run the migration

Many blogs exist on how to run the migration.

OSS note 2733253 – FAQ for SAP S/4HANA migration cockpit. Migration approach: Transfer / Migrate data using staging tables contains links to very extensive FAQ documents.

Tips and tricks can be found in this SAP blog.

Performance tips and tricks can be found in this OSS note: 3065607 – Performance tips & tricks for SAP S/4HANA Migration Cockpit: Migrate Data Using Staging Tables.

Master notes:

Data archiving: archiving infostructures

Several retrieval functions in SAP data archiving require the setup of archiving infostructures.

More on archiving data retrieval in general can be found in this blog.

Activation of infostructures

Using transaction SARJ you can configure the infostructures for archiving:

Using display, you can see the fields that are put in archiving infostructure:

On the first screen you can activate the infostructure by pushing the Activate button.

Activation is only activating the structure for future archive runs, not for past runs. For these you need to fill the structures first.

Filling the structures for existing archive files

Filling the structures for existing archive files is bit hidden. Goto transaction SARJ and select the object. Now choose menu Environment and choose Fill Structure.

In the next screen select the files you want to fill (these are normally yellow):

After selection, choose the Fill Structures button to start the batch job filling them. Don’t select too much. It is intense on reading the archive.

Green ones are done. Red ones have failed.

Most common cause for failures is that the variant for the WRITE program was set so the same document got archived twice into different archive files.

What can be done? If it is OK to have the same document in different files, you can ignore the archive session entries with error in SARI.

To avoid having duplicate keys in the infostructure in future, you can add the filename as an extra key field to the infostructure. This can be done as follows:

– SARJ ->Infostructure -> Display
– Technical data
– Change the field “File Name Processing” from ‘D’ to ‘K’

Archiving infostructure status

Use transaction SARI to check the status of the archiving infostructures:

From here you can go to the Status to check the status of the files.

Archive explorer jumps to SARE transaction for the explorer.

Customizing jumps to the SARJ transaction described above.

Reference OSS notes

2676572 – SARI/KSB5 Archived documents not displayed in line item report