Clean ABAP is the ABAP variant of the clean code principles. All background on clean ABAP code can be read in this blog.
This blog will explain how to upload the ABAP coding for the Clean ABAP ATC variant in your system and activate it.
Load ABAP Git code
To load the ATC variant code for clean ABAP you first need to install the ABAP Git code. Follow the instructions in this blog to do so. Simplest is the offline variant.
Download the ABAP clean code package
Now go to the Github code pal site for ABAP clean code and download the package:
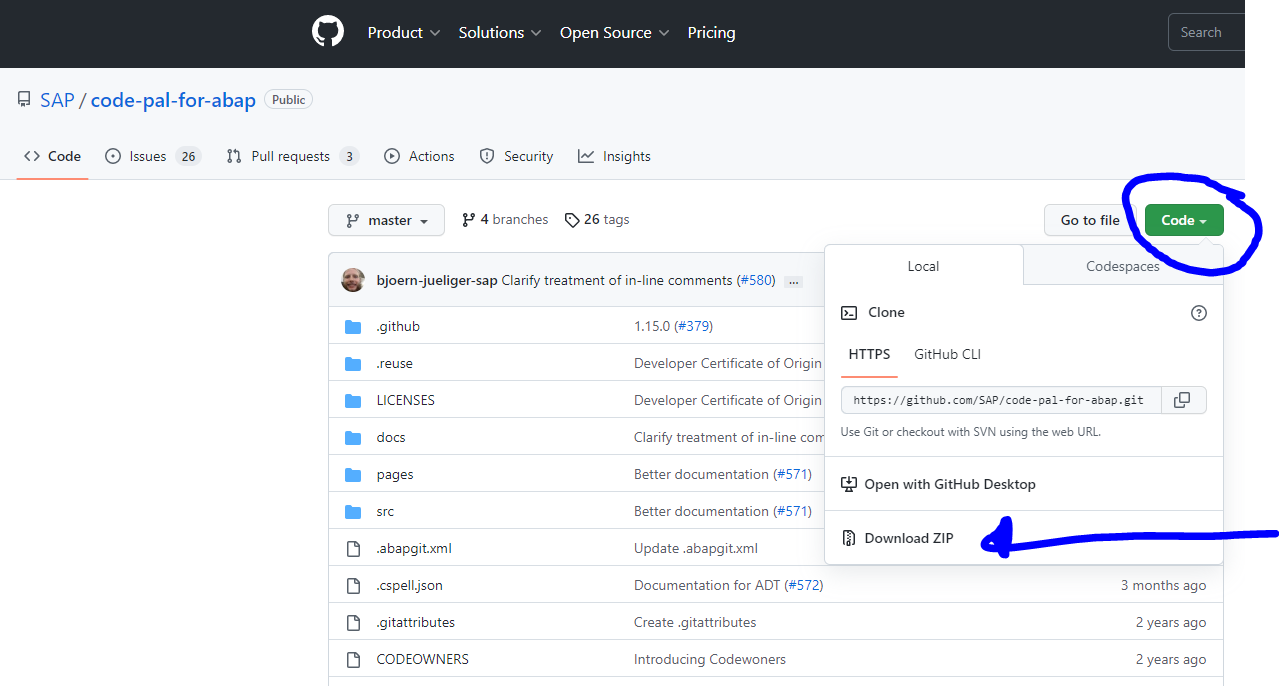
Select the button Code and choose the option Download ZIP.
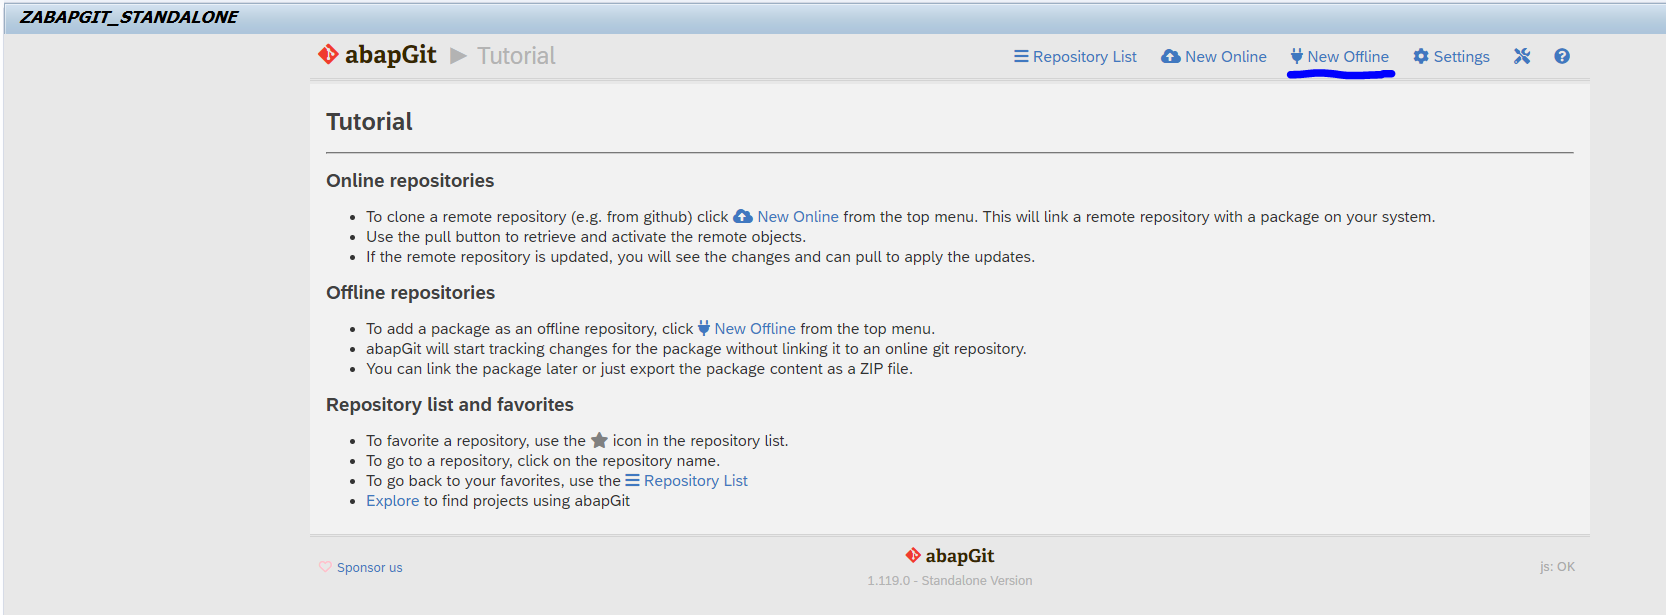
Upload the package
Now start the ABAP git that you loaded in your first step. Choose the option New Offline:
Give the repository a name and select a package:
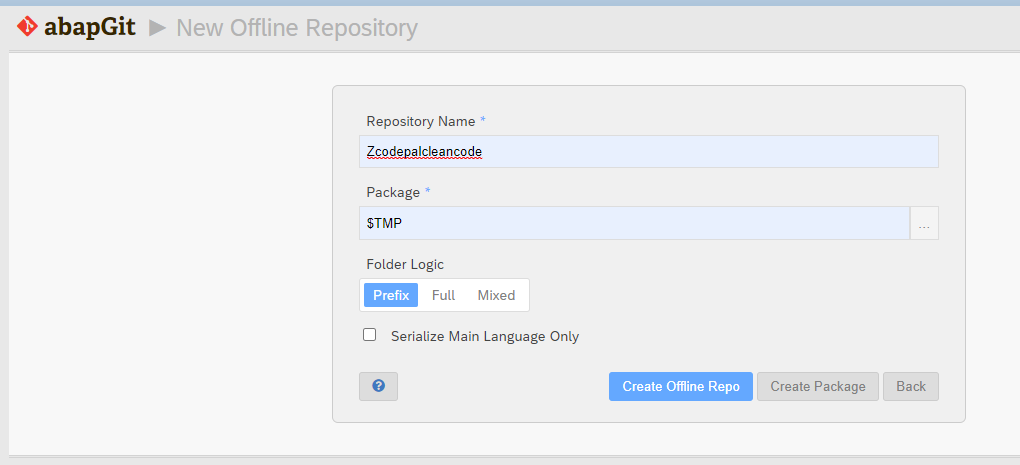
Then push the button Create Offline Repo.
Now select Import Zip:

Import the file you downloaded in step 2 from the code pal site.
Next step is the Pull zip:

You might get a screen with differences. Do not select anything there, only press Ok.
Then wait until all the Y objects are pulled into the system. This might take 5 to 10 minutes.
Activating the SCI checks
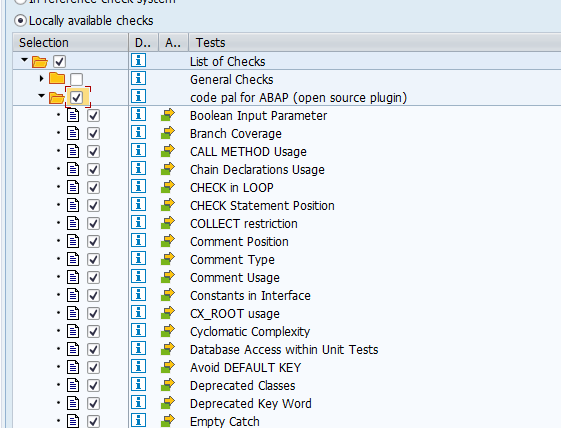
Now start transaction SCI. Select menu option Code Inspector, Management of, Tests. Select all the newly load Y checks for Clean ABAP code:
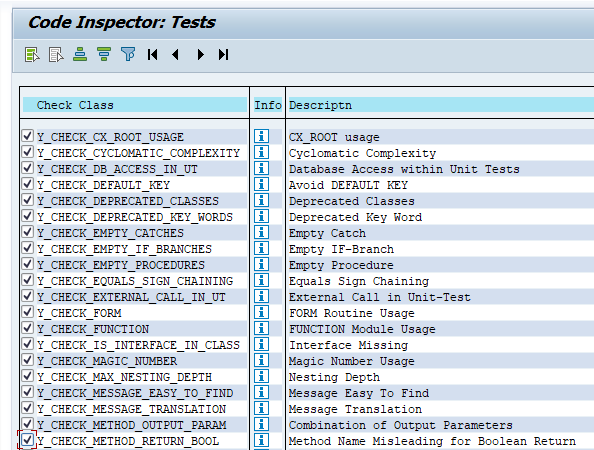
Important now: Save them!
Now you can create a global SCI variant:
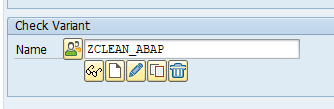
Select all the Clean code ABAP checks and save the variant:
You might get weird issues upon saving for other items, like for example missing CL_CI_CATEGORY_TOP. In that case, go to transaction SE16 -> look for table SCITESTS -> and look for CL_CI_CATEGORY_TOP if there is no entry. Enter the table SCITESTS and click "Create Entry", add CL_CI_CATEGORY_TOP entry and save.
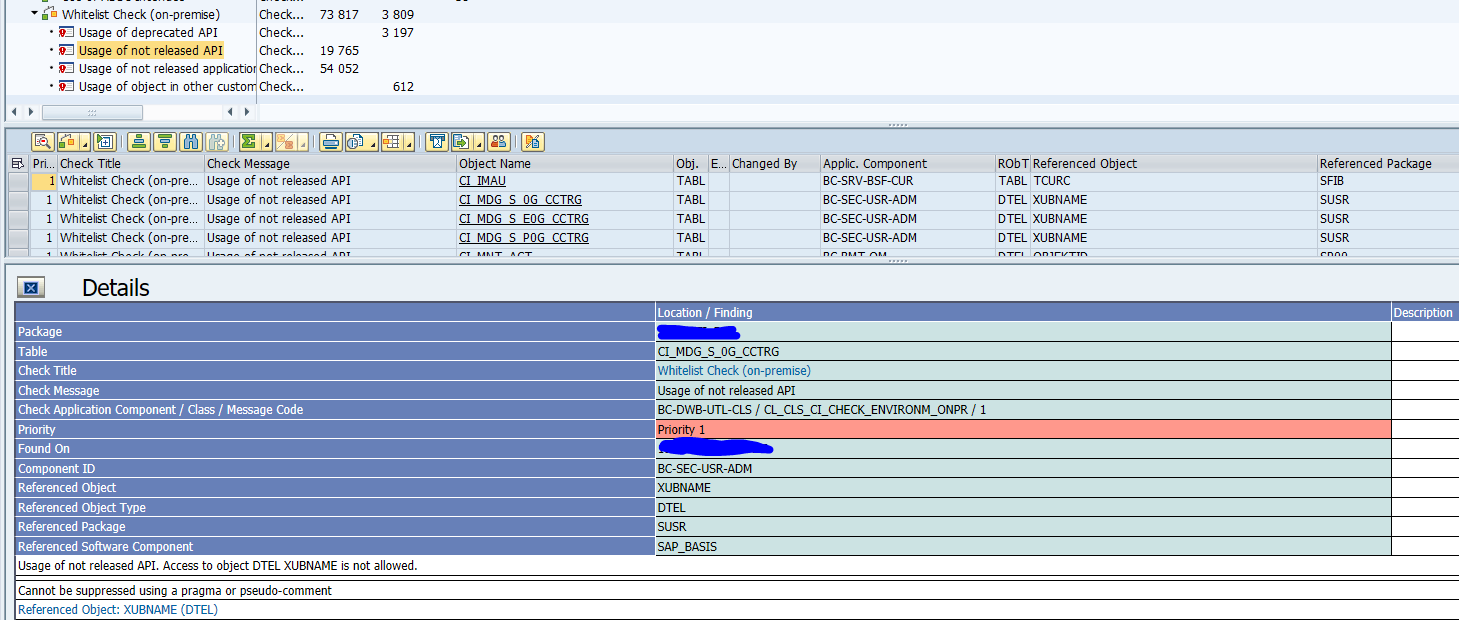
Test and usage
Take a program you want check. Then select menu option Program, Check, ABAP Test Cockpit with….:

Select the ZCLEAN_ABAP SCI check we created above. Run the checks.
Results:

Tip: click on the blue line to jump to the Clean Code site exactly explaining about the issue.
Clean ABAP Eclipse plug-in: ABAP cleaner
To speed up clean ABAP in practice, you can install the clean ABAP cleaner plug-in. Read this blog on how to do this.