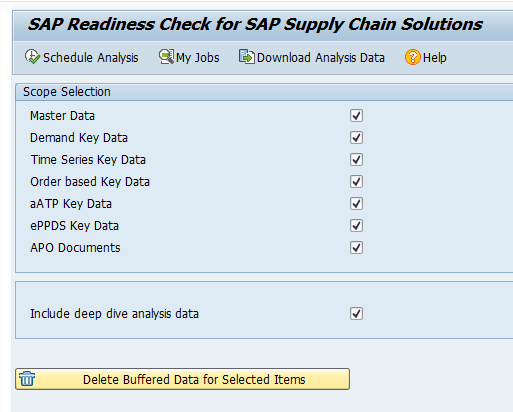
The SAP tool for ABAP system usage SCMON is great. The problem is that the data is a lot to digest. The SUSG function can aggregate the data, but that is difficult to view.
The below Z program is simply taking the SCMON data and is providing a summarized view.
Transaction ZSCMON and program ZSCMON
Create a program ZSCMON and assign transaction code ZSCMON as well.
Report code:
REPORT zscmon.

CONSTANTS : zgc_tcode TYPE tcode VALUE 'ZSCMON',
            zgc_col   TYPE lvc_fname  VALUE 'NUMBEROFCALLS'.

DATA: zgv_objtyp TYPE trobjtype,
      zgv_objnme TYPE sobj_name,
      zgv_clsnme TYPE scmon_classname.


PARAMETERS: zp_stdat TYPE scmon_slicestartdate,
            zp_eddat TYPE scmon_sliceenddate.

SELECT-OPTIONS: zs_obtyp FOR zgv_objtyp,
                zs_obnme FOR zgv_objnme,
                zs_clsnm FOR zgv_clsnme.

PARAMETERS: zp_sum  RADIOBUTTON GROUP g1 DEFAULT 'X',
            zp_det  RADIOBUTTON GROUP g1.

INITIALIZATION.
* AUTHORITY CHECK for TCODE
  CALL FUNCTION 'AUTHORITY_CHECK_TCODE'
    EXPORTING
      tcode  = zgc_tcode
    EXCEPTIONS
      ok     = 0
      not_ok = 2
      OTHERS = 3.
  IF sy-subrc <> 0.
    MESSAGE e172(00) WITH zgc_tcode.
  ENDIF.

AT SELECTION-SCREEN.
  IF zp_eddat LT zp_stdat.
    MESSAGE TEXT-001 TYPE 'E'.
"Slice End Date cannot be less that Slice Start Date
  ENDIF.

START-OF-SELECTION.

  IF zp_det EQ abap_true.
    SELECT object,
           obj_name,
           proctype,
           procname,
           classname,
           SUM( counter ) AS numberofcalls
              FROM scmon_vdata INTO TABLE @DATA(zgt_scmond)
              WHERE slicestart  GE @zp_stdat
                AND sliceend    LE @zp_eddat
                AND object      IN @zs_obtyp[]
                AND obj_name    IN @zs_obnme[]
                AND classname   IN @zs_clsnm[]
              GROUP BY object, obj_name, proctype, procname, classname.

*ALV Object
    cl_salv_table=>factory(
           IMPORTING r_salv_table = DATA(zgo_alv)
           CHANGING  t_table      = zgt_scmond ).

  ELSEIF zp_sum EQ abap_true.
    SELECT object,
           obj_name,
           SUM( counter ) AS numberofcalls
              FROM scmon_vdata INTO TABLE @DATA(zgt_scmons)
              WHERE slicestart  GE @zp_stdat
                AND sliceend    LE @zp_eddat
                AND object      IN @zs_obtyp[]
                AND obj_name    IN @zs_obnme[]
              GROUP BY object, obj_name.

*  ALV Object
    cl_salv_table=>factory(
           IMPORTING r_salv_table = zgo_alv
           CHANGING  t_table      = zgt_scmons ).

  ENDIF.

*Set functions, zebra pattern, column width optimization
  zgo_alv->get_functions(
           )->set_all( ).
  zgo_alv->get_display_settings(
           )->set_striped_pattern( value = abap_true ).
  DATA(zgo_alv_cols) = zgo_alv->get_columns( ).
  zgo_alv_cols->set_optimize( ).

* modify individual properties
  TRY.
      DATA(zgo_col) = zgo_alv_cols->get_column( zgc_col ).
      zgo_col->set_long_text( TEXT-002 ).
      zgo_col->set_medium_text( TEXT-002 ).
      zgo_col->set_short_text( TEXT-002 ).
    CATCH cx_salv_not_found.
  ENDTRY.

* ALV DISPLAY
  zgo_alv->display( ).
Text symbols:
001 Slice End Date cannot be less that Slice Start Date
002 NoOfCalls
003 Not authorized to access ABAP call monitor data
Selection texts:
ZP_DET Detail
ZP_EDDAT Slice End Date
ZP_STDAT Slice Start Date
ZP_SUM Summary
ZS_CLSNM Called Class Name
ZS_OBNME Object Name
ZS_OBTYP Object Type
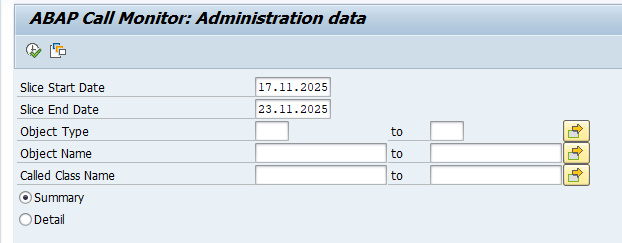
Running the transaction ZSCMON
Now run the program or transaction ZSCMON:
Fill out the correct data for the slice Start and End date.
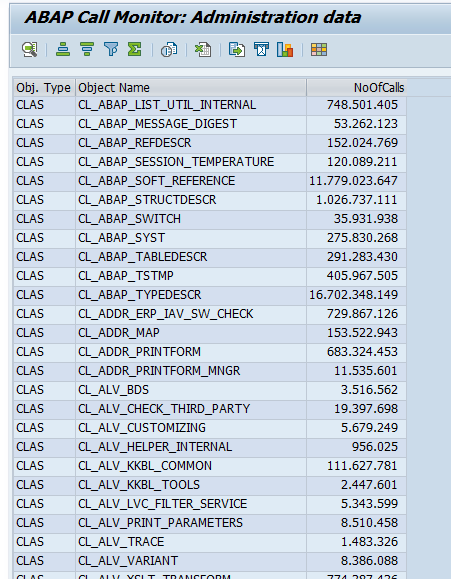
Result:
Run the program in detail mode if you still want to list the details.