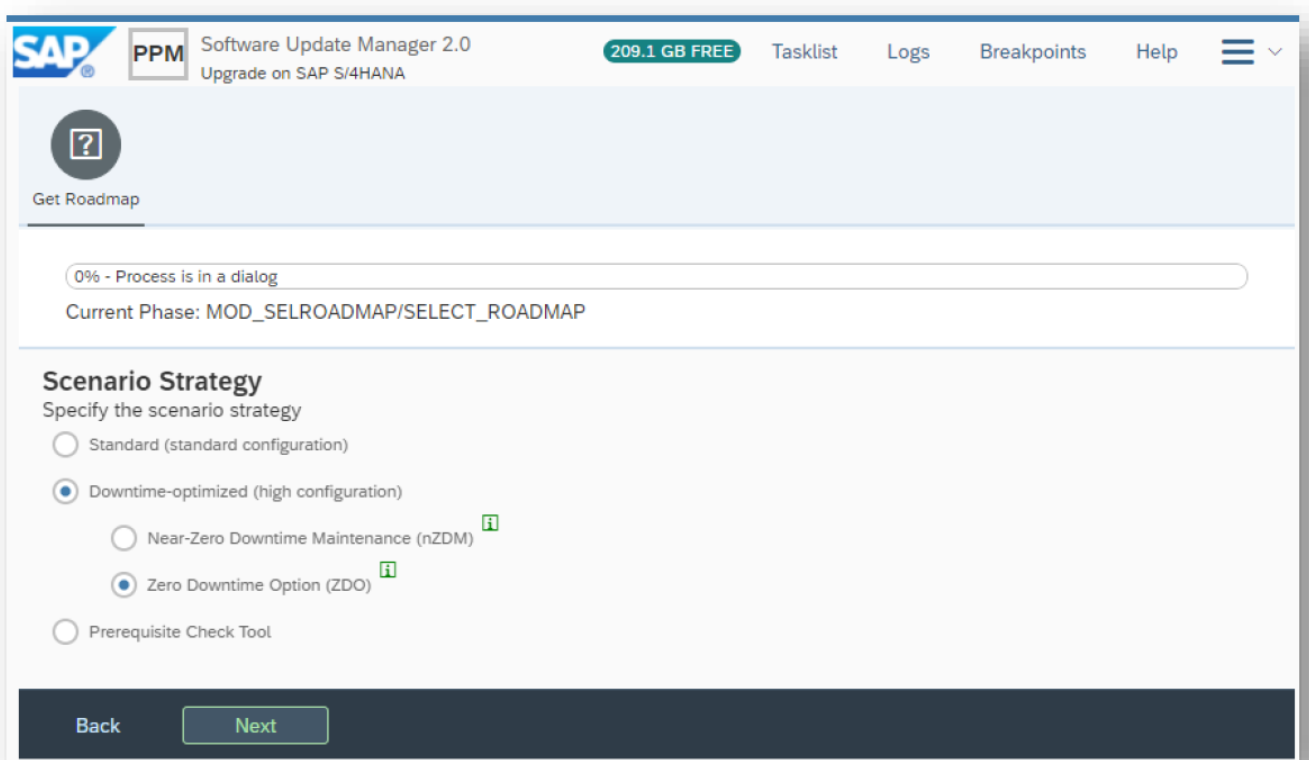
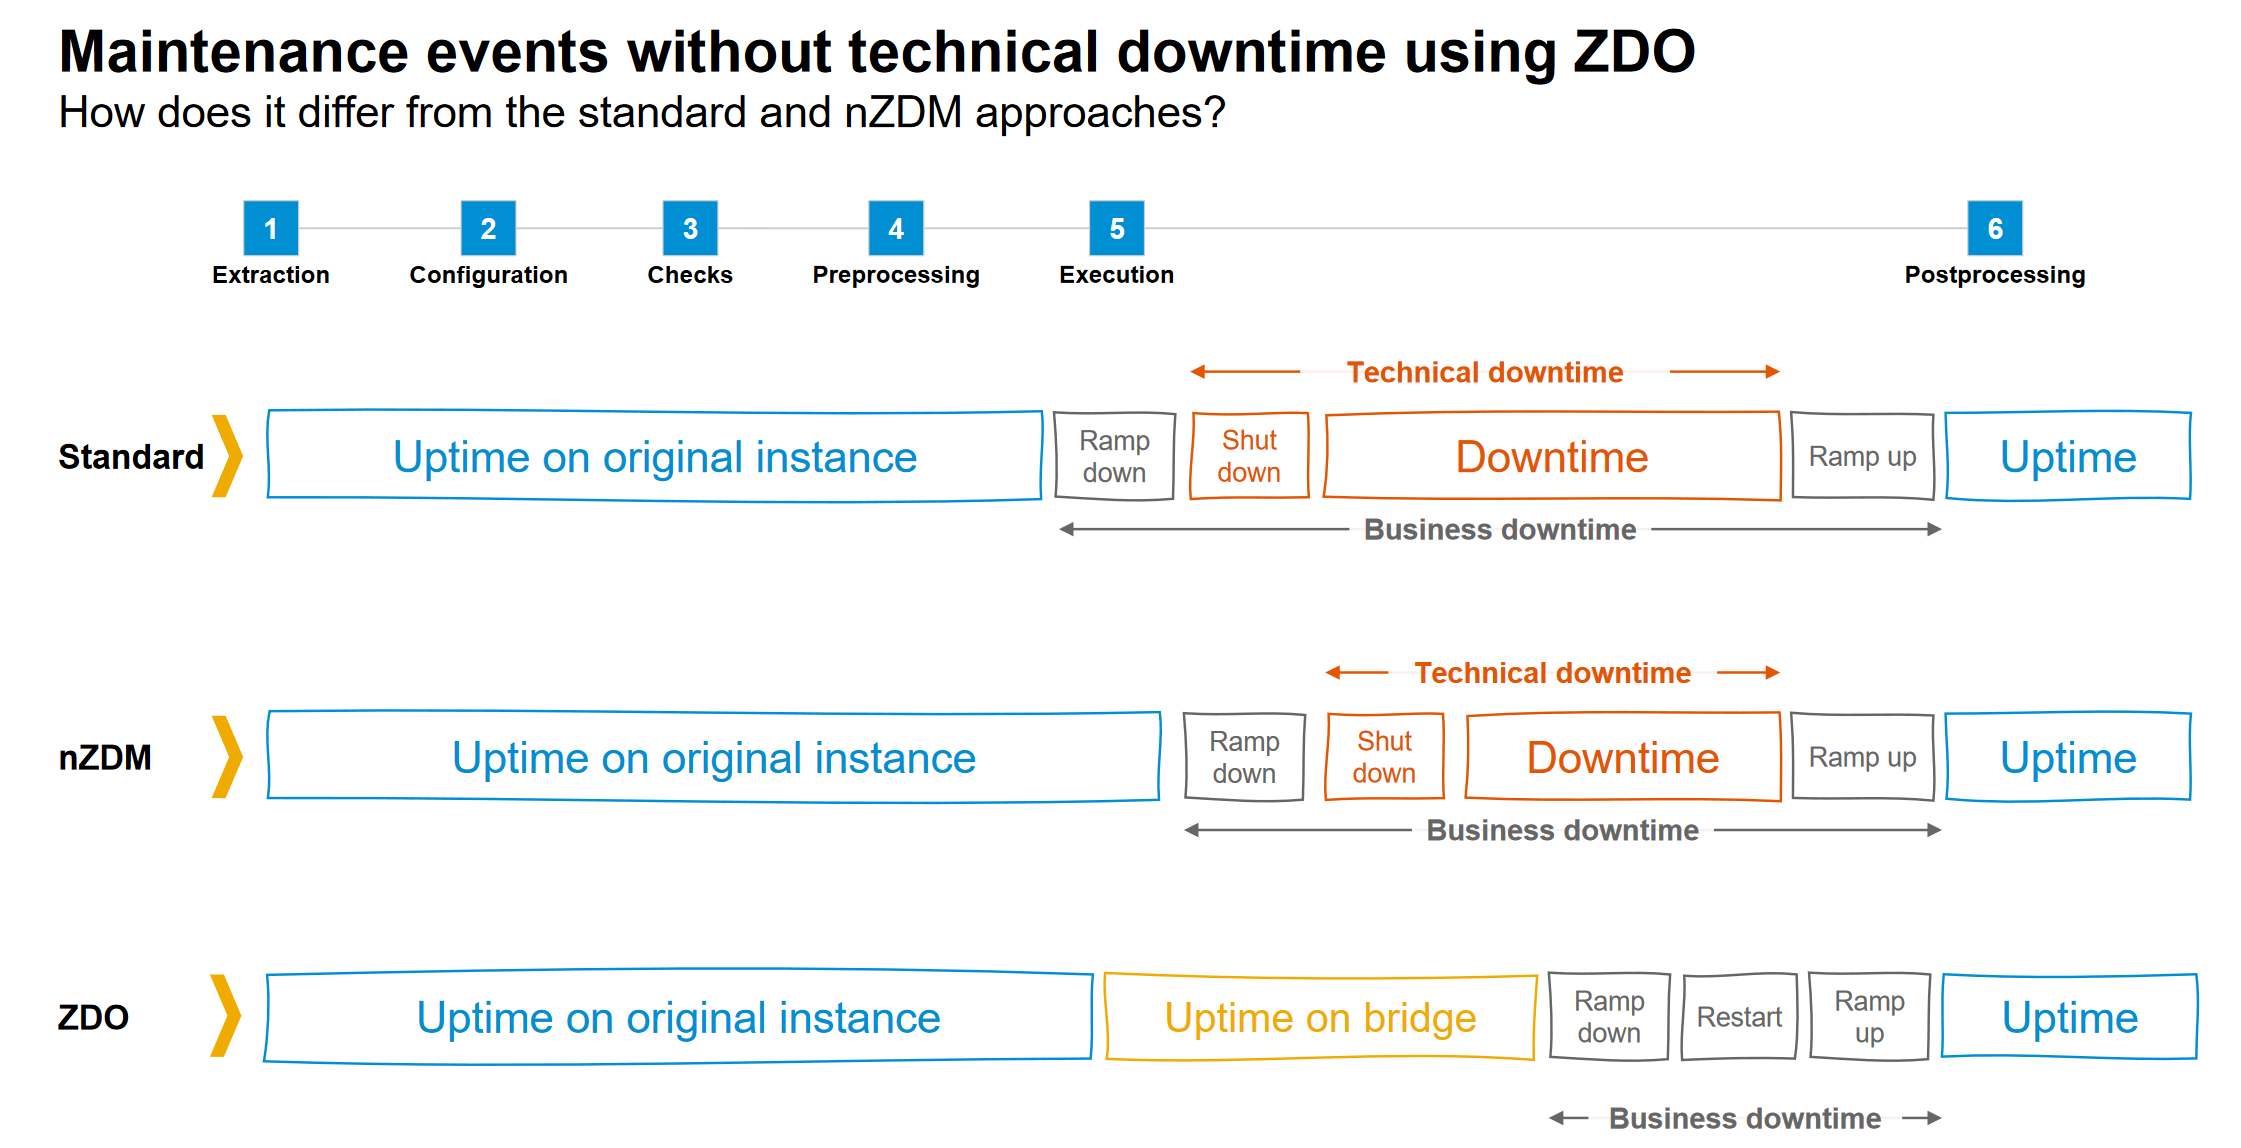
Next to nZDTM (near zero downtime) there is now a new option called ZDO (Zero Downtime Option). This new option even further reduces the downtime of an upgrade to a newer version.
The ZDO option is primarily available for S4HANA upgrades (for example upgrade from S4HANA 2020 to S4HANA 20201), but is also available for products based on the same ABAP version, like SAP Focused Run.
How does the ZDO work?
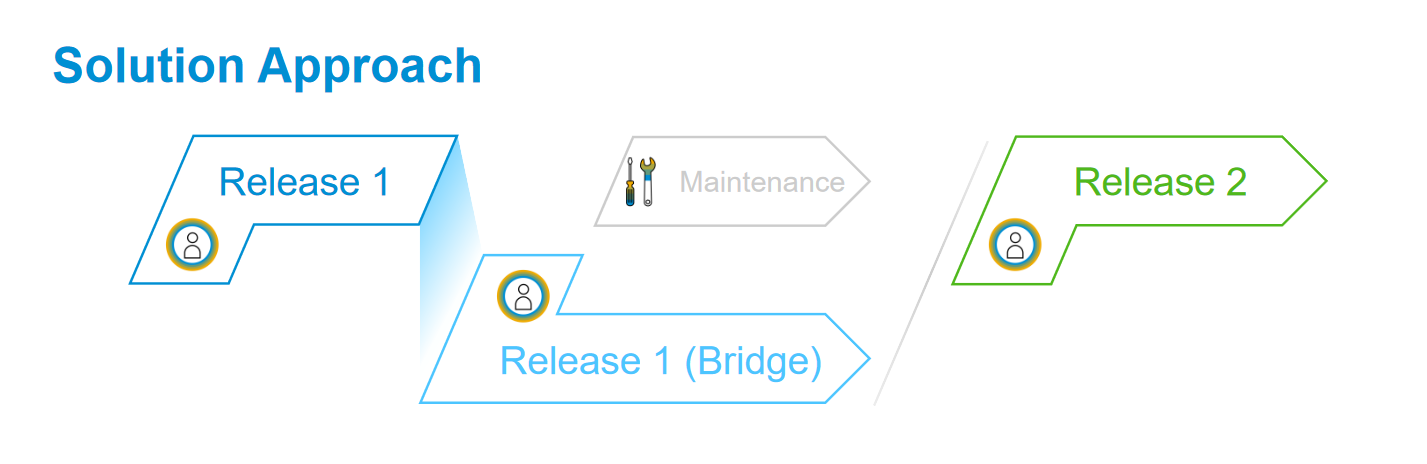
ZDO is the next evolution of the shadow system. Now not only the code is duplicated, but also the data and settings. This is done in a so called bridge system. Postings are duplicated in the main and in the bridge system.
In this way the business downtime is further reduced:
A ramp down, restart and ramp up is still required.
Technical background
All the technical background and restrictions are listed in OSS note 2707731 – Prerequisites and restrictions of Zero Downtime Option of SUM for SAP S/4HANA and training ADM330e or this online training on ZDO. Also check the SUM tool box generic OSS note (3092738 – Software Update Manager Toolbox – Central SAP Note) for the key word ZDO.
The note states as well that the basis person must have followed the training ADM330e before the customer is allowed to perform the ZDO option. The option is released for customer, after training. Why is training required? The option is technically very nice, but also complex (updates are done in both the old and new release). The restrictions and execution must be done correctly and in high quality fashion. This cannot be done without proper training.
You should also do a full dress rehearsal of the ZDO upgrade including people posting data in the system during the bridge phase.
The most common use case is an S4HANA upgrade. But the ZDO upgrade can be used in other used cases as well. For example SAP Focused Run can also be upgraded with ZDO. There are special notes, instructions and restrictions: 3269755 – SAP Focused Run 4.0 Support Package 00 – Update Preparation and Postprocessing Documentation. Check the notes carefully for your specific use case.
Memory
ZDO will use more memory since it will have 2 database schemas. Check and monitor this carefully on your test upgrades and extrapolate to production. A ZDO upgrade does require a test run on full production copy size.
Execution of ZDO issues
During execution of ZDO, you will get far more issues and errors as compared to the downtime optimized scenarios. For this reason, the first ZDO upgrade you execute should be on a sandbox system. Preferably as a copy of your productive system. You will learn a lot of things on the sandbox upgrade, to make the real upgrade later on go smooth.
Addons
Some addons might block the upgrade. Some can still be allowed in the upgrade, but cannot be upgraded along with the upgrade and have to remain at the same version. At the bottom of note 2707731 there is an always up to date excel file containing the Allow List for addons.
OSS notes in ZDO checks phase
During the prechecks and later even in shadow system build up, SUM will come with list of OSS notes that need to be applied in main system or in shadow.
For the real upgrade: already apply all the notes on the development system before the upgrade and transport these to production.
Database inconsistencies
All database inconsistencies must be resolved. Repair via SE14, see blog.
BI system settings
ZDO is currently only supported for embedded BI scenario. This might mean you need to get help from your BI team on de-activating some BI content.
To find out what is blocking: go to transaction SE24 and enter class CL_RS_UTILITIES. Start the test tool and launch method GET_SYSTEM_SCOPE. If the answer is DATA_WAREHOUSE, this will block the upgrade. Use your debug skills (or ask ABAP developer) to see which items are throwing roadblocks. Then de-activate or delete that content (with help of your BI team).
Old HANA transport containers
Some old HANA content might block the ZDO upgrade. Read more on this in OSS note 2982320 – HTA for HDI: Error in execution of HDI call: insufficient privilege. Steps to solve: repair privileges on the ABAP HANA user. Run program SCTS_HTA_ADMIN in repair mode.
ZDO OSS notes for specific applications
SAP Focused Run ZDO upgrades: 3612301 – ZDO Upgrade for SAP Focused Run: Corrections for Source System Release FRUN 5.0 SP00, FP01, FP02.
SAP GTS: 3607370 – Support Guide for Converting/Upgrading to GTS Edition for SAP Hana 2023.
SAP BW: 3002387 – SAP BW: Business application restrictions during ZDO Upgrade.
SAP EWM: 2293063 – Restrictions of ZDO Upgrade for SAP EWM by SCM Basis.
So for each ZDO upgrade, do check for notes about restrictions for business and/or technology, and check if it is applicable for you or not.
Background
Background blog from SAP: read here. And the more recent blog.