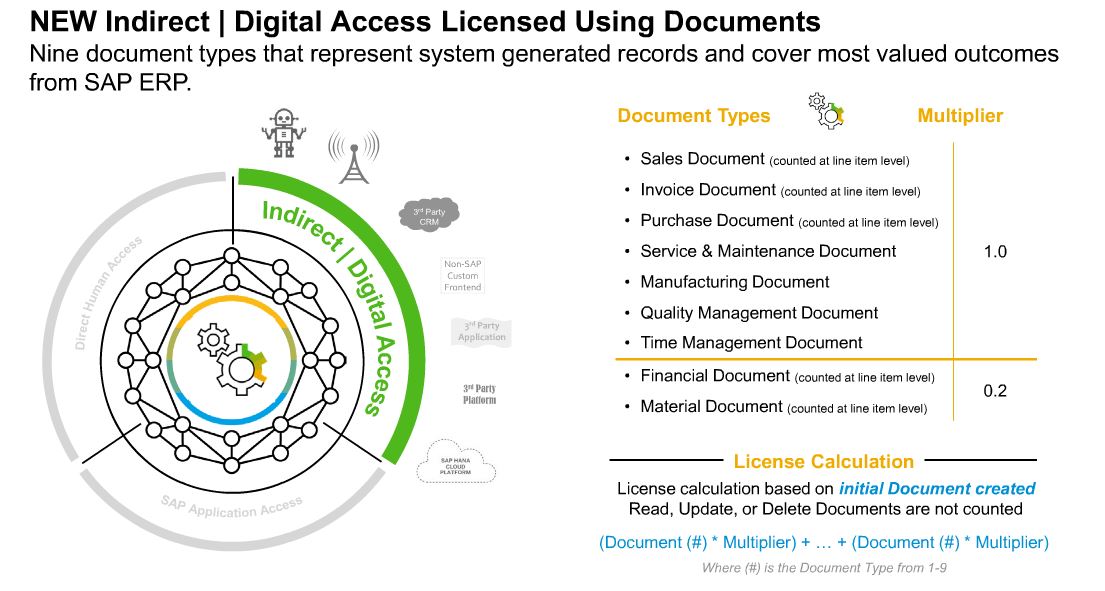
Questions that will be answered in this blog are:
- What are the current UI5 versions available and supported?
- How to perform UI5 last digit patching?
- When to patch and when to upgrade to new FIORI server?
Current UI5 versions available
The current UI5 version overview is published by SAP on this site.
The overview gives information on the main versions (like 1.56, 1.58, etc) and the available last digit patches (like 1.56.14, 1.58.5, etc).
Your own version can be found with this URL:
http(s)://<your server><your port>/sap/public/bc/ui5_ui5/index.html
Example:

This server has versions 1.48 (last digit patch 13) and 1.52 (last digit patch 8).
Last digit patching
To patch the last digit to the newest version, you first look for the corresponding OSS note. Search for term “ABAP SAPUI5 1.xx release” with xx being your release. For our example it is oss note 2550980 – ABAP SAPUI5 1.52 release. Or take the generic note: 3155948 – ABAP SAPUI5 patch version update.
The note describes per last digit version which file to download and which FLP note to apply after you do the patching.
In this example we will patch to level 1.52.23. The note tells us do use this file and note:

Download this file from the SAP software download section.
Check if the last digit patching program needs bug fix OSS notes ( /UI5/UI5_UPLOAD_PATCH_TO_MIME ).
2614248 - Upload UI5 patch error: Unable to lock the source code to edit
2997207 - /UI5/UI5_UPLOAD_PATCH_TO_MIME: Load UI5 archive from application server
3075898 - /UI5/UI5_UPLOAD_PATCH_TO_MIME: Problems detected with transport-related checks of Change Ctrl Mgmt
3145139 - Fix content type of UI5 files with hashed names in MIME Repository
3153462 - UI Library Patch Error while parsing an XML stream: 'BOM / charset detection failed'.
3220439 - Prerequisite for improvement of UI5 patch installation
3271129 - "File contains no Demokit" error in report /UI5/UI5_UPLOAD_PATCH_TO_MIME for UI5 1.102 release
3280413 - SAPUI5 patch upload: Prevent inconsistent file state after Virus Scan misconfiguration
The upload and processing of the last digit patch file can take a long time (typically 1 hour). If you don’t take measures the system will dump after 10 minutes with a time-out.
Goto RZ11 and set rdisp/max_wprun_time to value 12000 (and undo this after the patching). In newer versions of netweaver the parameter is rdisp/scheduler/max_runtime, which needs to be set to 120m.
Now start program /UI5/UI5_UPLOAD_PATCH_TO_MIME:
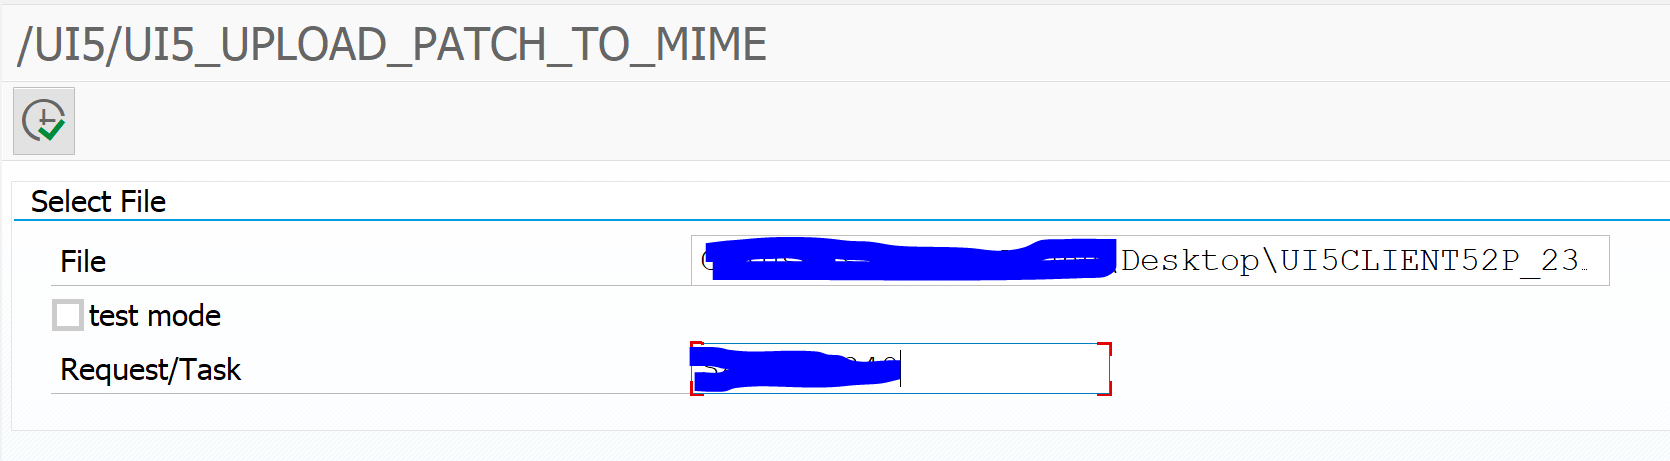
The file has to point to the file you have downloaded to your desktop. Use F4 to select the correct file. The request /task must be a valid unreleased workbench request.
First run in test mode. Wait until it is done (1 hour is normal…). If the result is ok, remove the tick box for test mode and run real mode (yes, 1 more hour to wait).
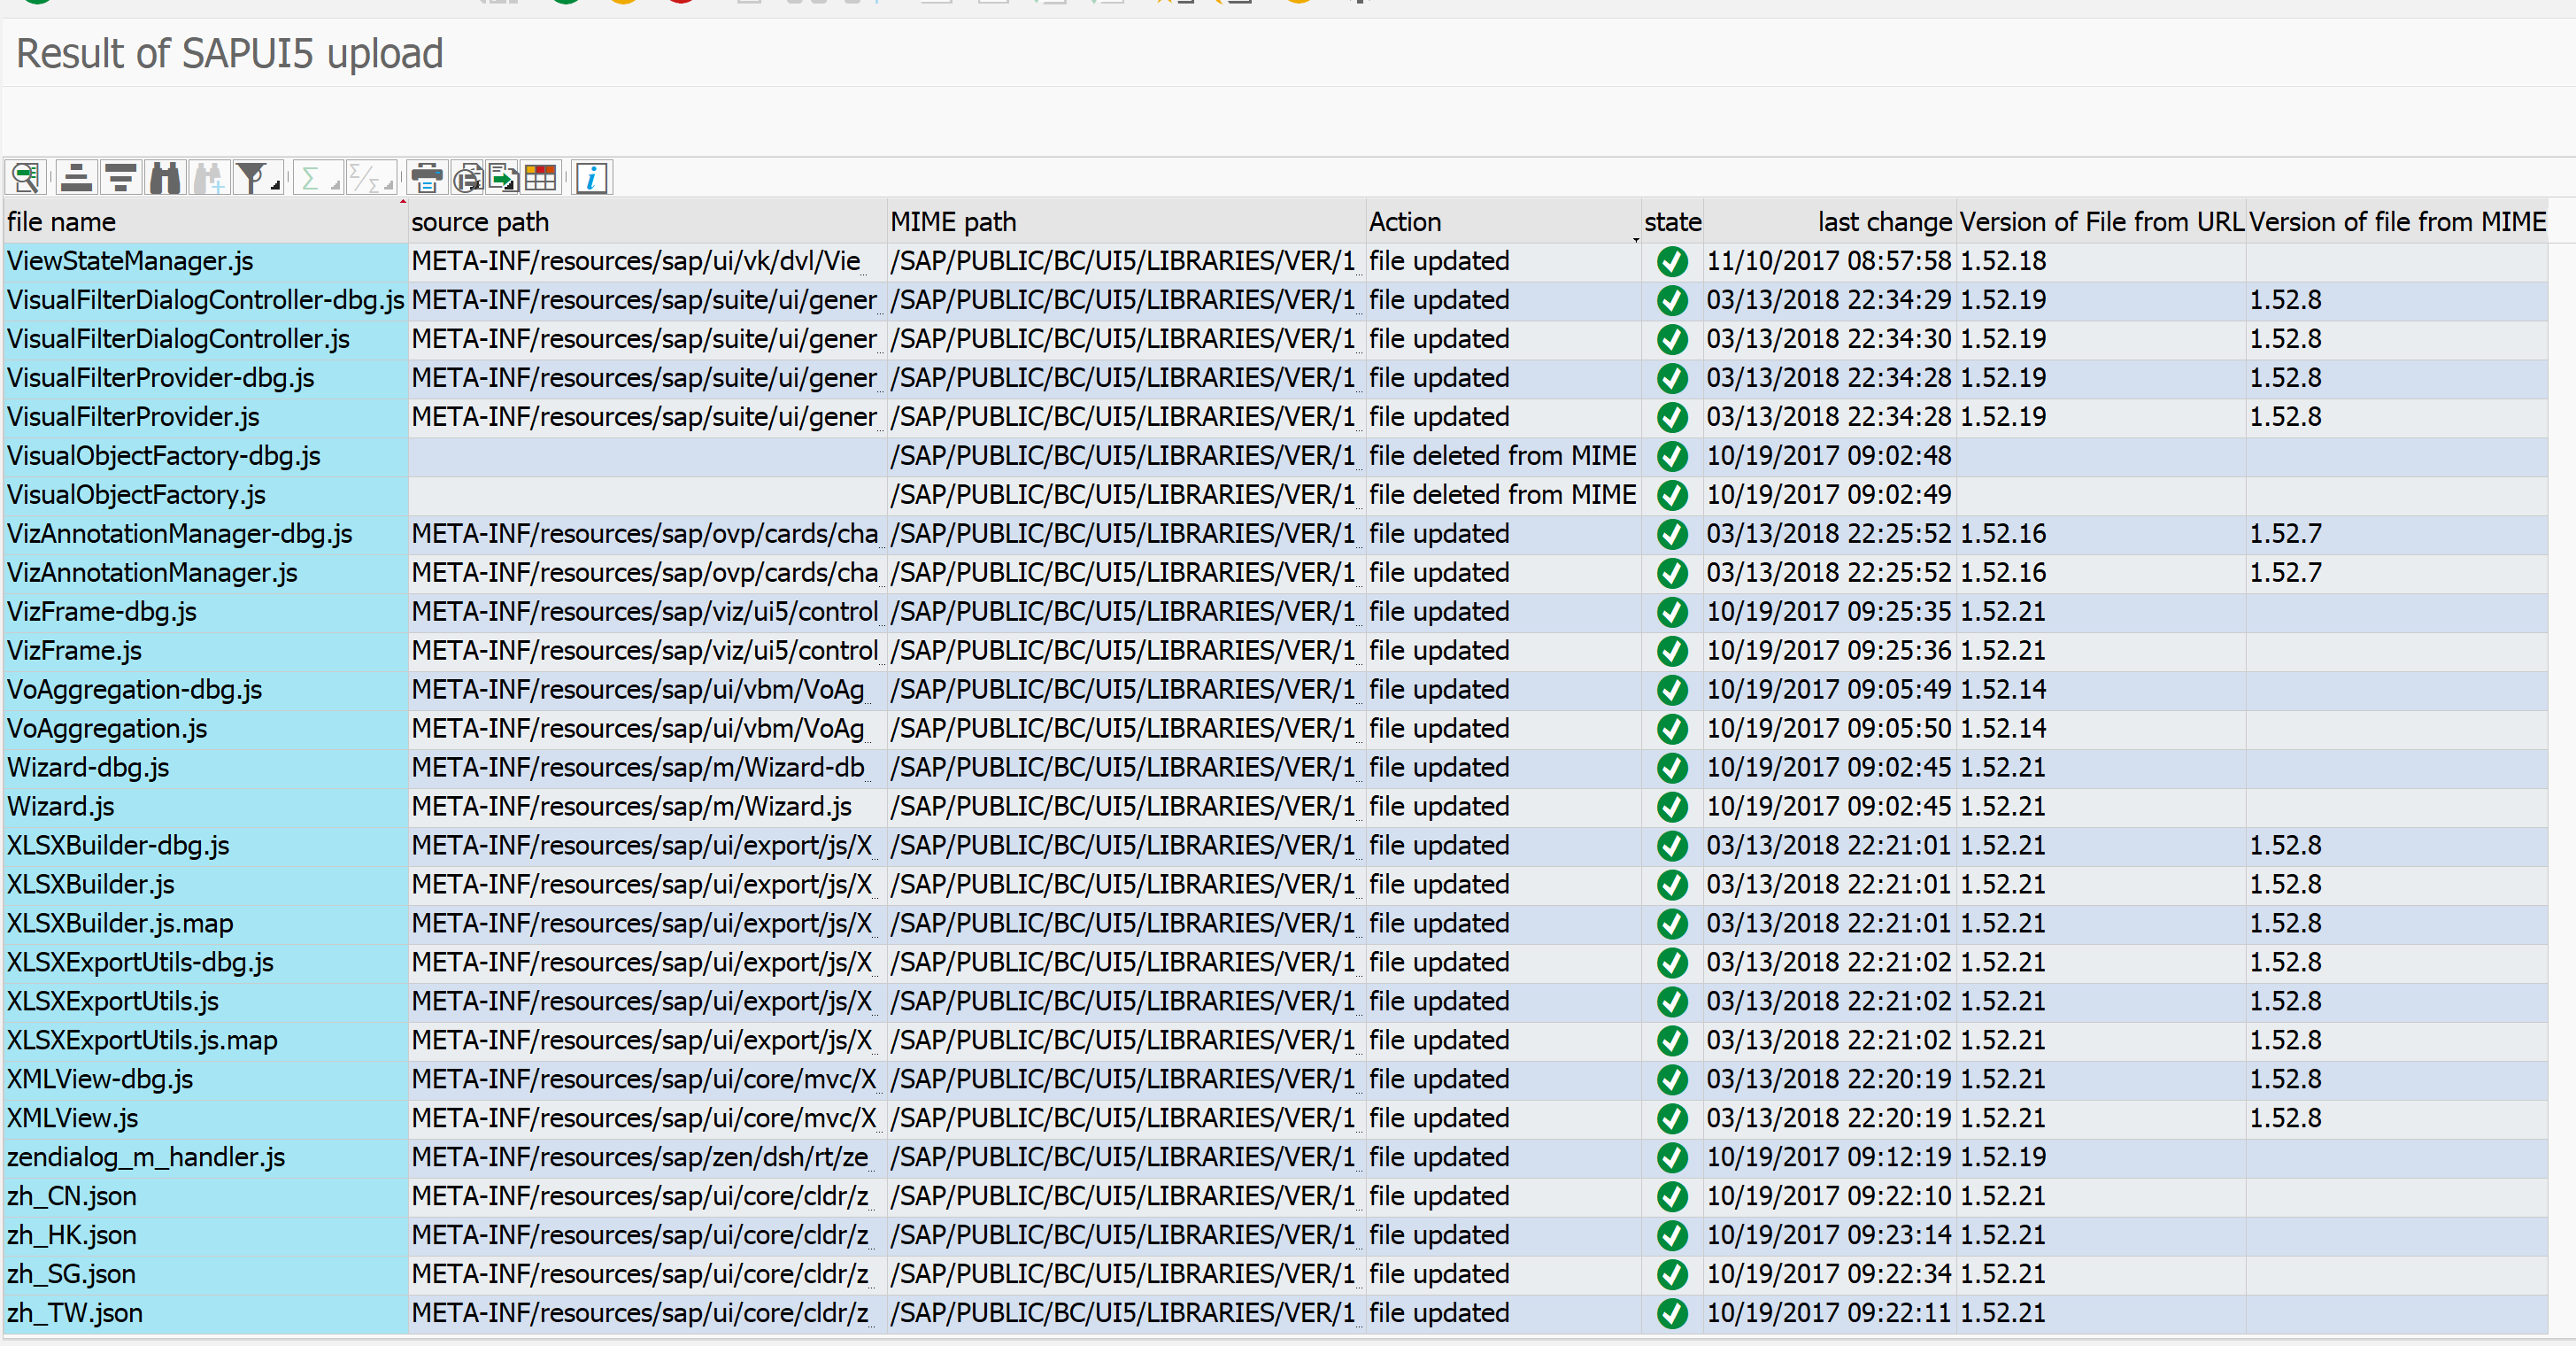
End result should look like:
After the application of the patch, apply the FLP note (in this case note 2605065).
Now you can start the version overview again to see if the patching was ok:

As you can see the 1.52 version is now updated to level 1.52.23. The 1.48 version is the same.
More background in OSS note 2630700 – SAPUI5 patch update fails.
Transport of last digit patch to Q and P systems
When you want to apply last digit patch on Q and P systems, you can move the transport you have selected in the upload step. The unfortunate thing is that the import to Q and P of this transport also takes about 1 hour. This means you need to properly plan the import (especially on production select a time where no users are using FIORI apps).
Patching versus upgrading
The goal of last digit patching is simple: it solves bugs in the SAP delivered UI5 libraries. But it can also bring new bugs.
Best patching strategy: only patch when you have a bug that must be solved. Then patch to latest version. Don't think last minus one, since the UI5 patches come every 2 to 4 weeks: just take latest one. If your system is stable: don't patch.
Upgrading to a higher FIORI frontend server will give you new libraries which will have new functions. Also: the higher frontend servers have better performance due to faster ABAP kernel, better caching features etc. If you are using newer S4HANA solutions, you will be forced to upgrade frontend server to specific minimum version.
Best practice upgrading: if you are using central FIORI gateway server plan for upgrade every year or every 2 years at minimum. Every year at least apply support pack: the support pack will also to do last digit patching as well. After support pack or full version upgrade immediately patch to last digit version available before starting the testing.
Background OSS notes
Background notes: