This blog will explain about the new SAP license model for indirect access, also known as Digital Access license.
Questions that will be answered in this blog are:
- Where to find reference material on the new SAP license model?
- How does the new SAP license model look like?
- What are the exact definitions inside the documents for digital access?
IMPORTANT:
The explanation in this blog is to help you understand. This is not a replacement of the official SAP site. Please always check the latest official SAP site on the latest status of licensing. The document to search for in the SAP site is called SAP licensing guide (a guide for buyers).
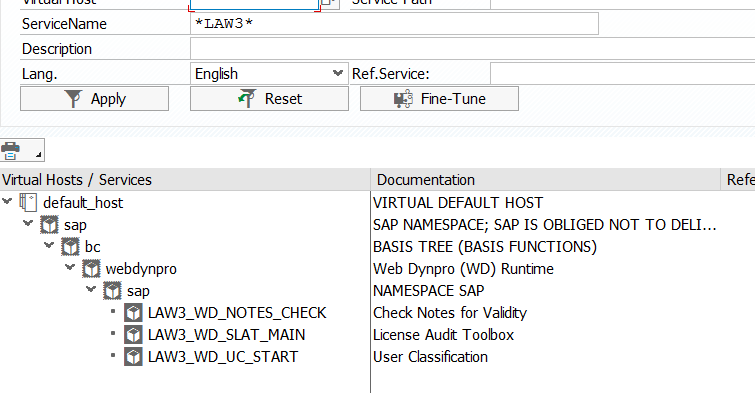
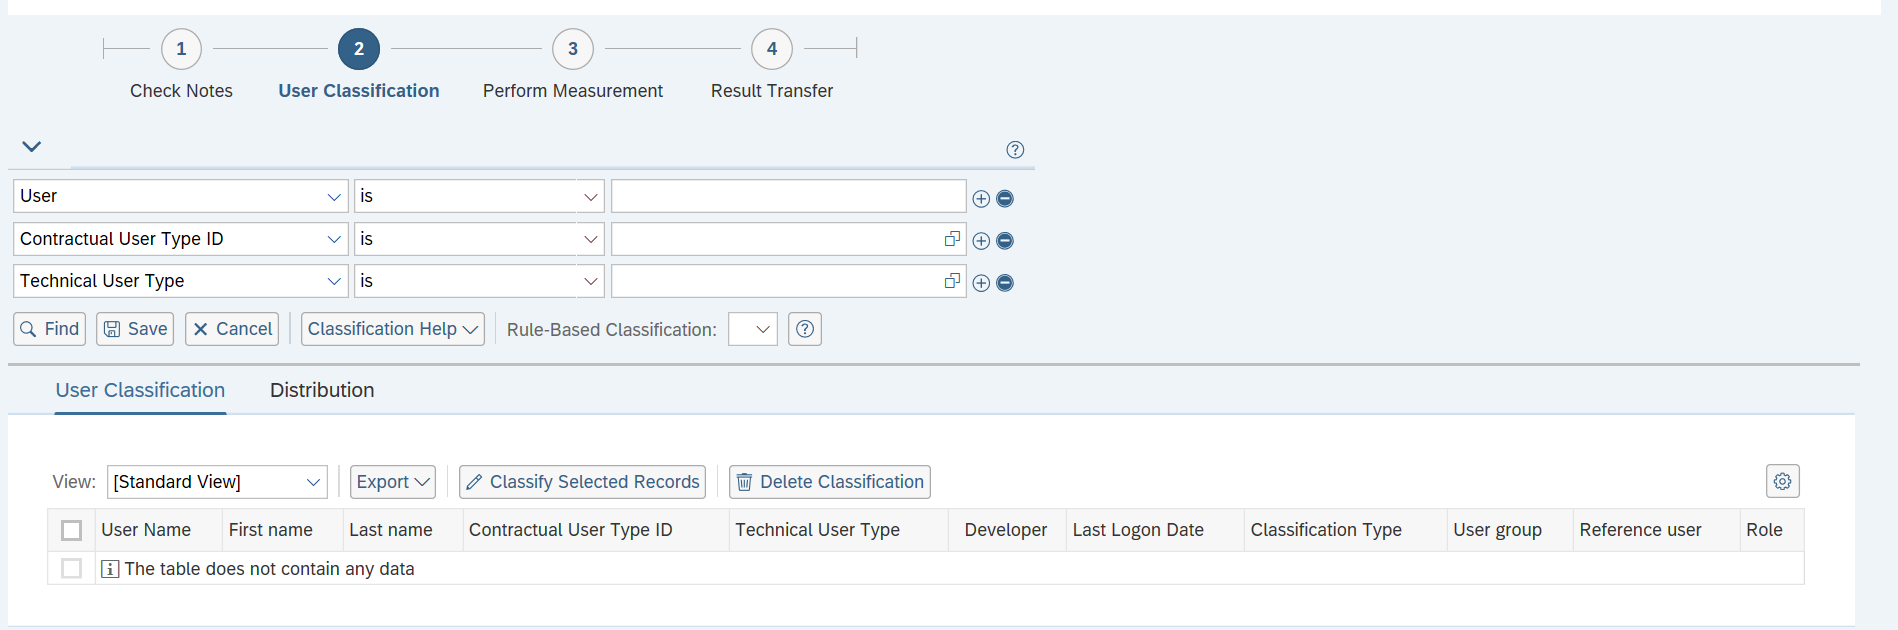
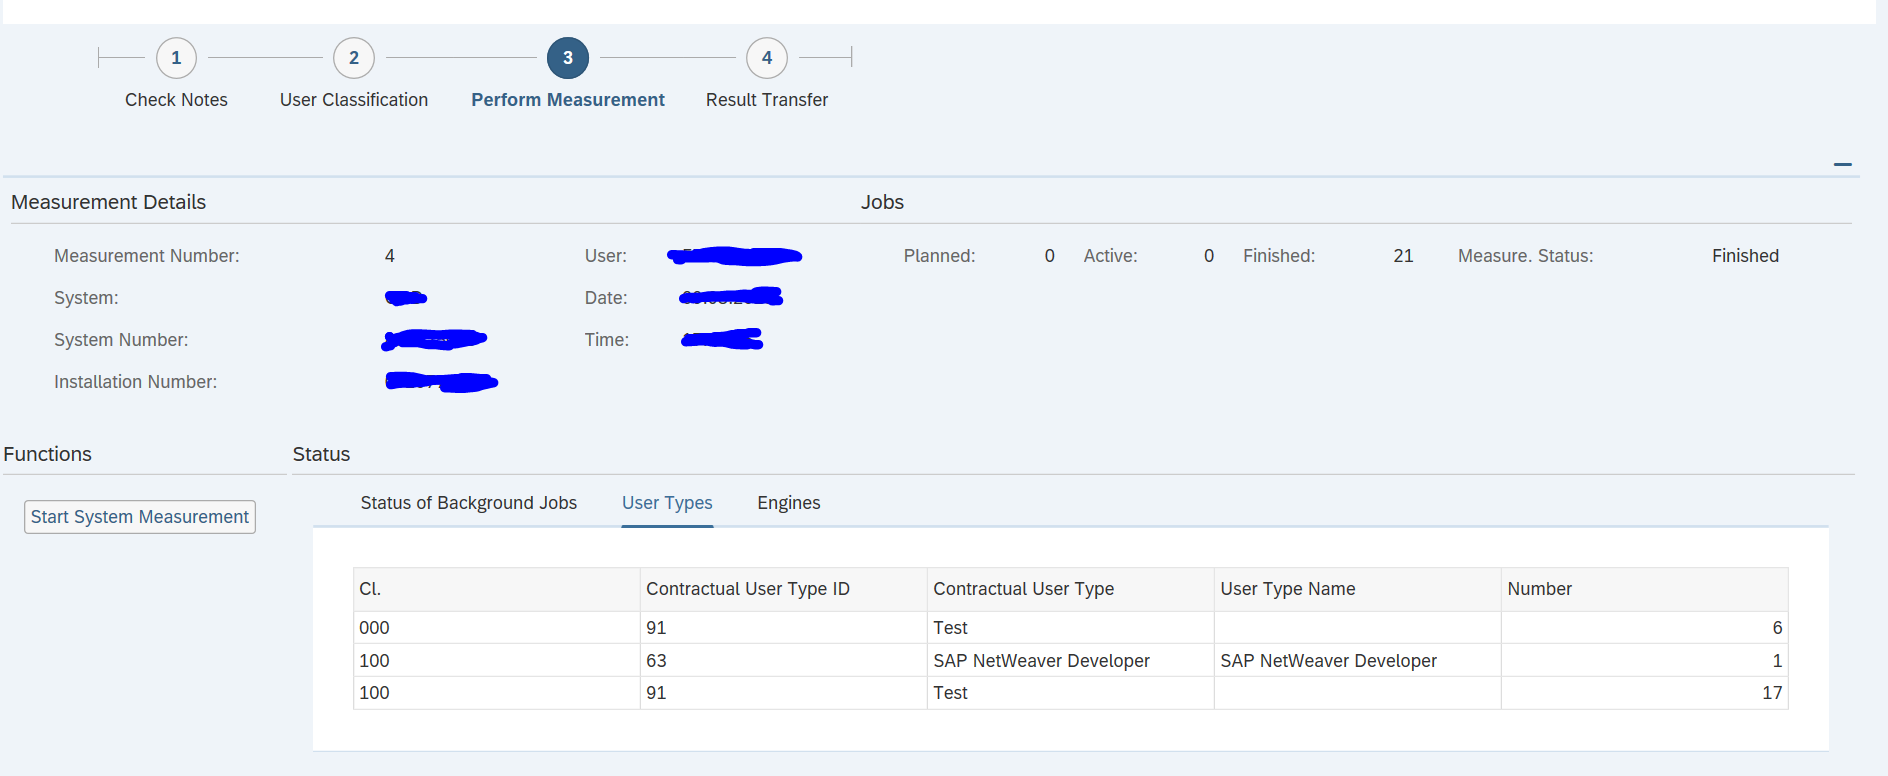
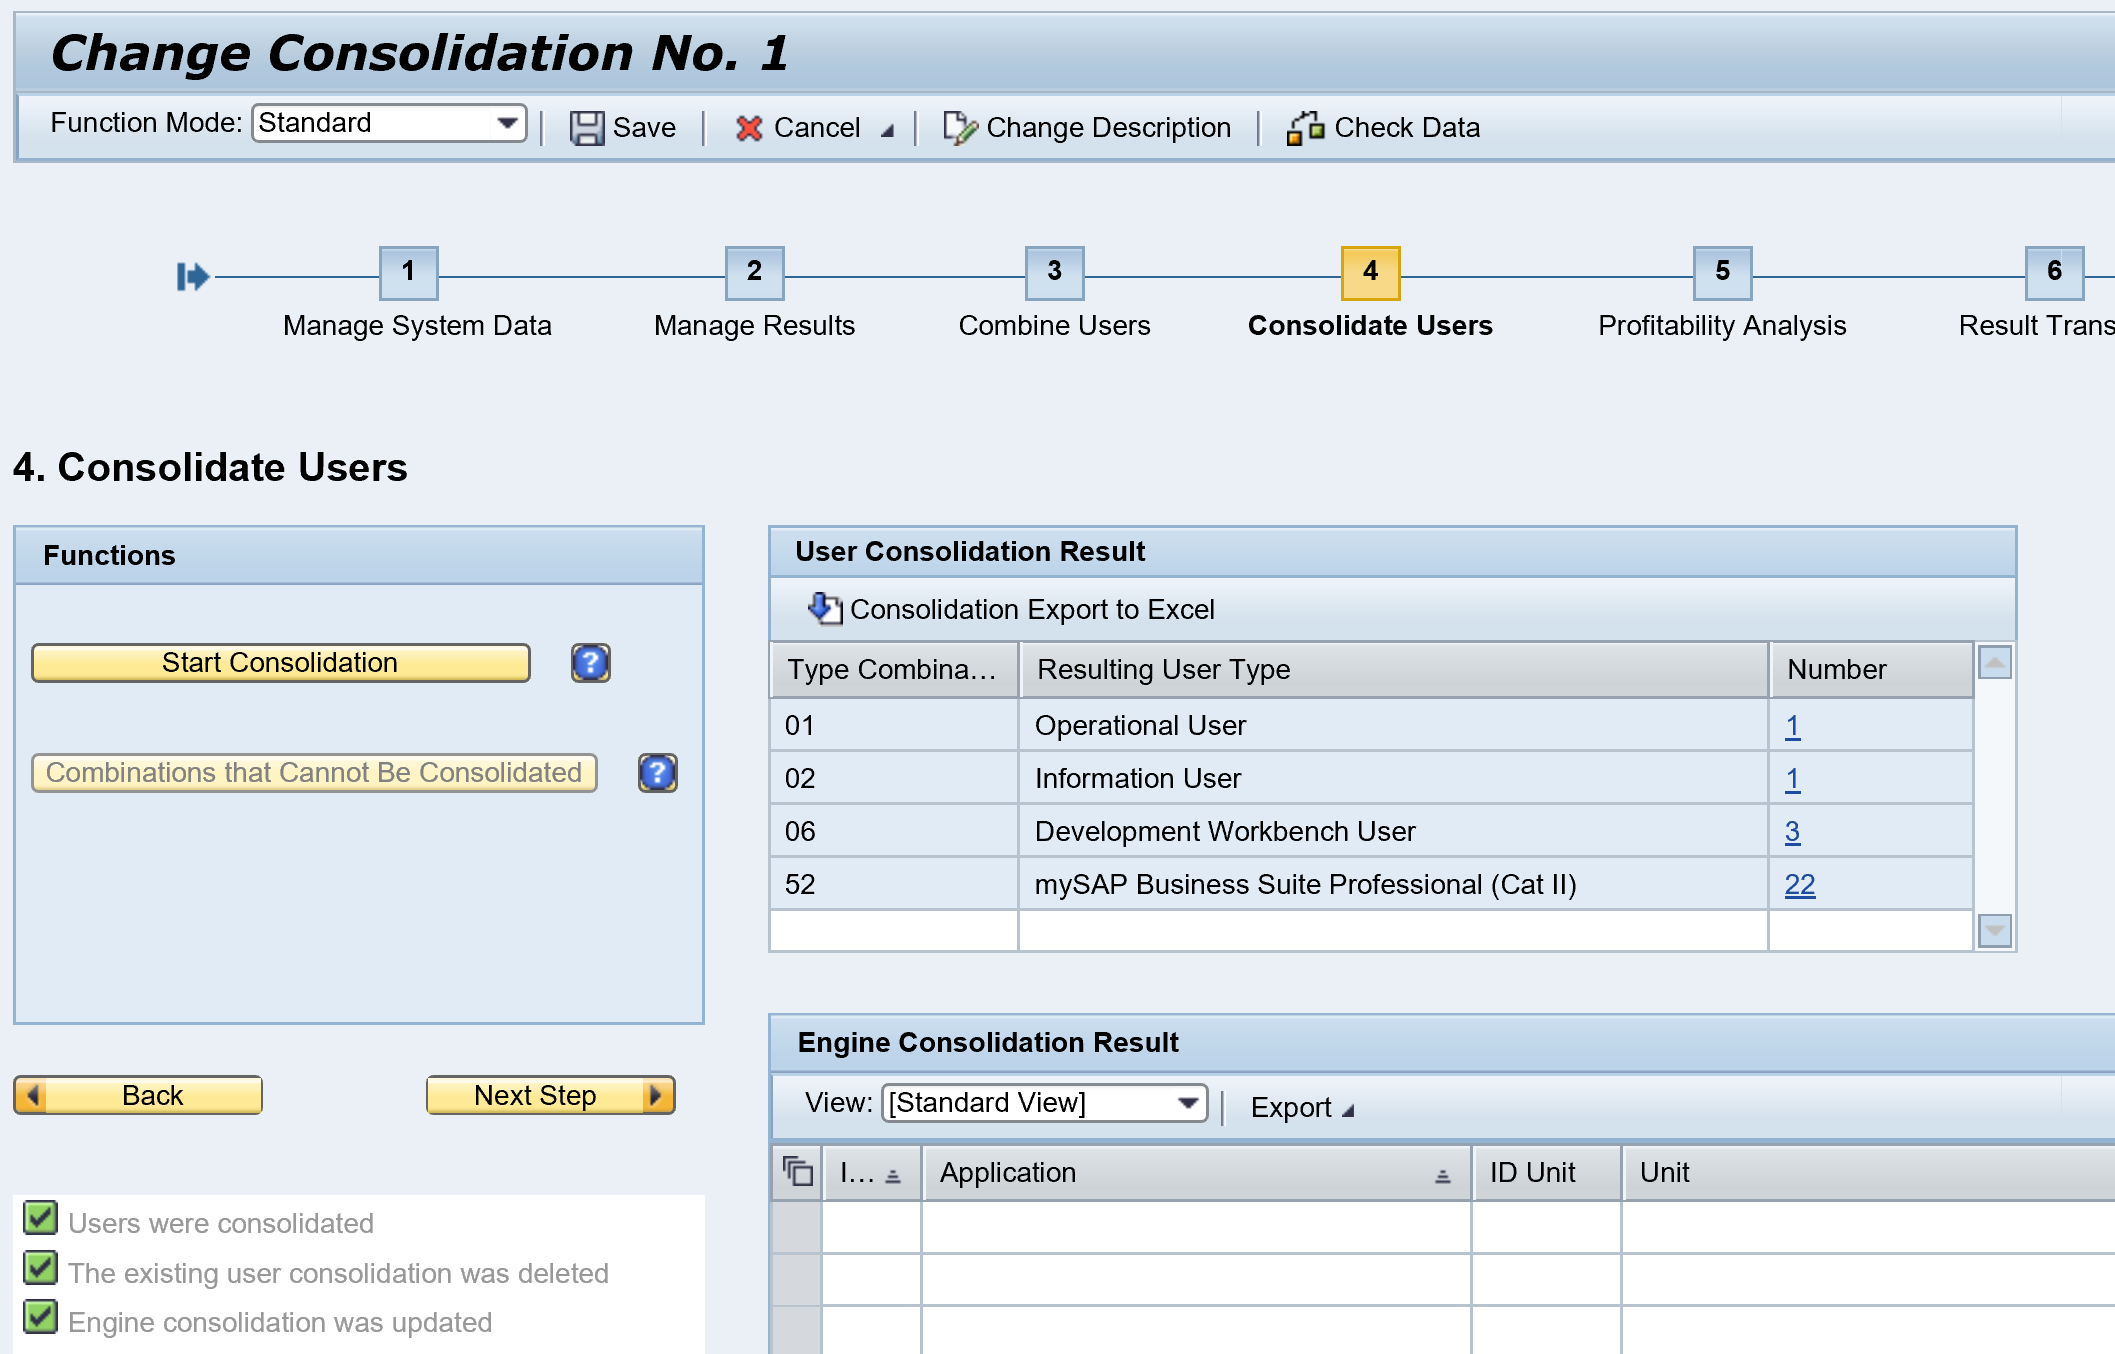
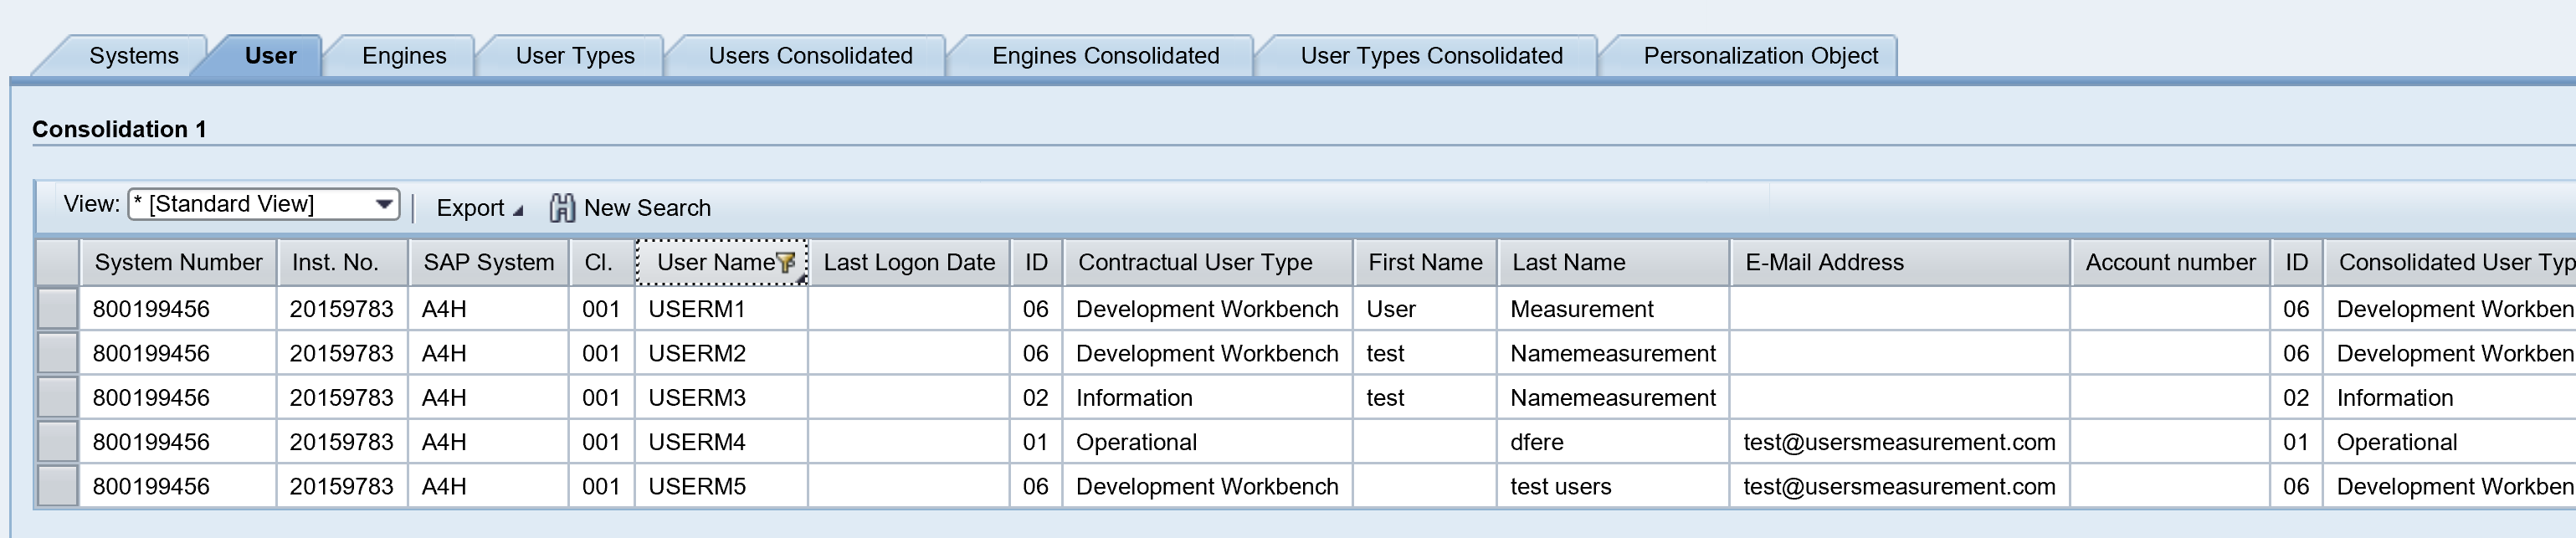
For measurement of digital access in your system read this blog.
SAP offers a free “Digital Access Evaluation Service”. If this service is useful for you, or ‘waking the sleeping dog’ is up to you.
References
Before starting the explanation these are important and useful references:
- Official announcement on the new license model can be found following this link.
- Generic explanation of the indirect access model can be found following this link.
- Explanation on indirect access for existing systems can be found following this link.
- Background on new model document details can be found following this link.
- Useful background documents hosted by ASUG group, follow these 2 links: link1 and link2.
- OSS notes:
The new model
The new model consist of 3 components:
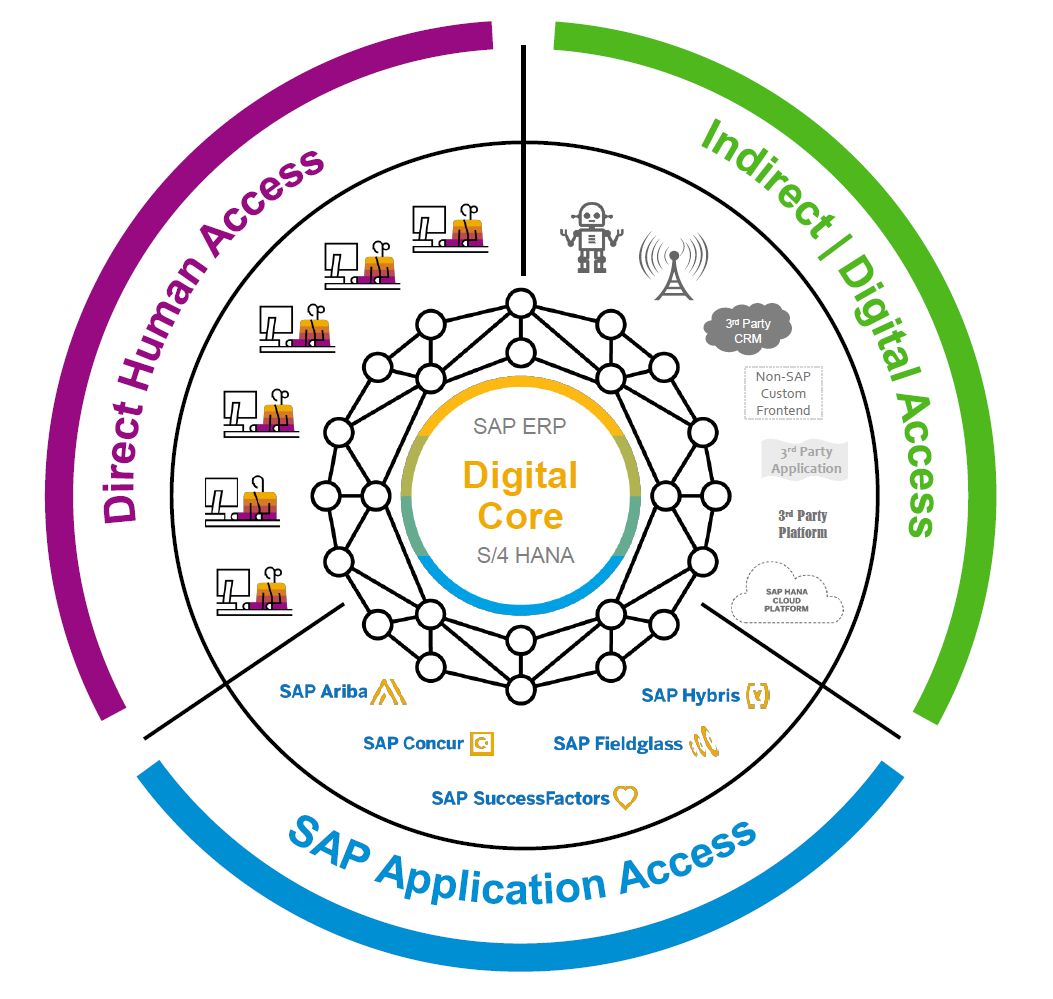
- Direct human access
- SAP applications (engines)
- Indirect access / digital access
Formal definition:

Digital Access to SAP ERP (“ERP”)

This Package grants (a) humans a license to Use ERP through Non-SAP Application(s) that is/are directly integrated to ERP without the need to be licensed as a “Named User” of ERP and (b) non-humans (e.g. bots, sensors, chips, devices, etc.) a license to Use ERP directly or through Non-SAP Application(s) that is/are directly integrated to ERP and without the need to be licensed as a “Named User” of ERP (collectively, “Digital Access of ERP”).
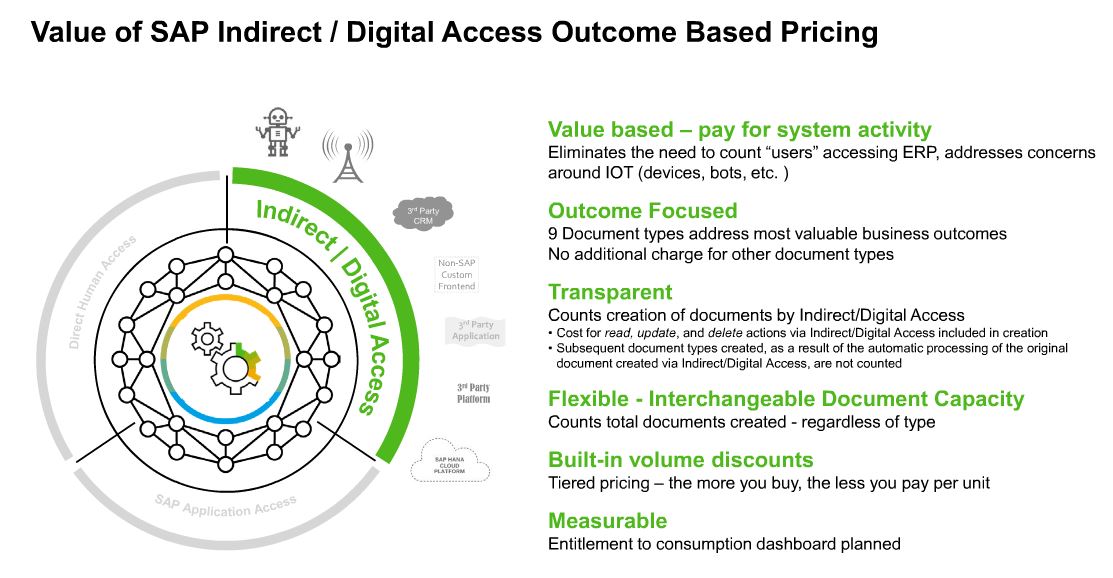
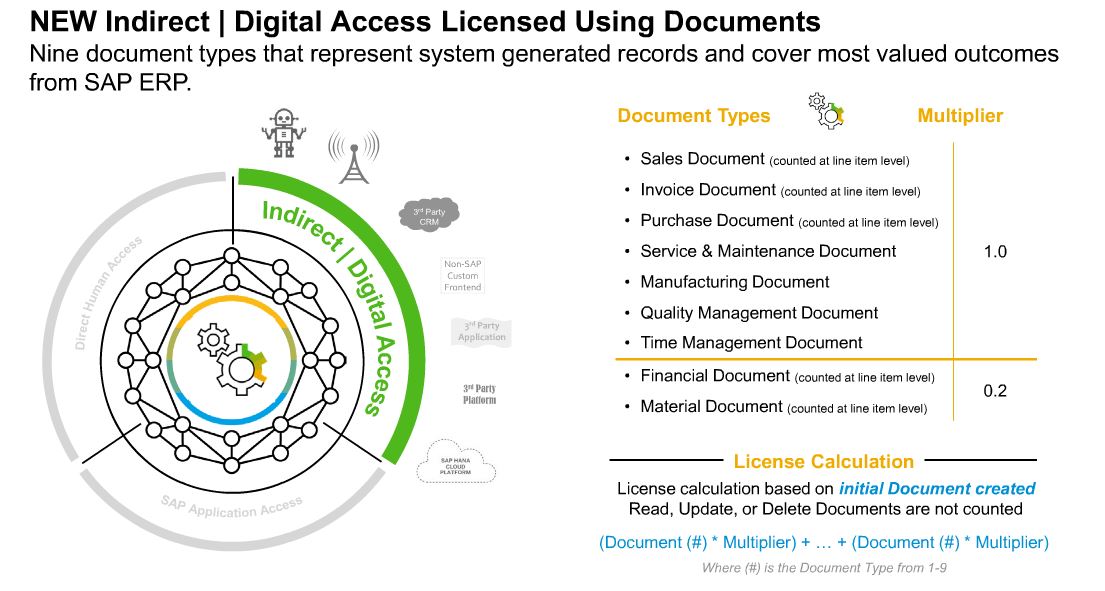
All Digital Access of ERP will be licensed based exclusively upon the number of Documents created annually by such Digital Access of ERP. Documents are unique records (i.e. unique digital line-items/objects) as defined in the “Document Definitions” column of the below table. Each Document shall count as one (1) Document, except for Material Documents and Financial Documents which shall each count as two tenths (0.2) of a Document. However, where the automated processing in ERP of a Document from one Document Type results in the subsequent creation in ERP of one or more additional Documents of different Document Type(s), such additional Documents shall not be counted.
Where a Non-SAP Application is connected to ERP via a Connectivity App, such Non-SAP Application is still deemed directly integrated to ERP for purposes of this provision. Any humans and/or non-humans using ERP through application(s) (e.g. Ariba, Concur, Successfactors, Hybris) that is/are integrated to a Non-SAP Application that is directly integrated to ERP do not need to be licensed as a “Named User” of ERP.
In practice this should means documents posted via generic interface user, IOT device, 3rd party application, cloud application posting data in SAP system, etc.
By simply counting documents and agreeing on a price per document, this will simplify the ever ongoing discussion on indirect access.
Document definitions
SAP starts with 9 documents. You can find the list and definition in the table below.
| Document Types | Document Definitions |
| Sales Document | A Sales Document is (i) a line item record that represents the material and/or service being sold or quoted and/or (ii) a record that represents an individual order/release against a scheduling agreement which indicates the material and/or service being sold. |
| Purchase Document | A Purchase Document is (i) a line item record that represents the material and/or service being ordered or requested and/or (ii) a record that represents the release against a scheduling agreement which indicates the material and/or service being procured. |
| Invoice Document | An Invoice Document is a line item record that represents the material and/or service being billed. |
| Manufacturing Document | A Manufacturing Document is (i) a record which represents the production-related details associated with manufacturing a material, including: the type, quantity and color of what to produce, when to produce it, where to produce it and/or other distinguishing characteristics, and/or (ii) a record that represents a confirmation which indicates the status of the processing activities associated with manufacturing orders. |
| Material Document | A Material Document is a line item record that represents a specific material being received, issued or transferred to, from or within a storage location or plant. |
| Quality Management Document | A Quality Management Document is (i) a record that represents the details of a nonconformance being reported including the information required for problem solving and/or (ii) a record that represents results of an inspection. |
| Service & Maintenance Document | A Service & Maintenance Document is (i) a record that represents the details of work to be performed including the information needed to plan, execute and bill for a service or maintenance request , and/or (ii) a record that represents the details of a problem being reported including the information required for problem solving and/or (iii) a record that represents the status of the processing associated with service orders and maintenance orders and/or (iv) a record that represents a claim by a customer for repair or replacement or compensation for under-performance, pursuant to terms in a warranty document. |
| Financial Document | A Financial Document is a record that represents accounting information in a financial journal. |
| Time Management Document | A Time Management Document is (i) a record that represents an employee’s time worked and assigned to business related objects and/or (ii) a record that represents a confirmation (e.g., a progress update) which indicates the status of the processing activities associated with manufacturing orders. |