This blog will explain how to execute a data archiving run.
Questions that will be answered in this blog are:
- Which settings do I need to make or check before data archiving run?
- How to perform the data archiving run?
- How to validate the data archiving run?
- How to retrieve that archived data?
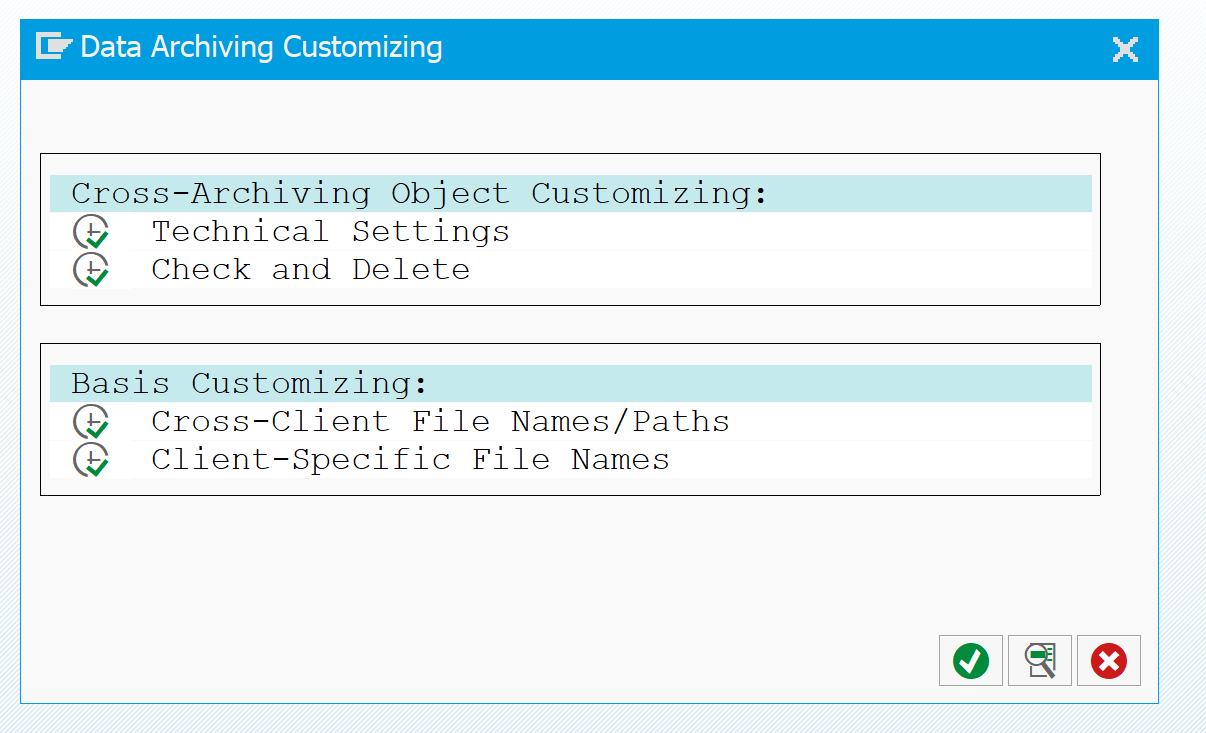
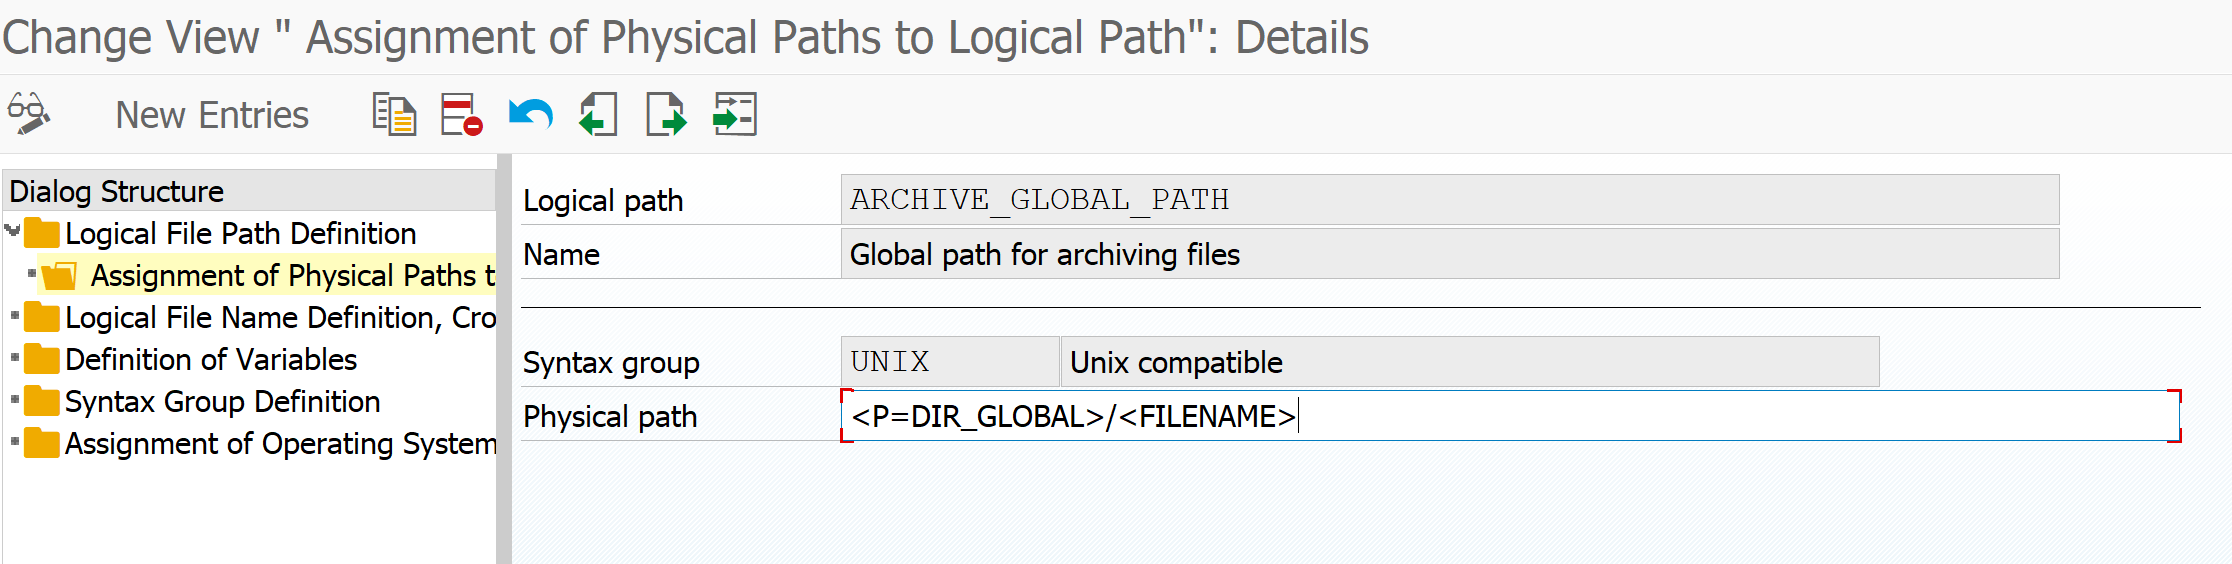
This blog assumes you have finished the basic technical data archiving setup as described in this blog. It also assumes you have made agreements with your business on the retention periods. For more information and tips on discussions with the business teams on data archiving, read this blog.
If you are looking for specific functional data archiving runs:
- Audit log
- CATS time writing data
- Change documents
- CO line items
- CO order data
- Customer and vendor master data
- Deliveries archiving
- Financial documents
- Handling units
- Idocs
- Material documents archiving
- Material ledger data
- MM interfacing postings
- Production order
- Profit center accounting document
- Purchase documents
- Purchase requisitions
- Sales orders
- SD invoice archiving
- SD transports
- WM transfer requirements and orders
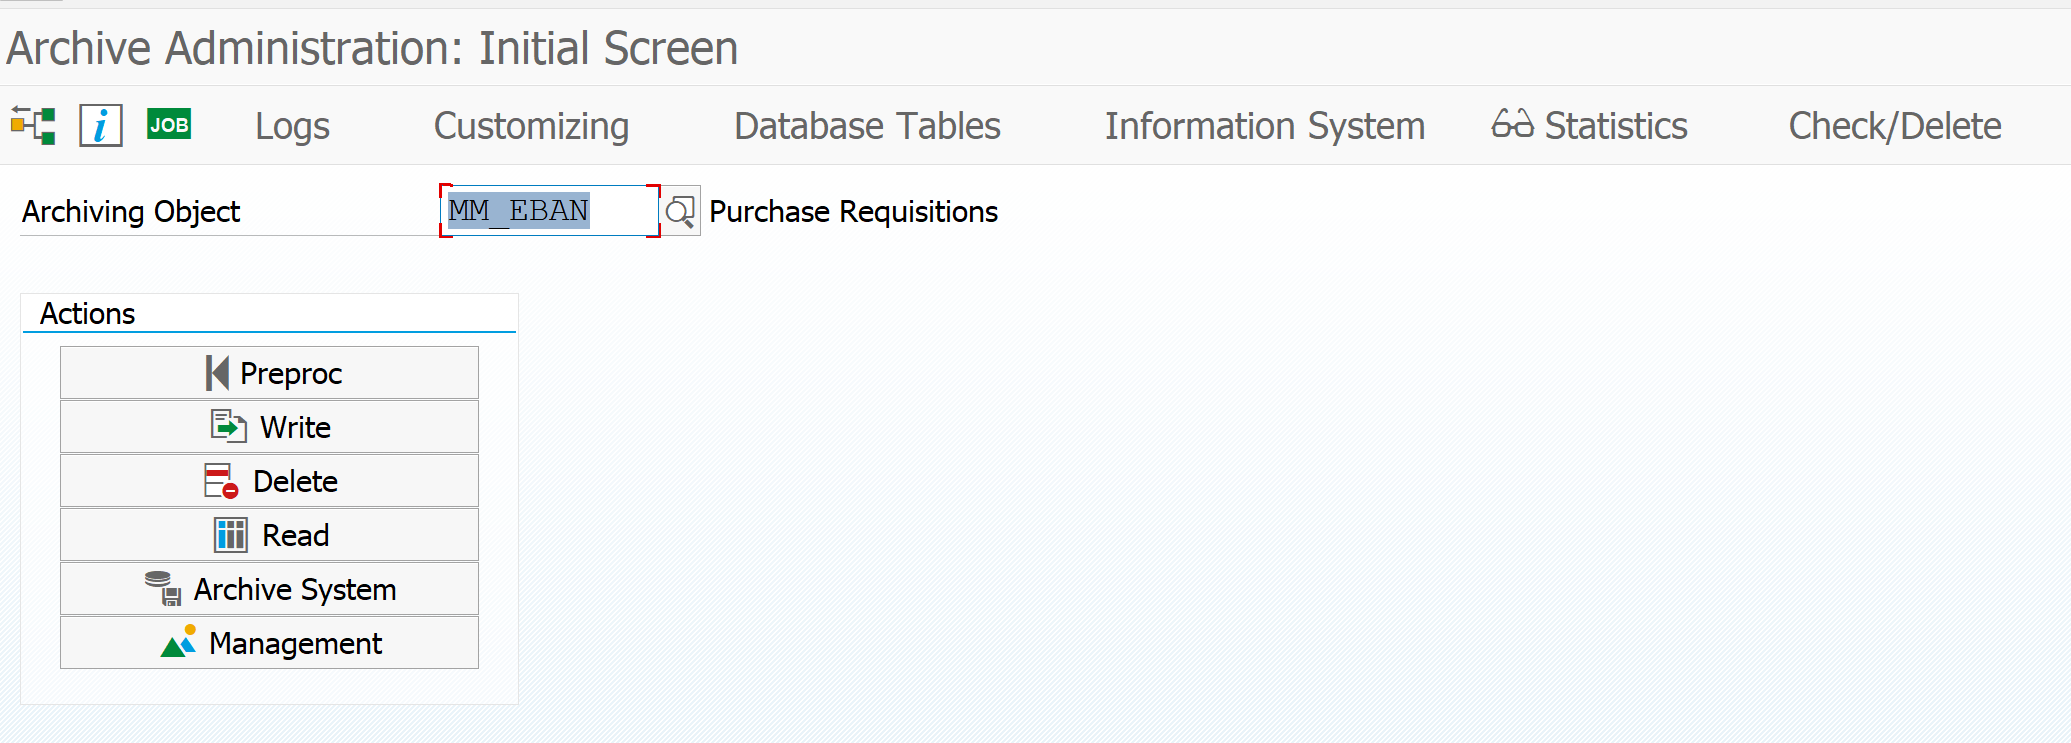
Functional data archiving example: purchase requisitions
To explain the functional data archiving we will use Purchase Requisitions as example. Technical object name is MM_EBAN.
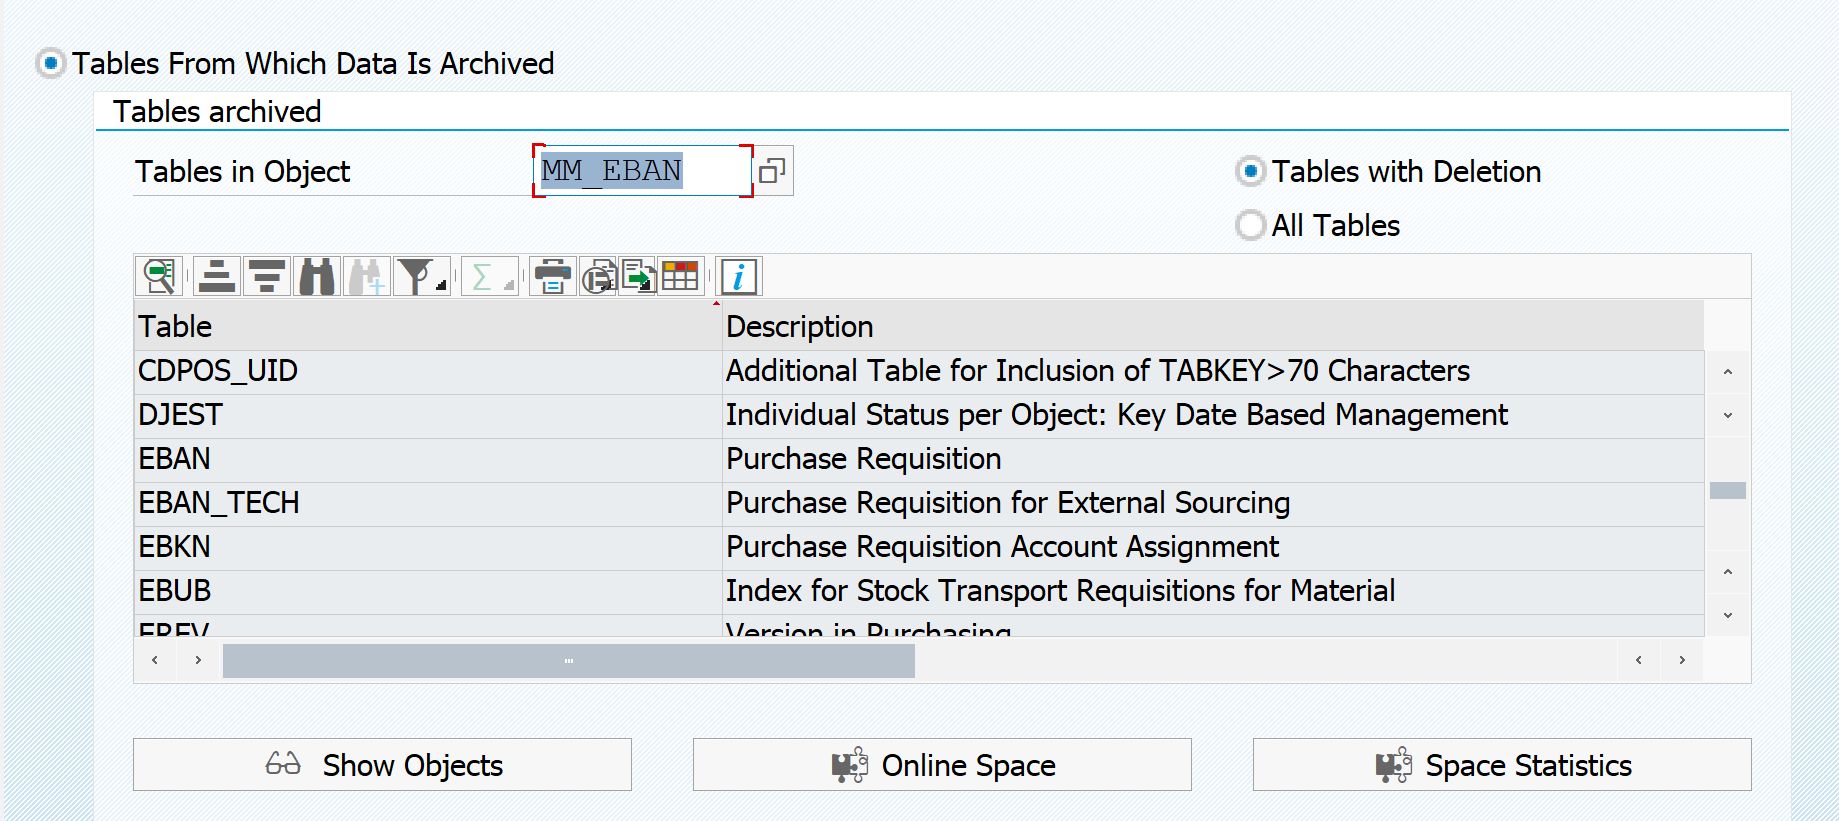
To see which tables are archived hit the Database Tables button. Here you can see the list of tables from which data potentially be archived:
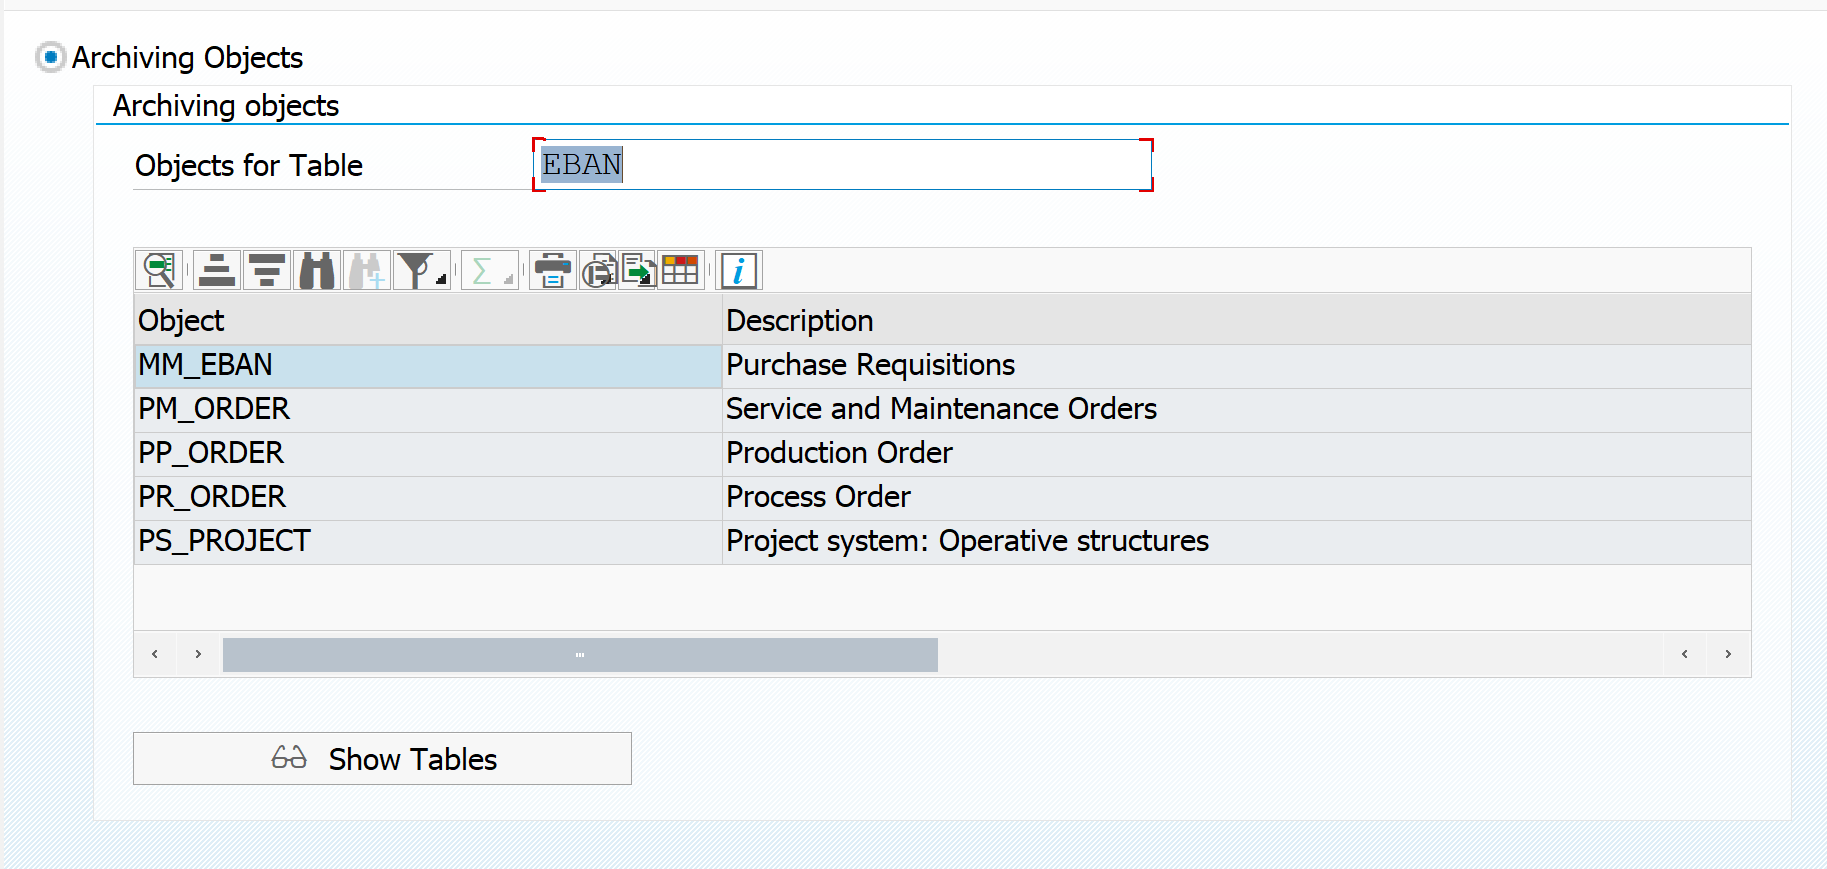
If you want to see the other way around, which table is used in archiving objects, do put in the table as entry point, to retrieve list of archiving objects. In this example archiving objects that delete from table EBAN:
Dependency of objects
By clicking the top left button on the archiving object you get the archiving dependency view. For MM_EBAN this is pretty simple: it has no dependencies.
As example for dependencies this is the overview for sales orders (SD_VBAK):
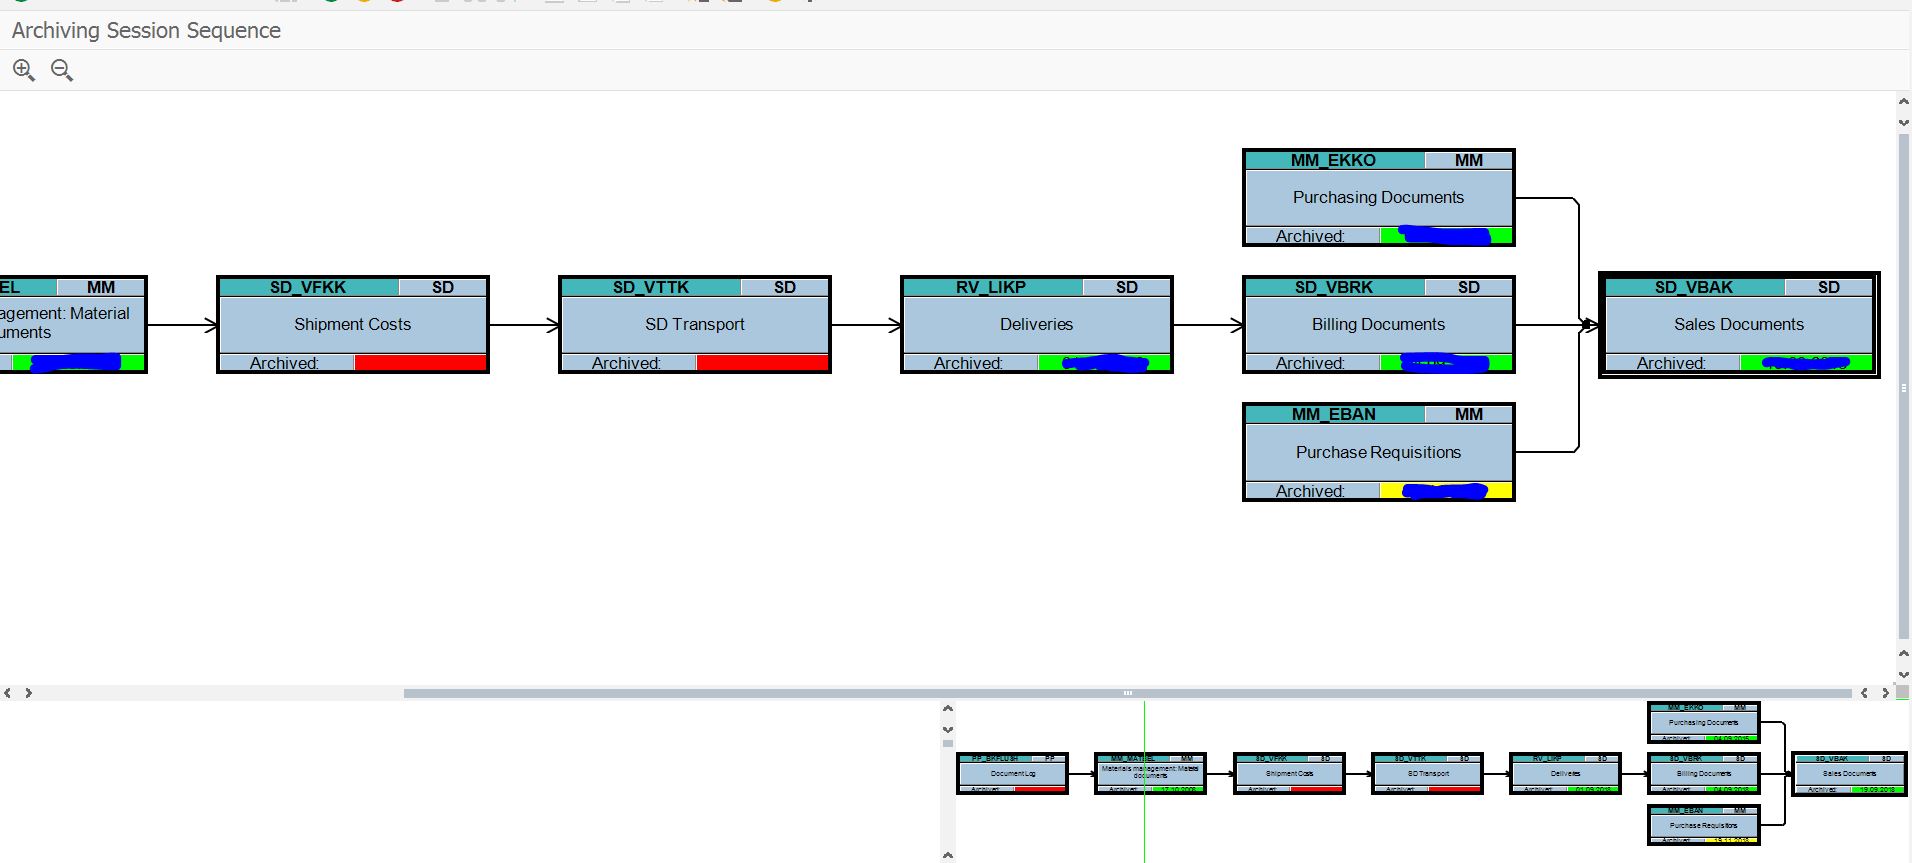
Here you can see that before you can archive sales orders, you should archive the billing documents first. And for the billing documents, you should archive the deliveries first.
Functional archiving settings
First we have to make or check the object specific functional archiving settings.
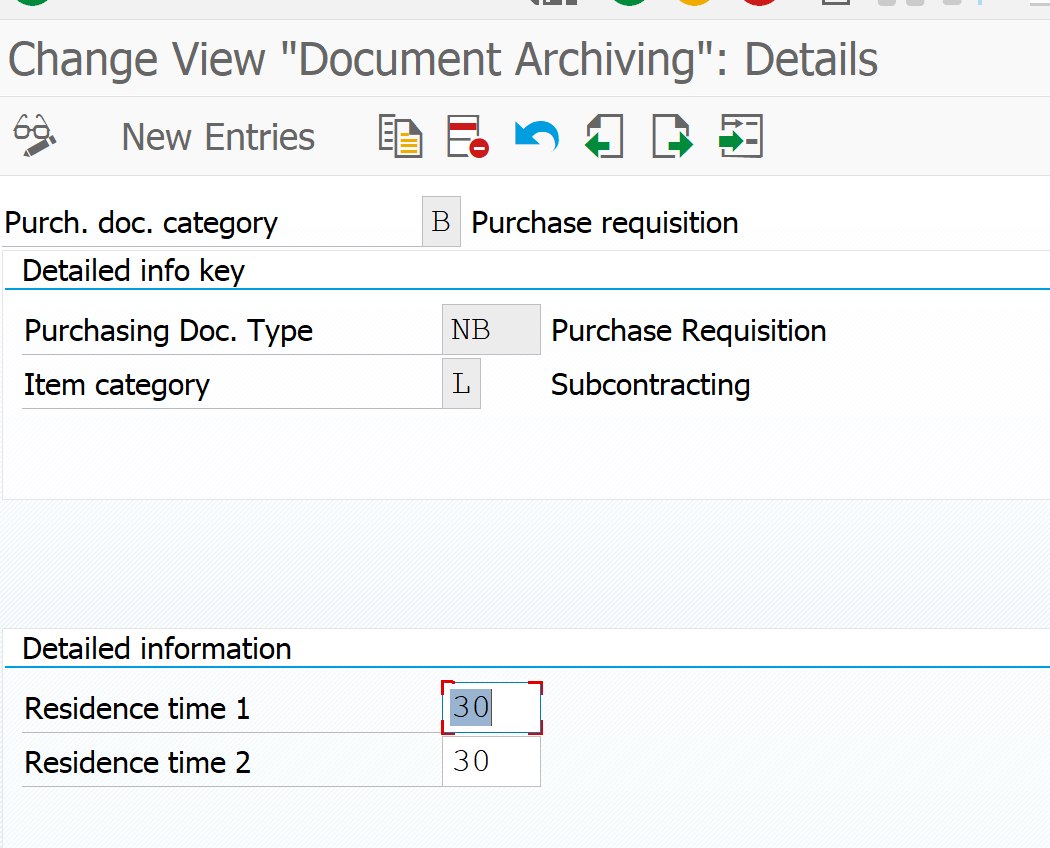
In the case of purchase requisitions we have to set the retention periods per document type:
Pre-processing step
Some archive object have a pre-processing step. MM_EBAN has one as well. In this step data is selected and marked for archiving (many times by setting deletion flag or other indicator).
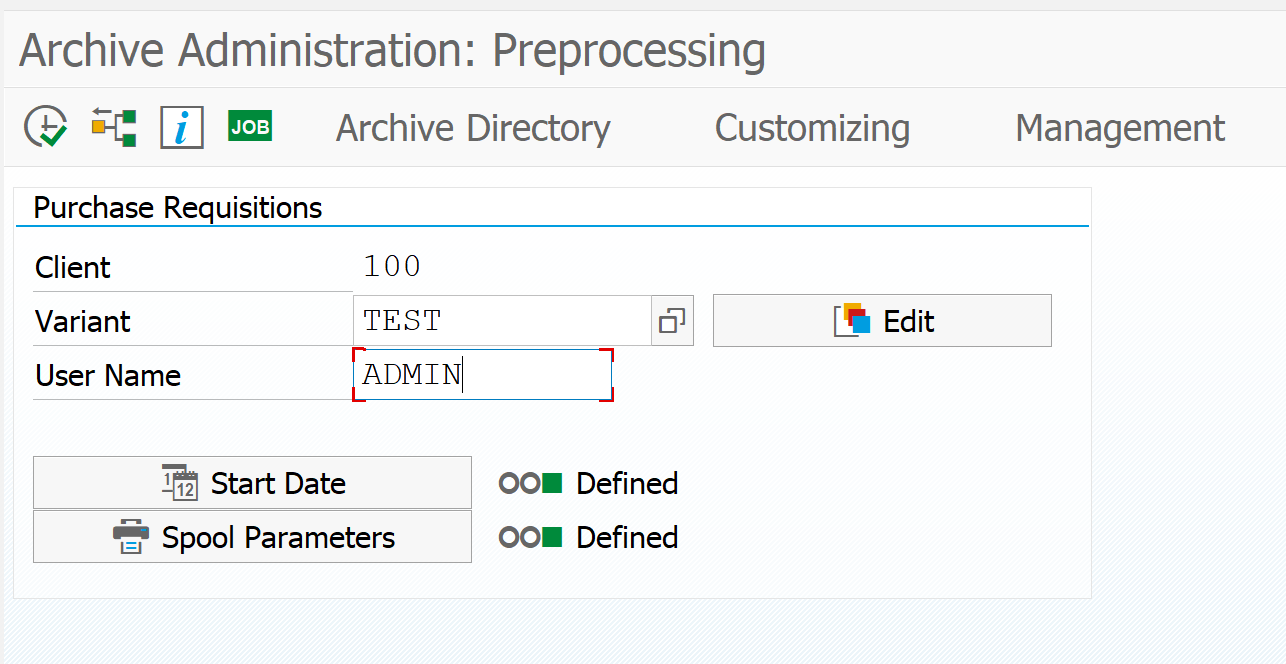
In the step create the variant (give it a useful name) by putting in the name and pressing Edit. On the next screen fill out your data select the log level. Go back to the first screen and select the start data and spool parameters. When both lights are green, hit the execute button. When you click the job log button you check for the results.
Example of result of pre-processing run:
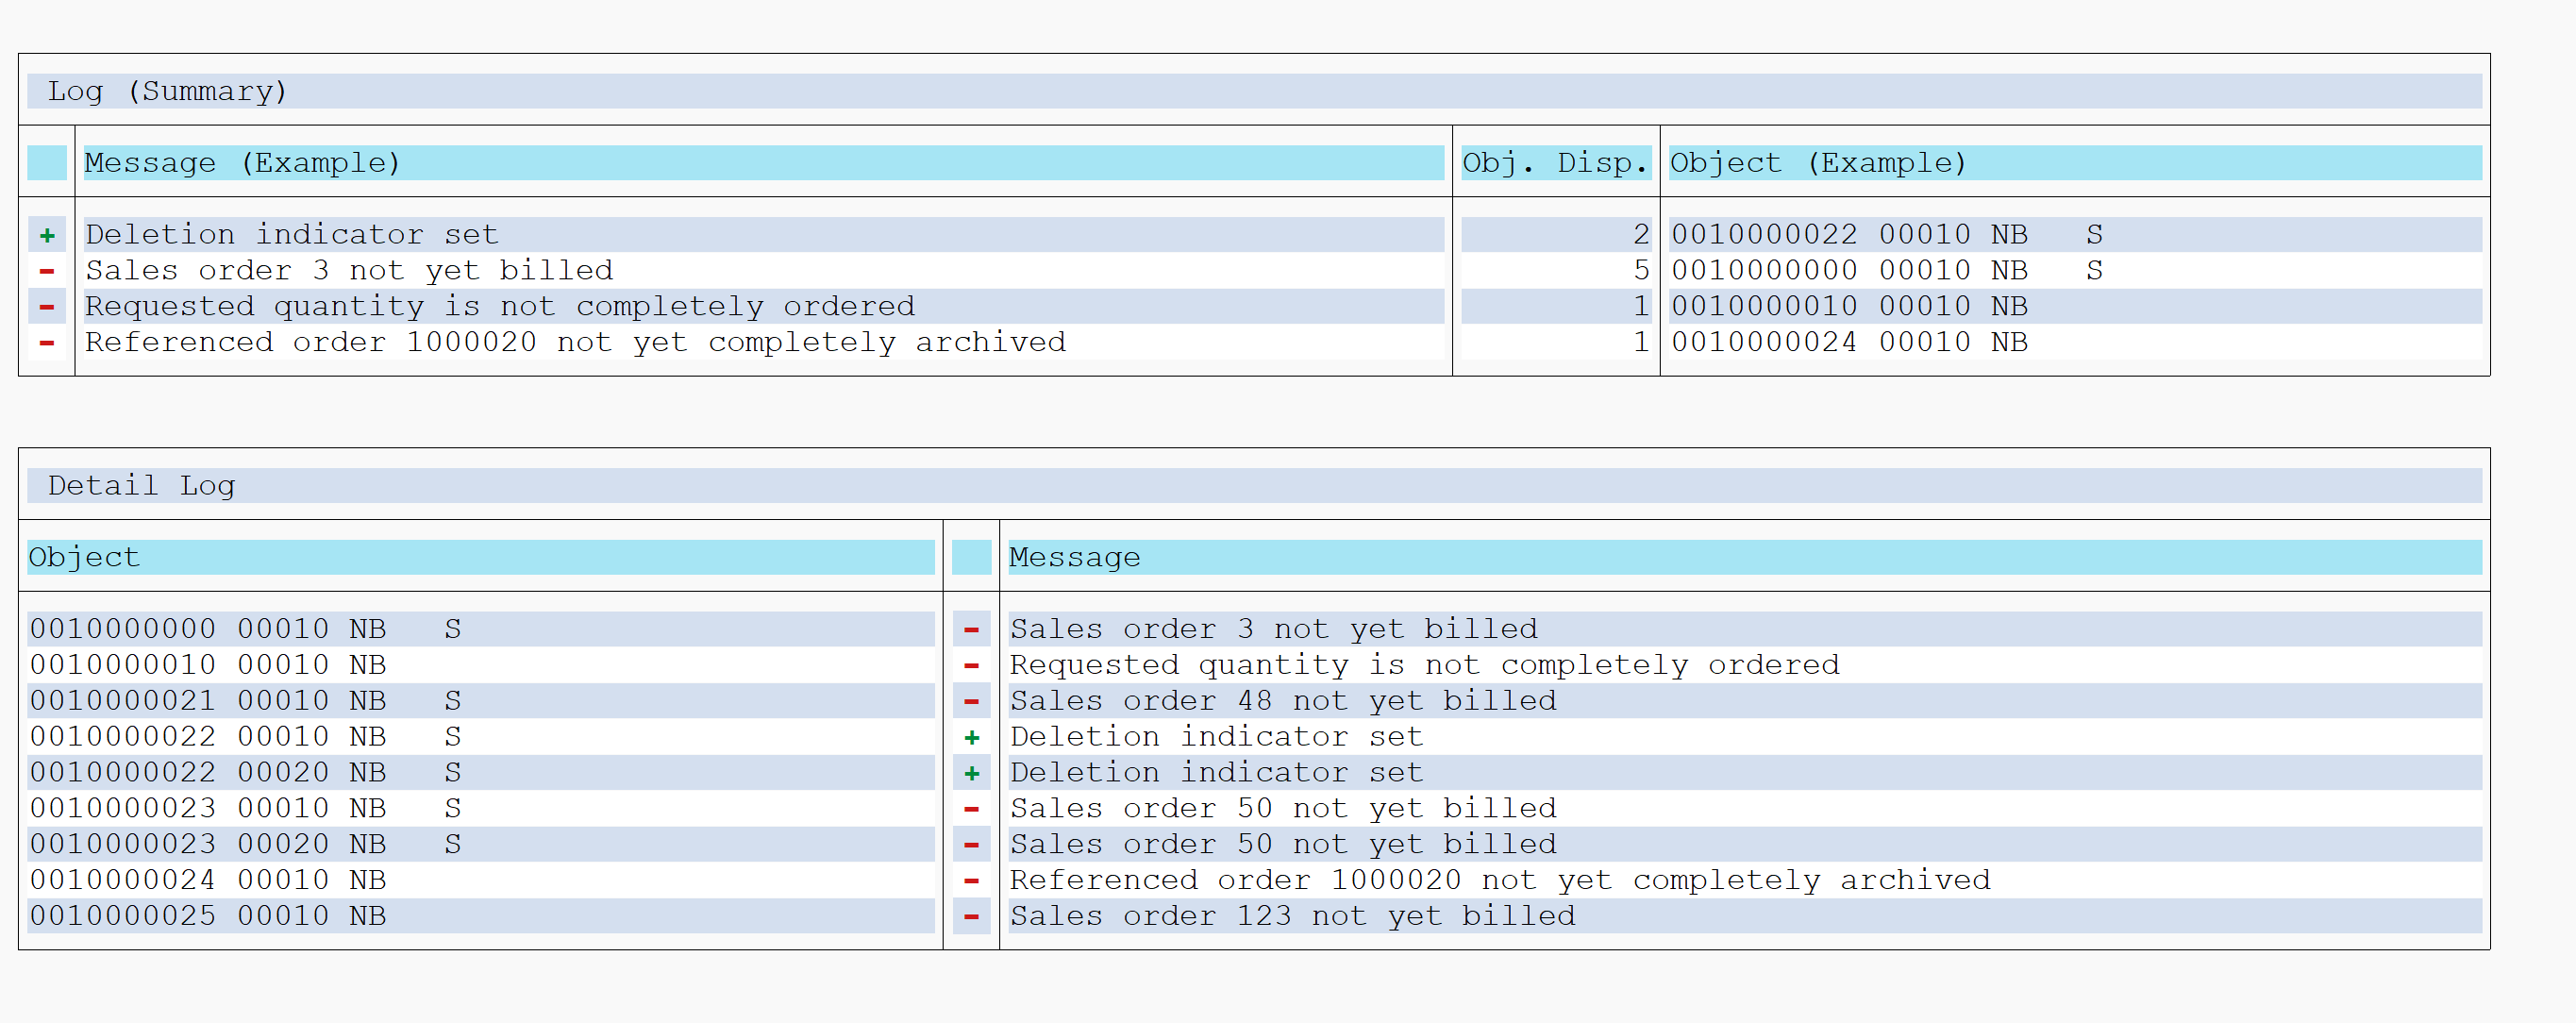
As you can see not all selected data is archived. Transactions that are not completed from business point of view will not be flagged for archiving.
Write run
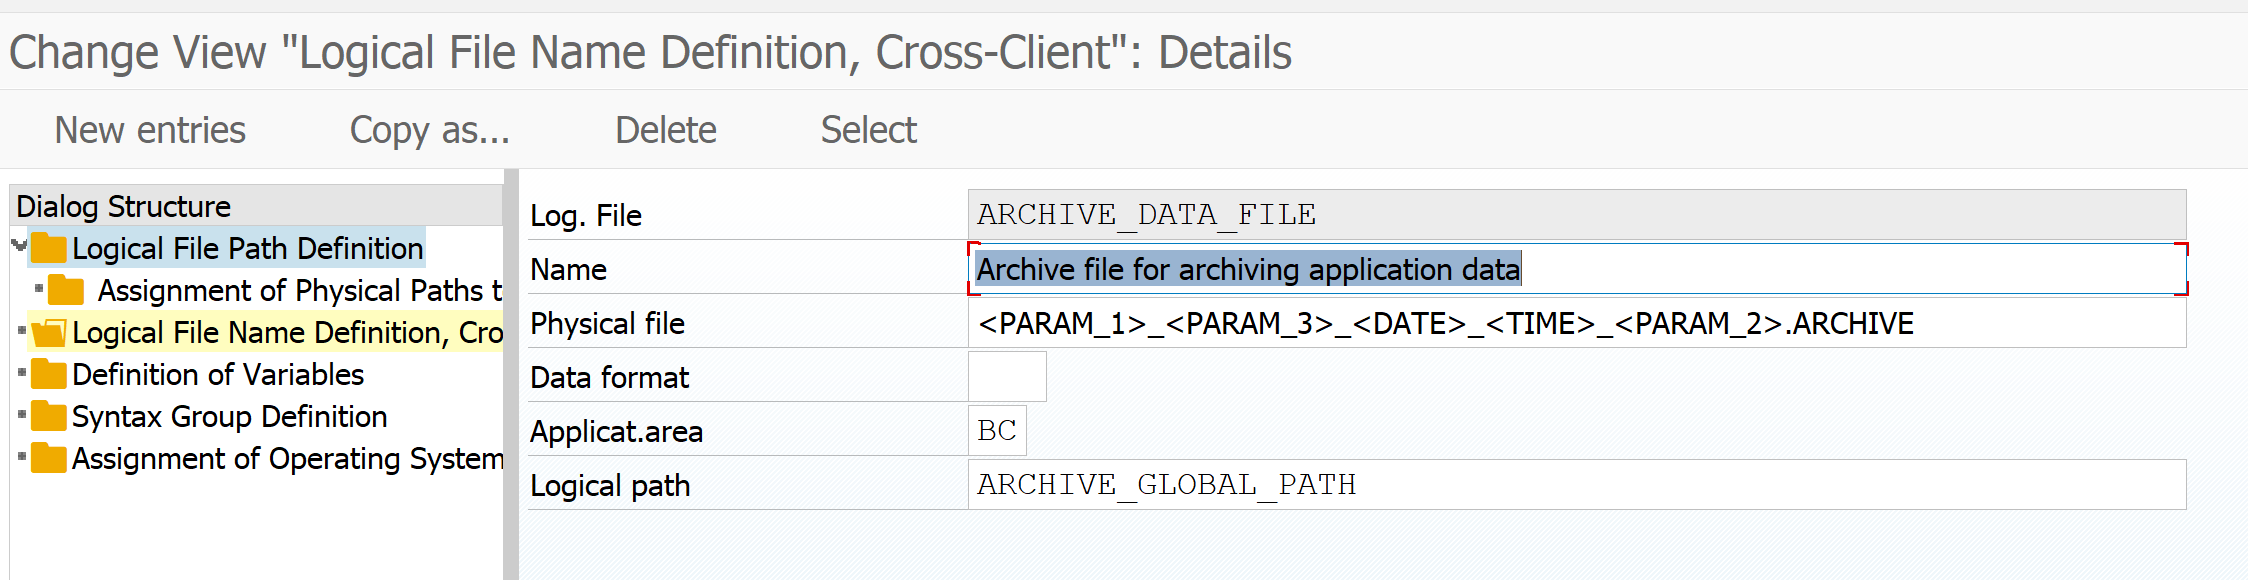
If you have done the pre-processing step, continue with the write step. Principle is the same: select the data and log level. Important in the write step is to correctly fill the Archiving Session Note with a useful text. This text is put as label on the archive file for later retrieval:

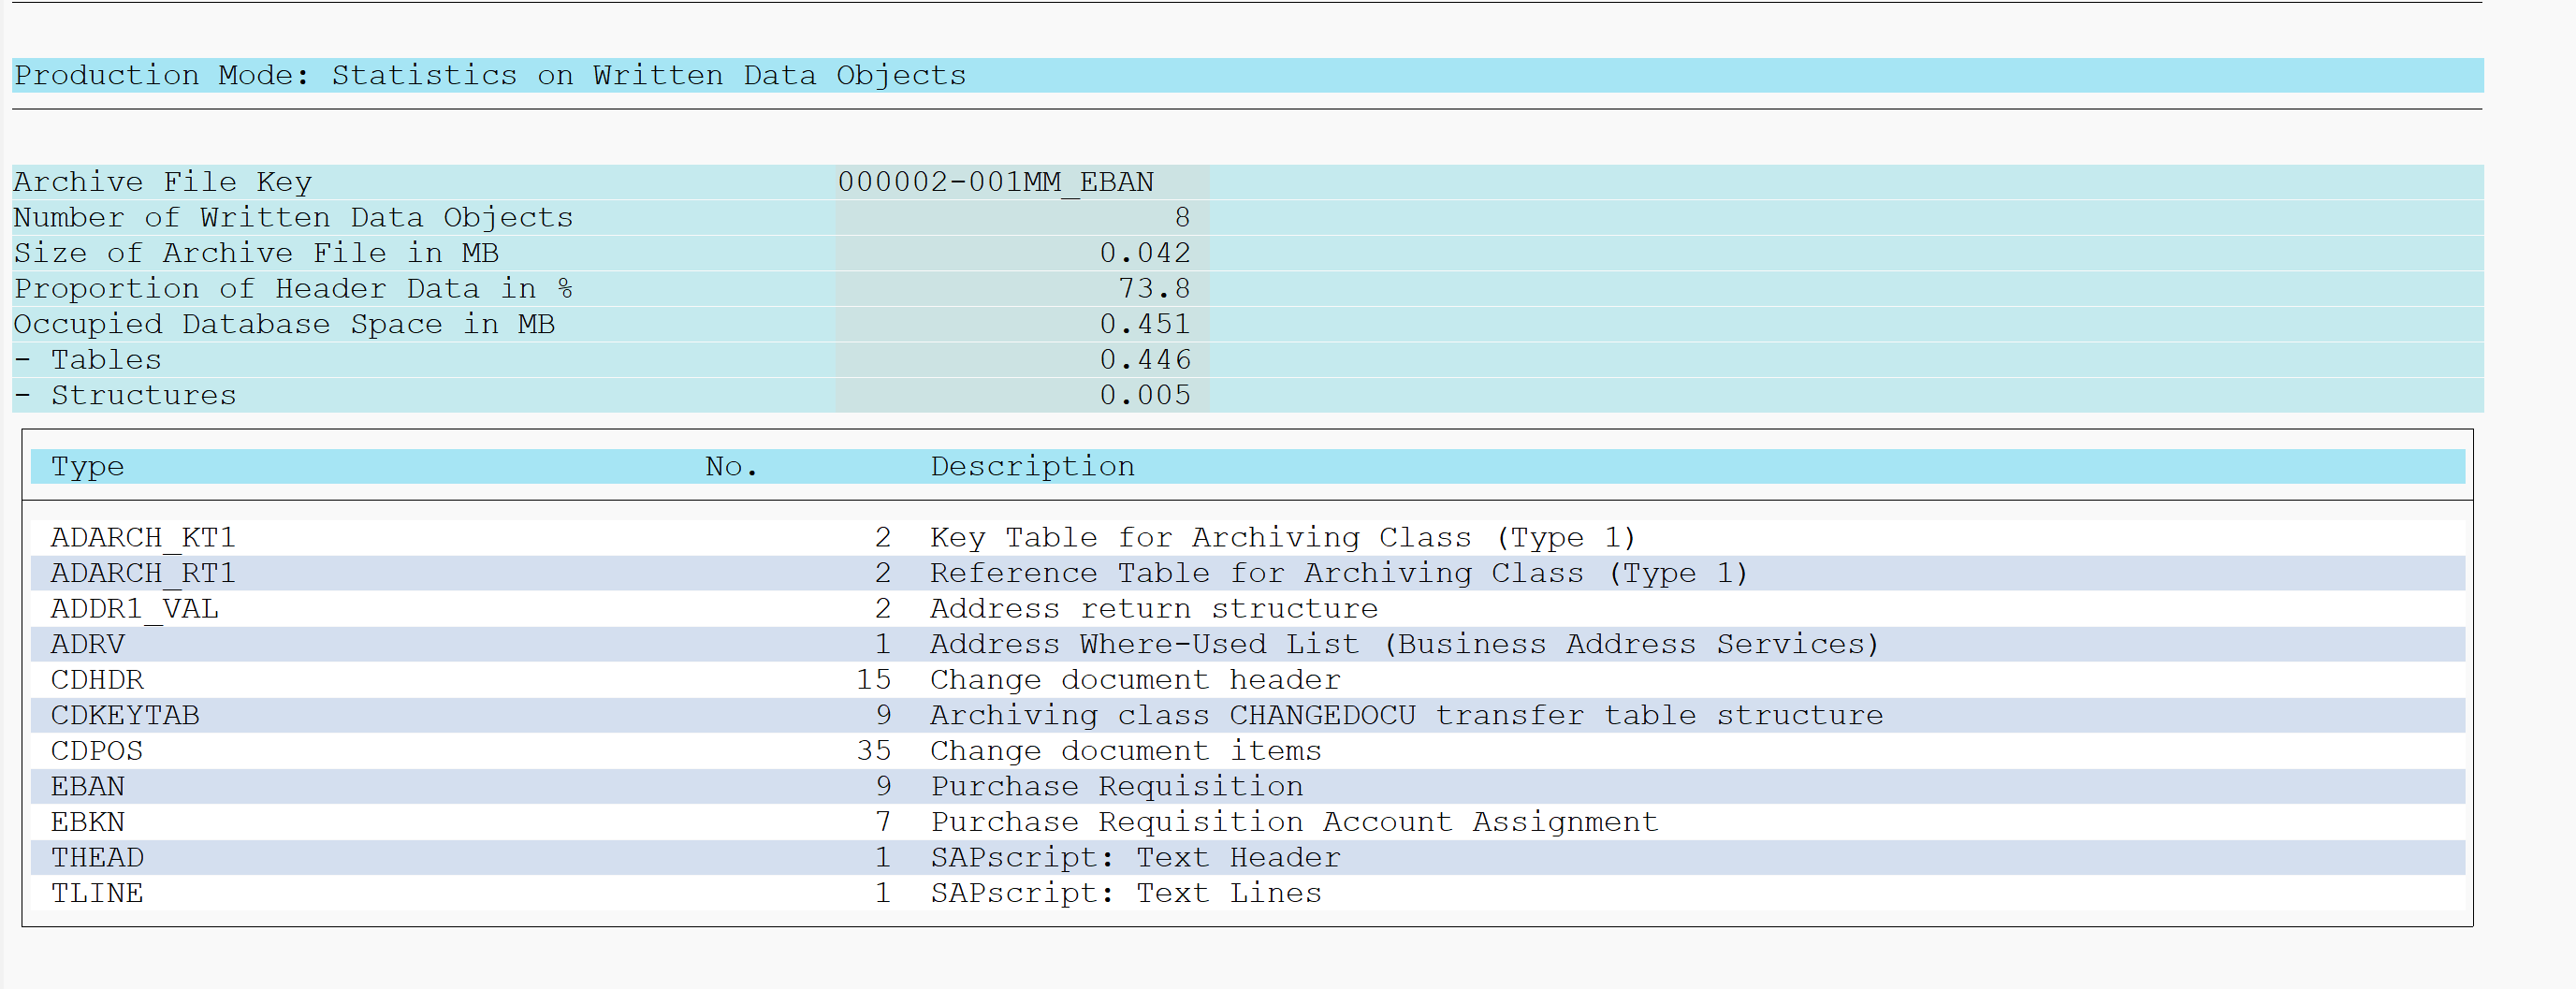
When done plan the job and execute. Result looks like:
Pending on your technical system settings the file will be stored automatically or you still need to do this manually.
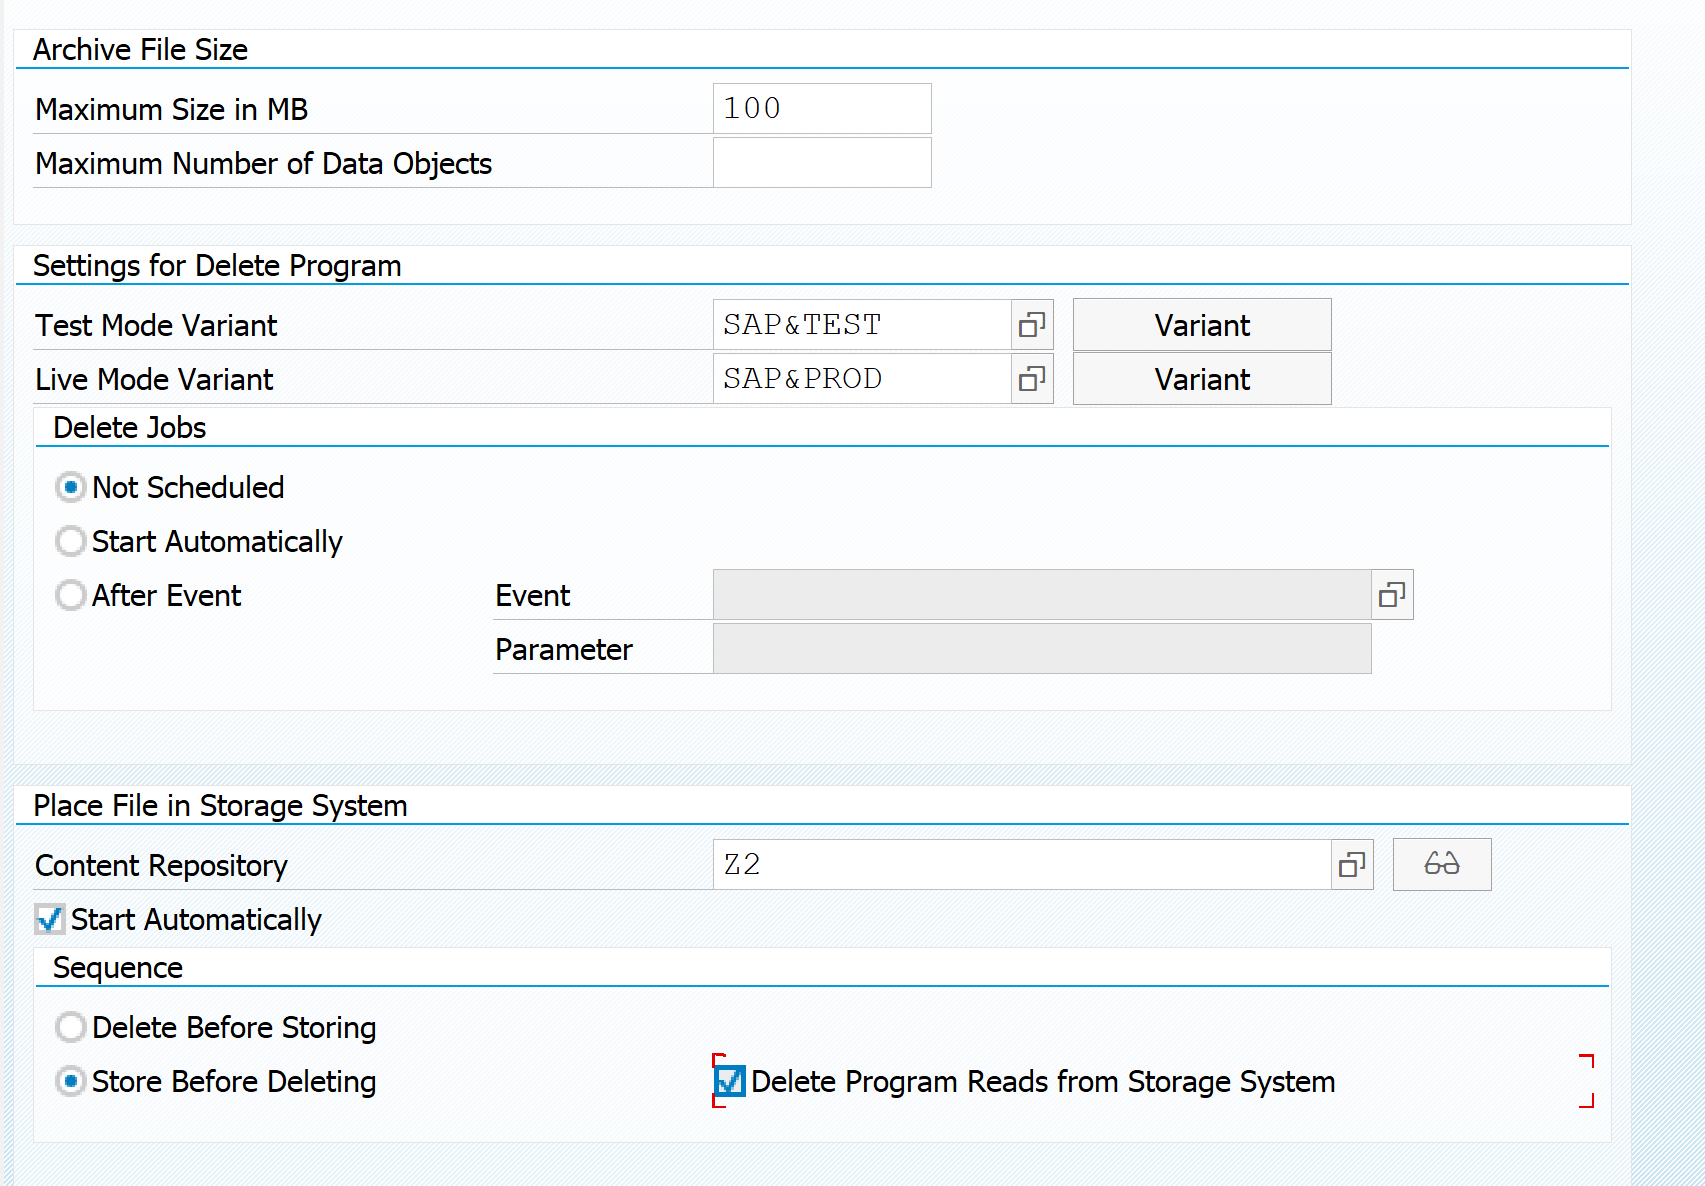
Storage run
If you have setup the system to store files in content server, you first have to execute storage run. For more details see this dedicated blog.
Deletion run
Finally we can now start the deletion run: the actual clean up of old data happens now.
Select the data files you want to archive and start the run.
Word of care with deletion: please don't select too much files and subsection in one go. Each file sub section will result into a deletion job. The deletion will put significant load on the database, since it will be pushing out a lot of data. If you are not careful you will launch easily 20 or more heavy deletion jobs that run in parallel and that might severely decrease system performance.
Result of archiving deletion run:
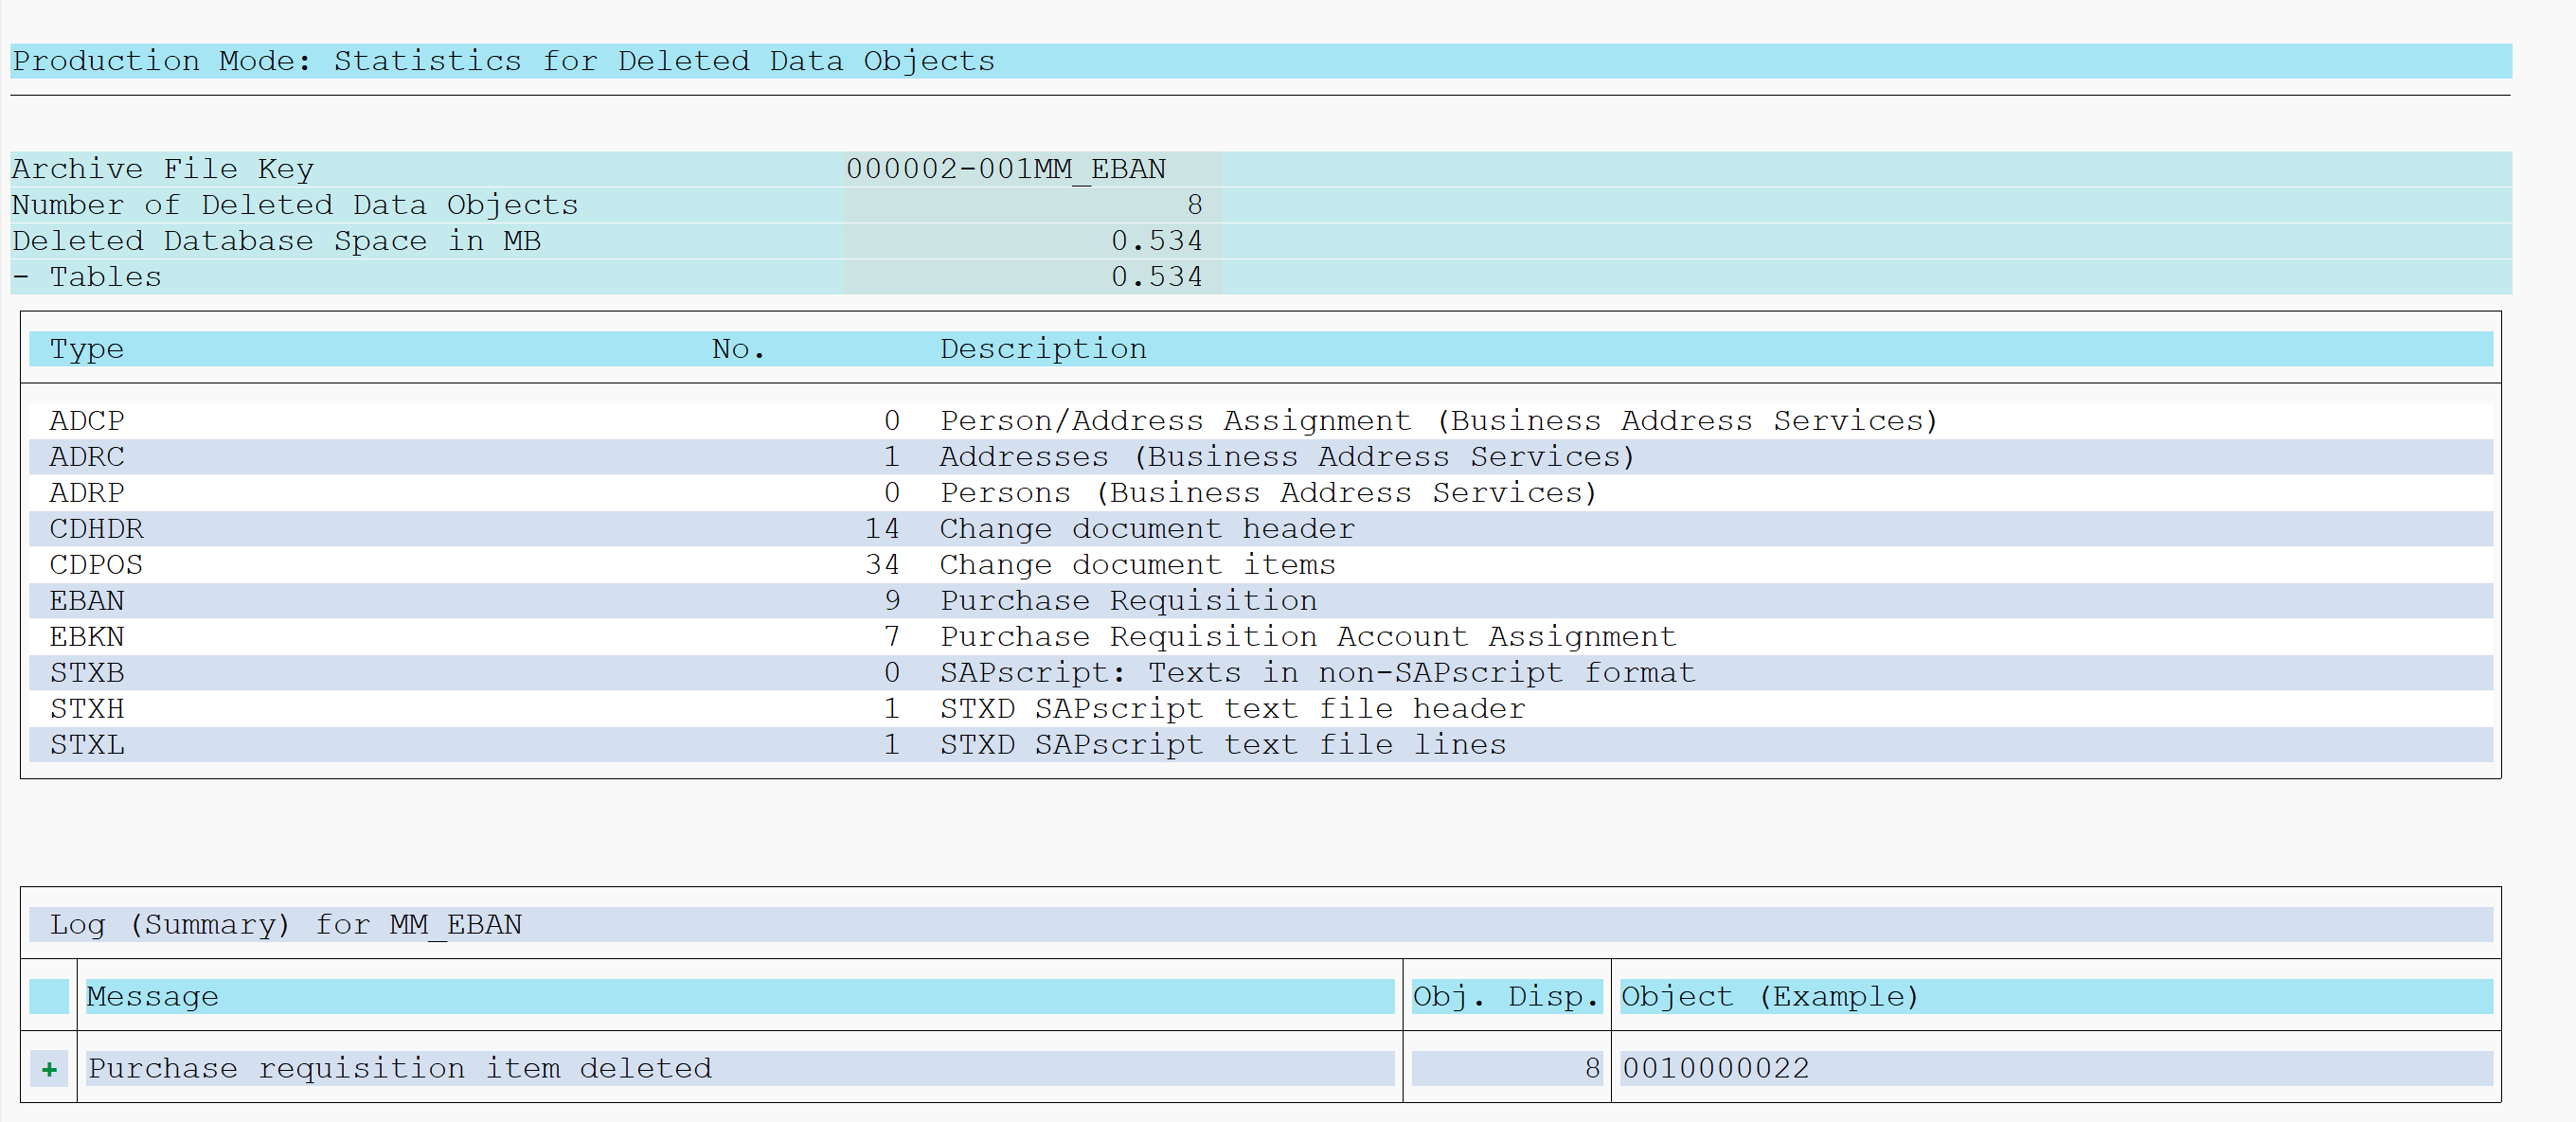
Checking archive result
The result checking is possible by looking at the technical correctness of the archive file.
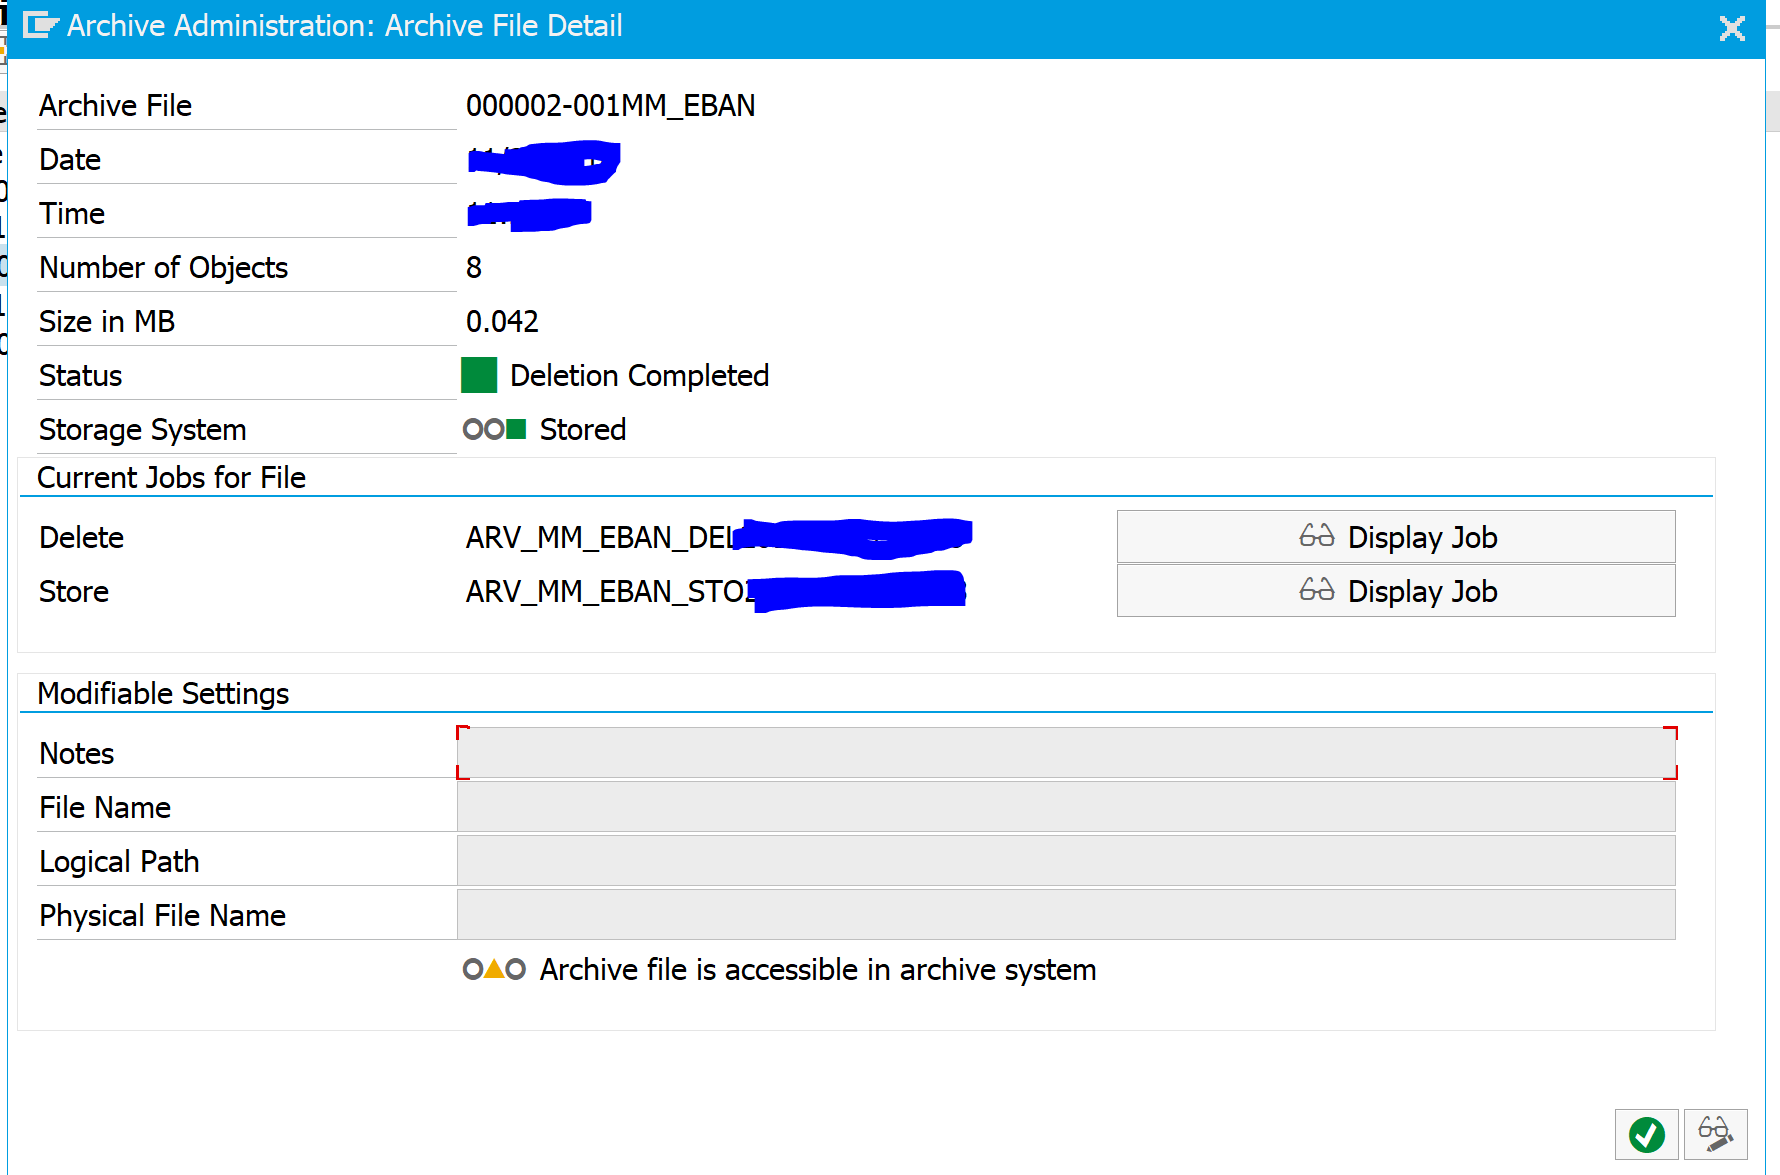
In the archiving object choose the Overview button. Then select the archive file you want to inspect. A correct file should like like this:
In the testing phases and first production runs, you also want to do record counting. A good way is to run the TAANA transaction for key tables you want to archive before the archiving and after the archiving. The difference should match the deletion counter on the write and deletion logs. If you find differences: check for bug fix OSS notes.
Data retrieval
Retrieving archived data is different per archived object. Some retrieval is nicely integrated into the normal transaction. Some require extra transaction to run. Some retrieval is via special program.
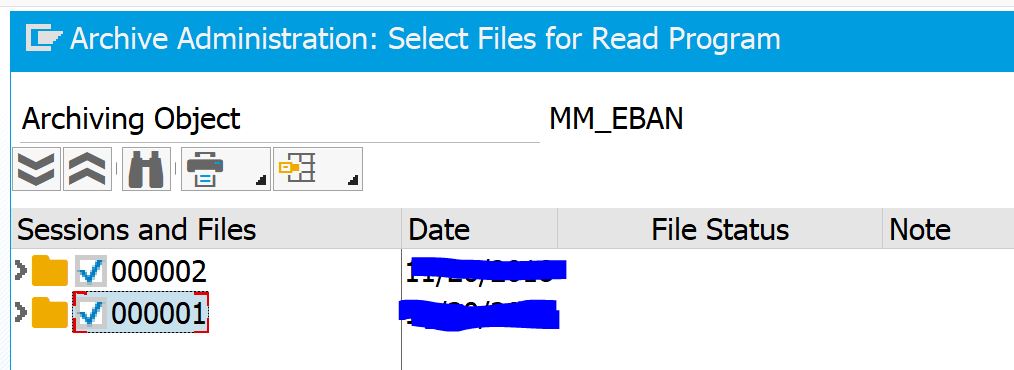
Data retrieval of purchase requisitions can be done via SARA and choosing the read option.
Here you first need to manually select the archive files to read from (see I did not give the note and regret it, since the file has no meaning now…):
Result after reading looks like this:

More on data retrieval in this dedicated blog.
OSS notes check
Before starting to check the data archiving for an object, it is best to check and read the OSS notes for the pre-processing, write, delete and read programs. Apply the bug fix notes and read about certain aspects, before you have time-consuming effort to figure out you have a bug or a certain feature that is documented inside the notes.
Controlling amount of parallel batch jobs
The deletion phase of archiving can lead to uncontrolled amount of parallel batch jobs. See this dedicated blog on how you can control it.
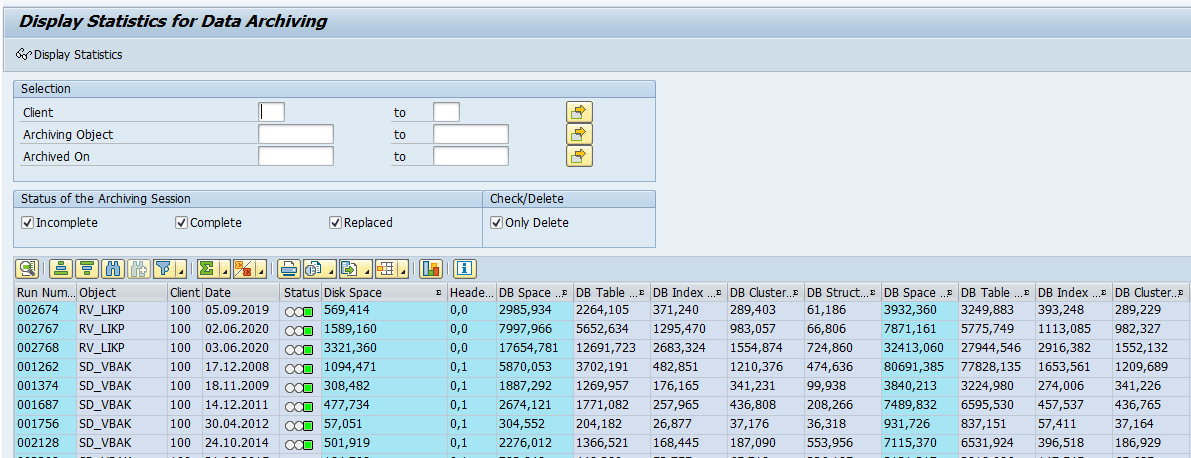
Data archiving run statistics
Transaction SAR_DA_STAT_ANALYSIS can be used to collect statistics on the data archiving runs:
FIORI app
If you are running recent version of S4HANA, you can also use a FIORI app for monitoring the data archiving runs. Read more in this dedicated blog.
Further optimizations
Further optimizations: