This blog will explain the installation of the ABAP development tools (ADT) on the laptop or workstation.
Activation of the ABAP development tools needed on the backend is explained in this blog.
Questions that will be answered in this blog are:
- Where can I find the software downloads?
- Which Java version do I need?
- What is the installation sequence?
The newer method for ABAP development is to use Visual Code. Read this blog on the installation.
Java version
As of February 2021 Java version 11 is mandatory. See OSS note 2949356 – Java 11 is mandatory for ADT in February 2021.
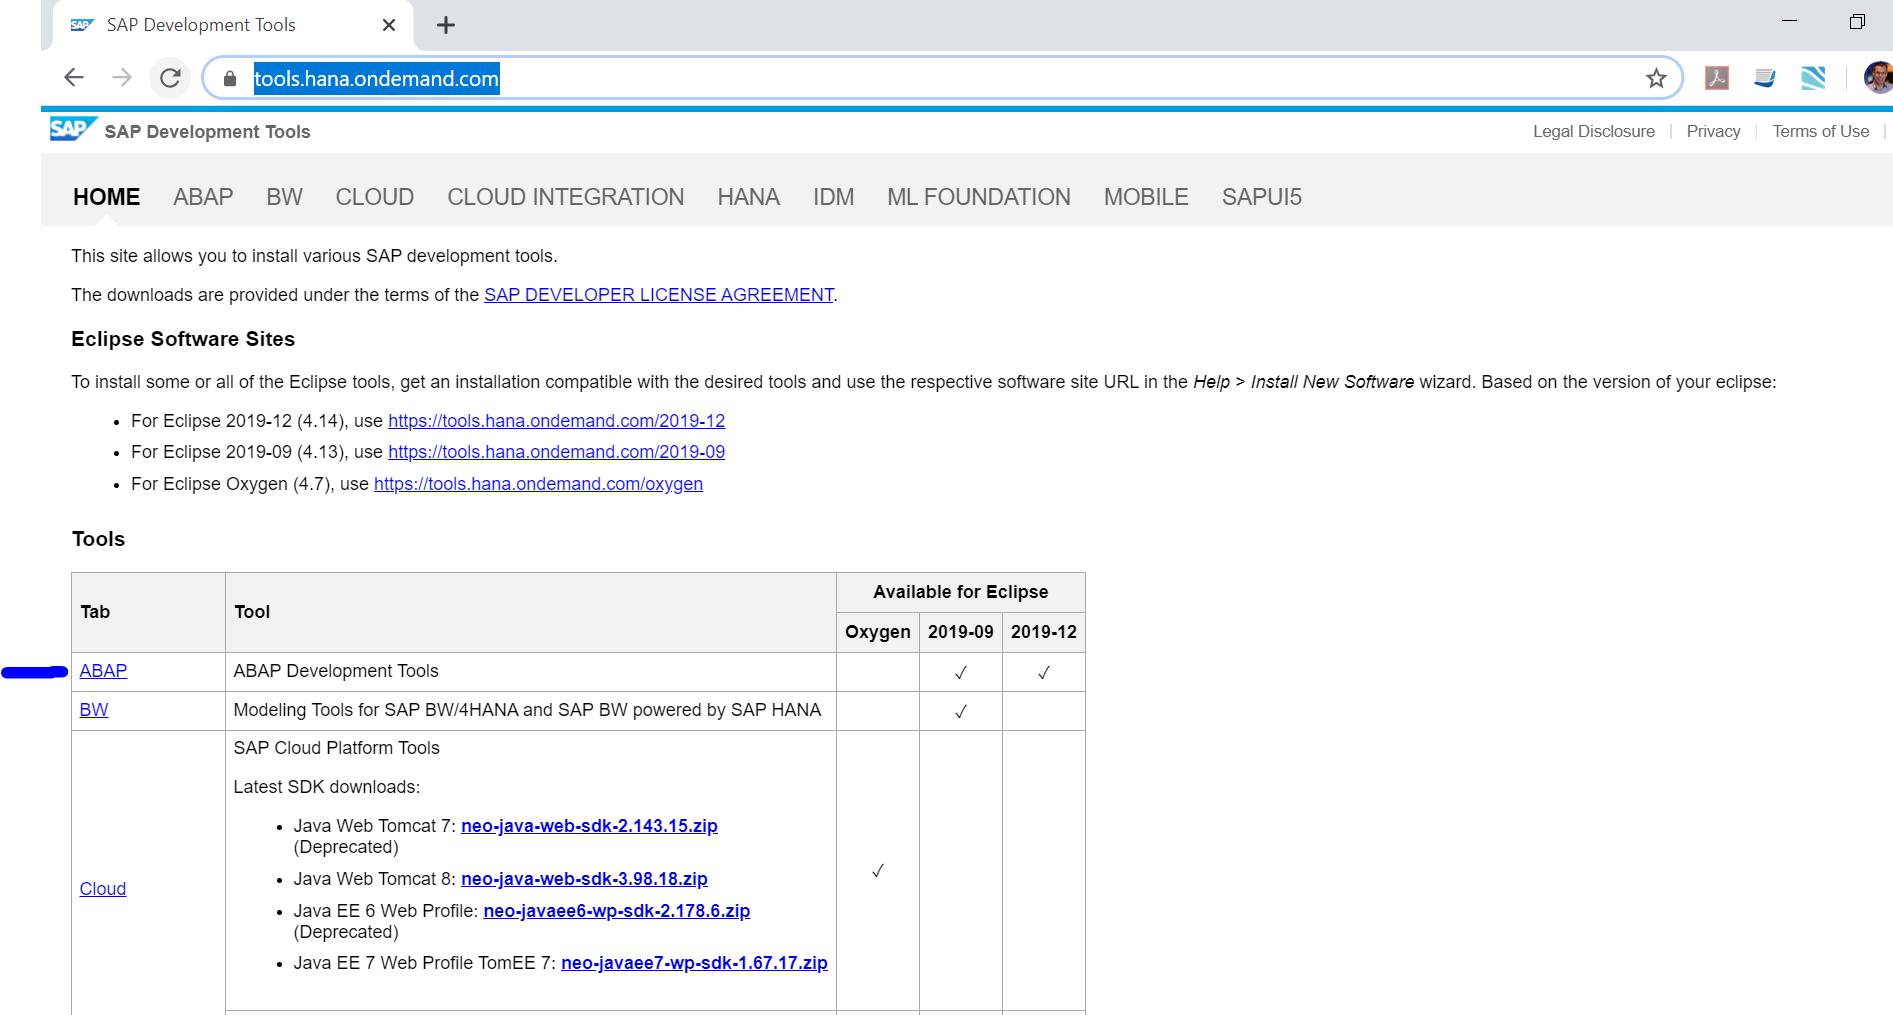
Software download of ADT tools
Software can be downloaded from the SAP public site: https://tools.hana.ondemand.com/ .
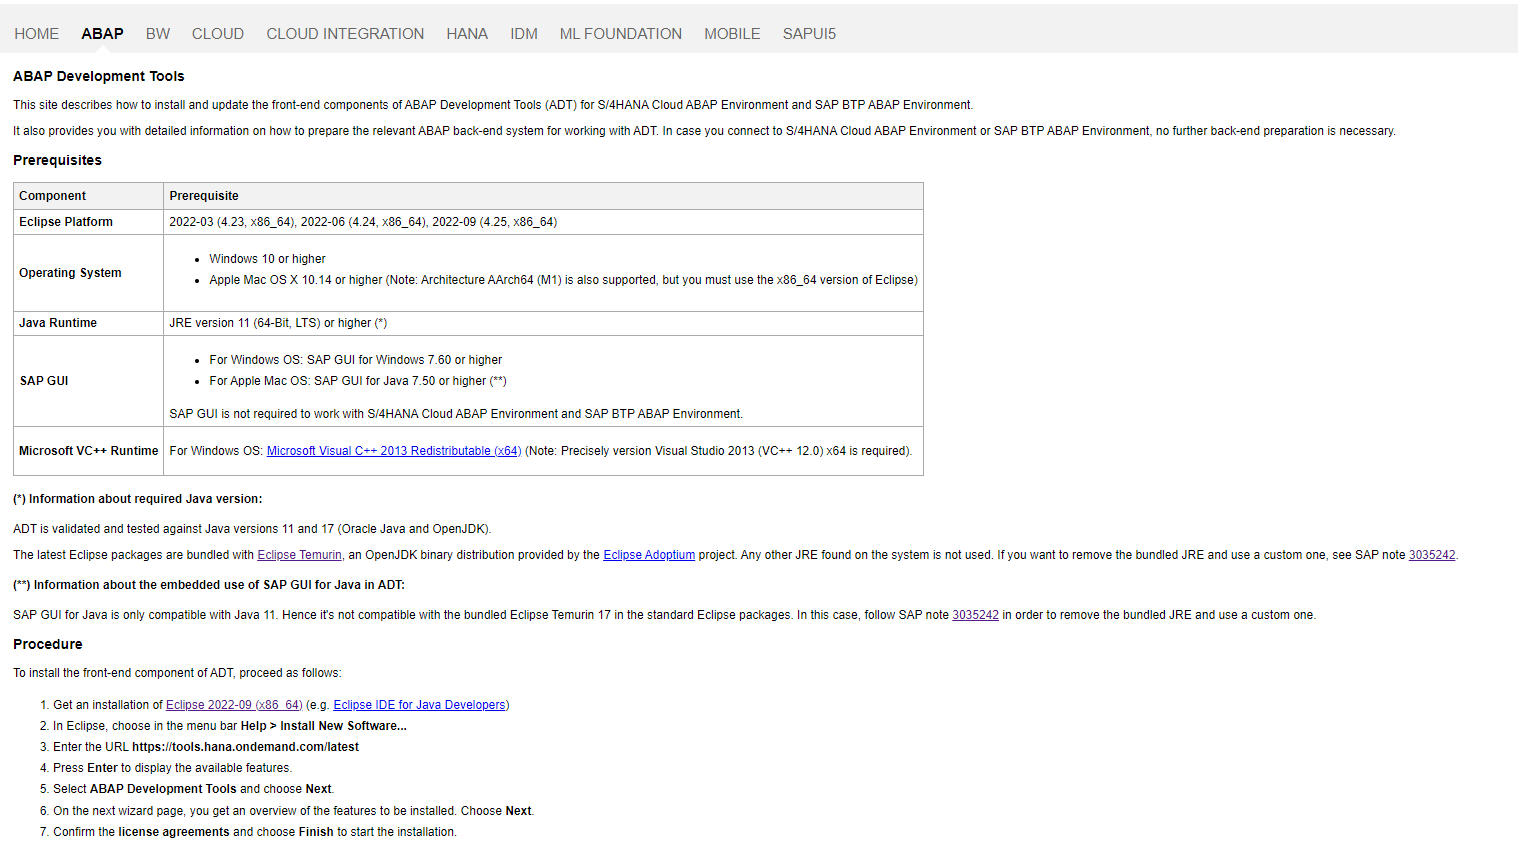
Click on the ABAP part:
Download here the Eclipse version needed and check carefully the JAVA instructions. Pending on your local system a JAVA JRE might already be there or forbidden by your windows administrators. Check note 3035242 – Remove bundled JRE from Eclipse packages if needed.
Installation
Make a directory on your local machine called C:\ADT\.
Do not use spaces and special characters in the installation directory. This is a main cause of issues.
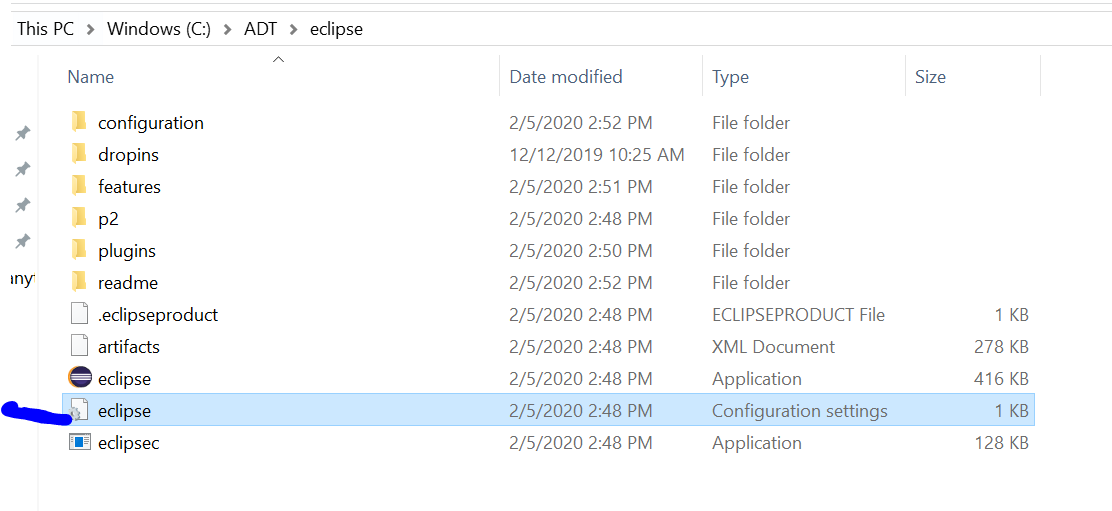
Extract the files:
Now in the the directory Eclipse, you can launch Eclipse by double clicking on the executable:
This will now launch Eclipse. If this works ok, skip the launch issue below and proceed to Installation inside Eclipse.
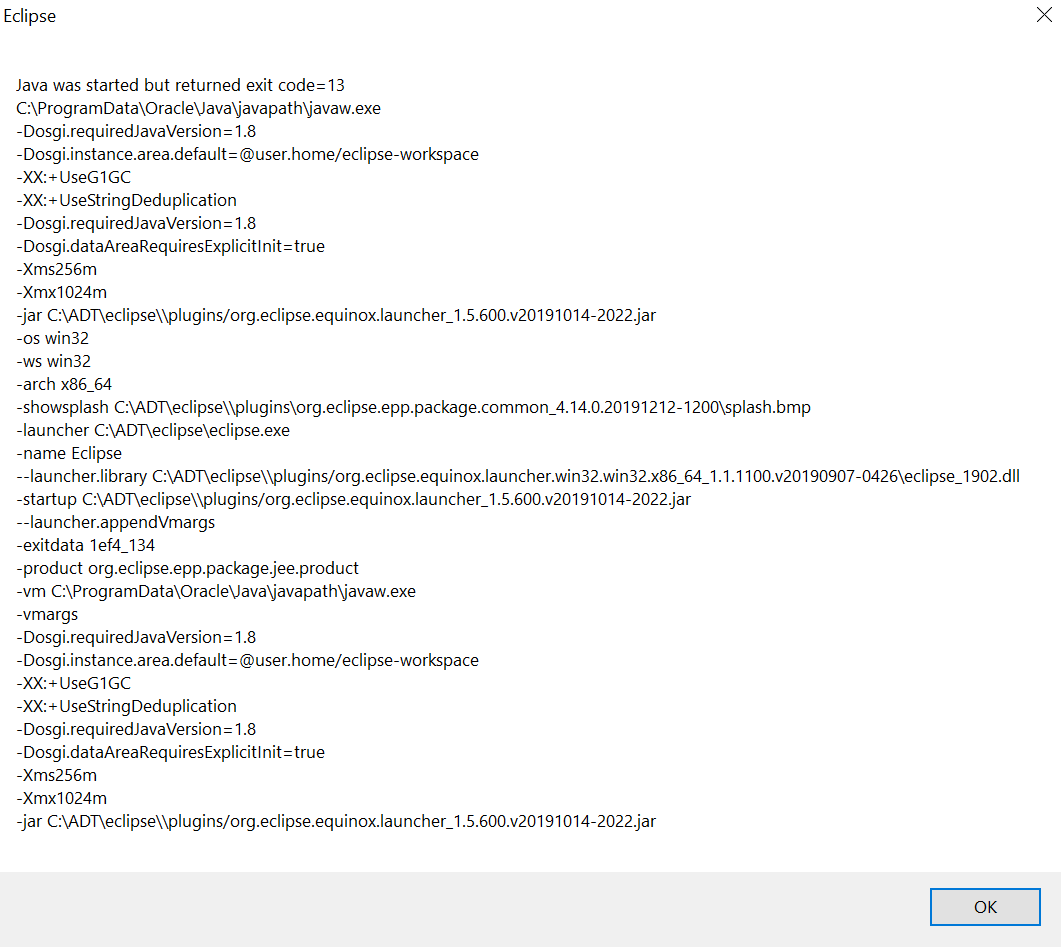
Launch issue
Depending on your JAVA installation and settings a Eclipse launch code might appear:
If this happens, most likely Eclipse can’t find a proper JAVA installation. In the previous step you have downloaded the SAP JVM files and extract them as well to the C:\ADT\ folder.
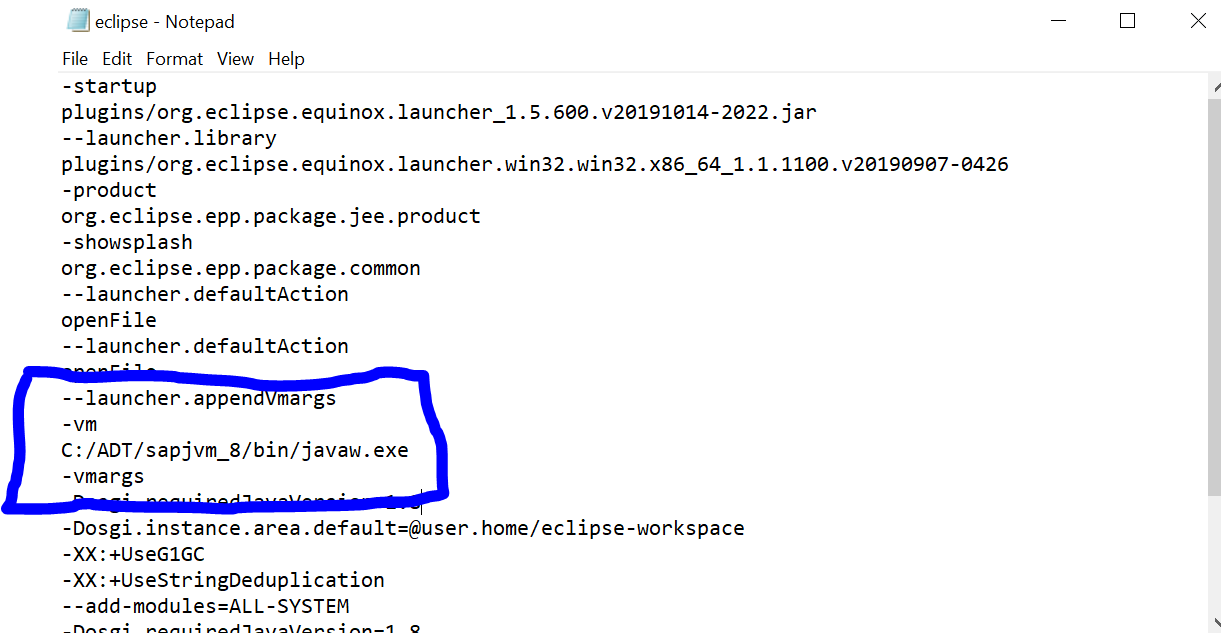
Now we need to edit the Eclipse.ini file:
Edit the file and add the line to point to the SAP JVM:
-VM
C:/ADT/sapjvm_8/bin/javaw.exe
This has to be inserted at exactly the designated spot. Save the file and re-launch Eclipse.
Installation inside Eclipse
After first initial launch of Eclipse:
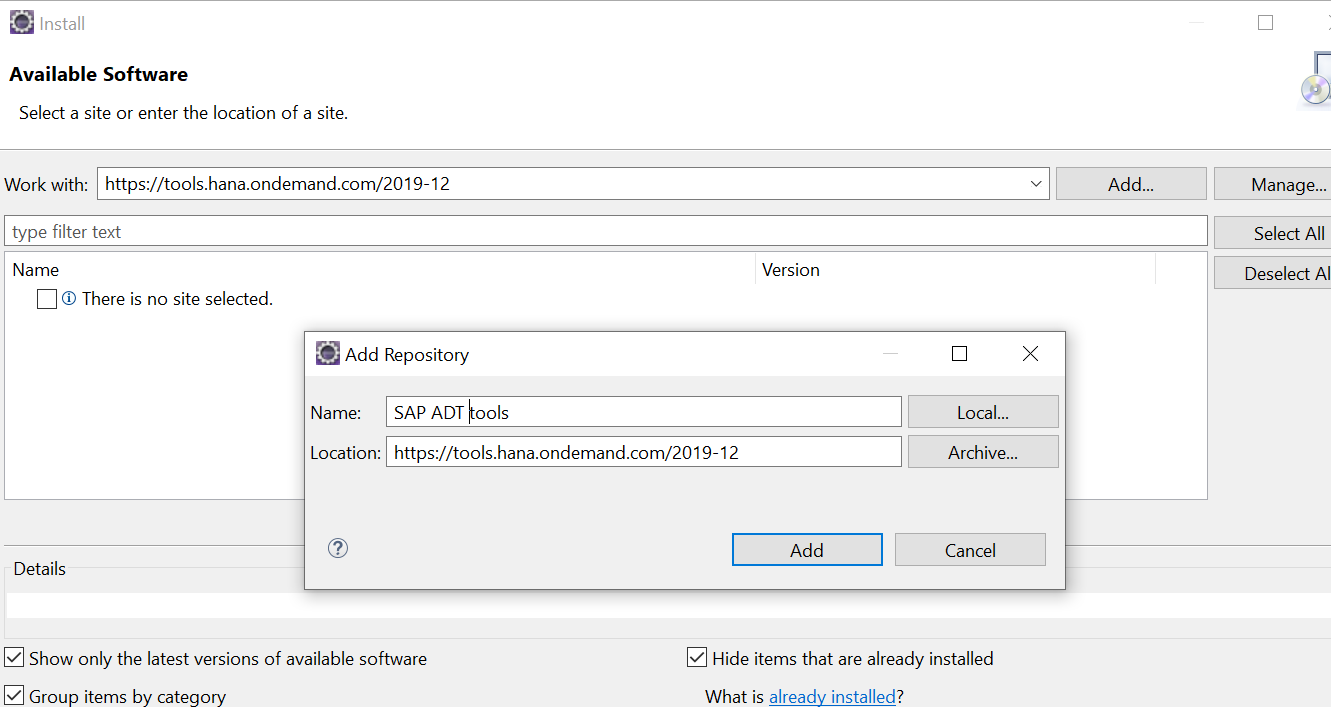
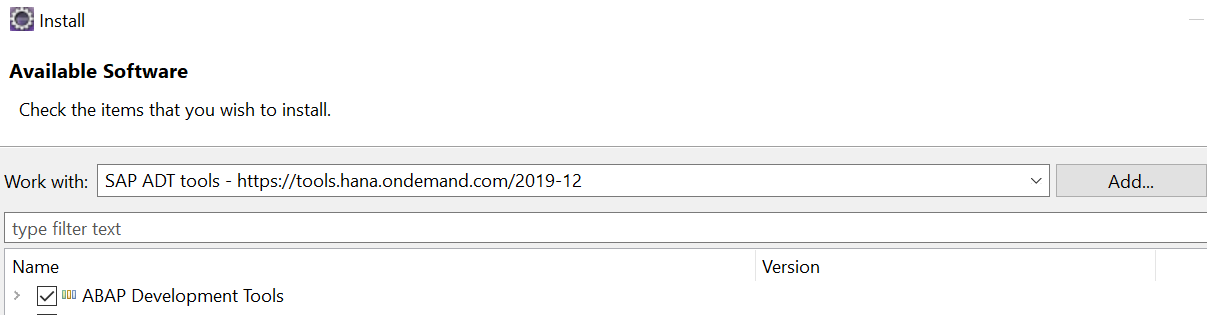
- In Eclipse, choose in the menu bar Help > Install New Software…
- Add the URL https://tools.hana.ondemand.com/latest
After this install is done Eclipse needs to restart.
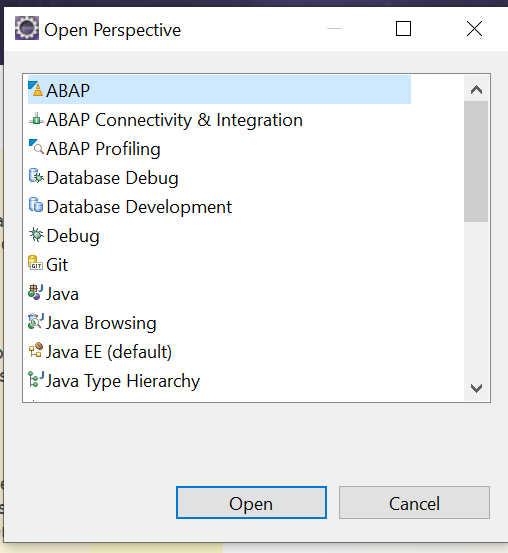
Now you can open the ABAP perspective in Eclipse:
ABAP Eclipse OSS notes
There might be bugs in Eclipse. In SAP OSS search for component BC-DWB-AIE to find bug fixes or explanations on specific functions.
Or look for the search term “quick fix” to find bug fix notes for the Eclipse quick fix function.
Clean ABAP Eclipse plug-in: ABAP cleaner
To speed up clean ABAP in practice, you can install the clean ABAP cleaner plug-in for Eclipse. Read this blog on how to do this.