When you are storing a lot of SAP office documents, you will find that table SOFFCONT1 is growing to a large value. Out-of-the-box SAP stores SAP office documents in that table. This blog will explain how you can route the storage of these documents from database to a content server. If you no longer need the SAP office documents, you can also delete them (read this blog on the deletion).
Questions that will be answered are:
- Which settings do I need to make to route SAP office documents to the content server?
- Which settings do I need to make to route GOS attachments to the content server?
- How can I test if the documents are stored correctly in the content server?
Check current settings
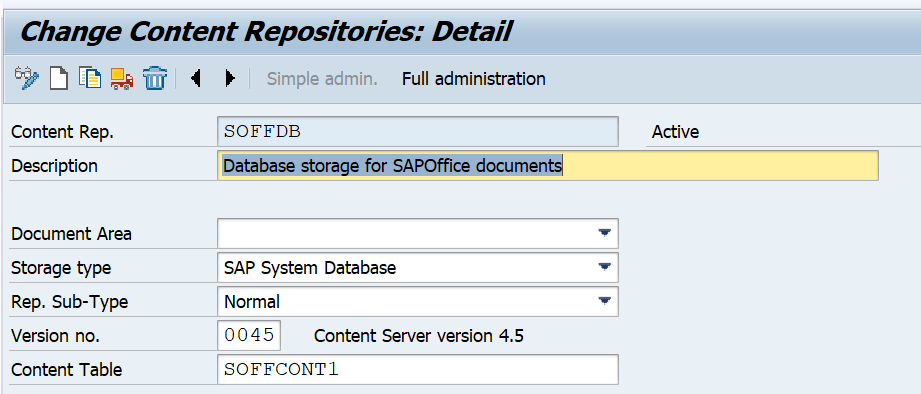
Start transaction OAC0 and open the entry for content repository SOFFDB:
Here you can see documents are written to SAP table SOFFCONT1.
Reconfiguration of SAP office to content server
First check with transaction OANR that the number range is defined properly:
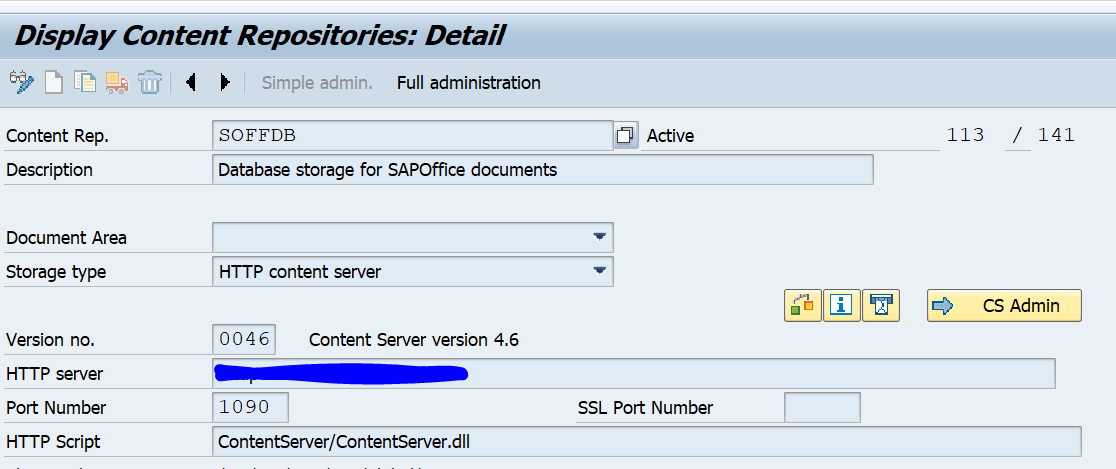
Goto transaction OAC0 and alter the settings for SOFFDB to your content server settings:
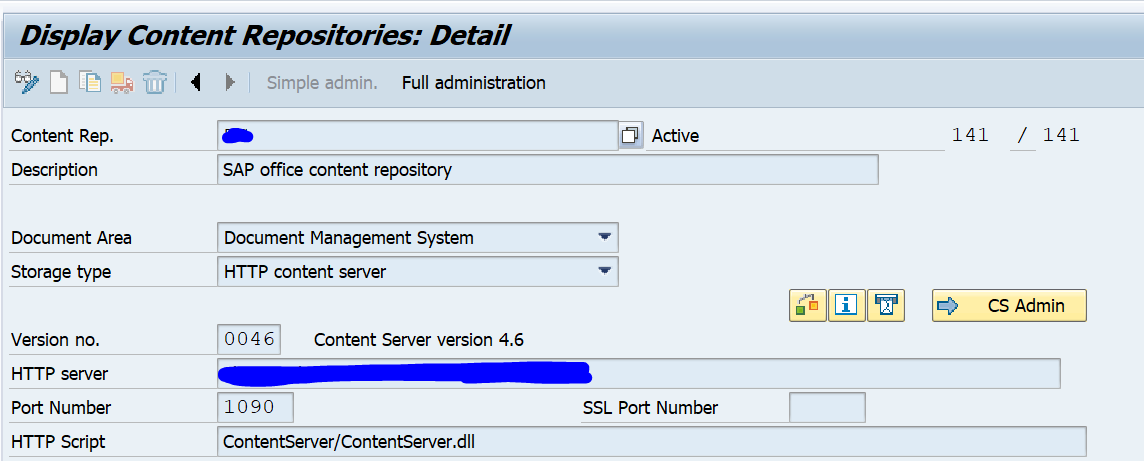
Also set up a new content server:
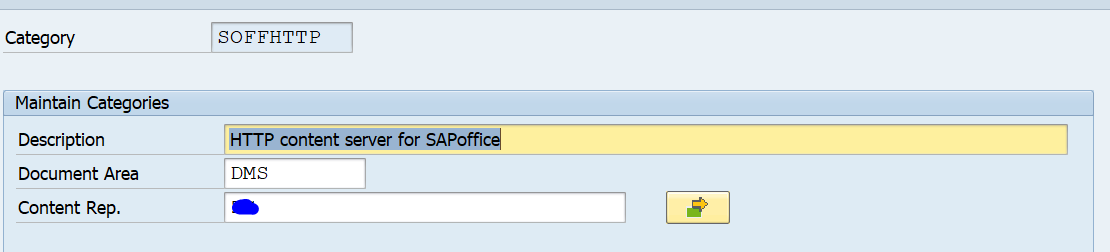
Now goto transaction AOCT to change the category settings for 3 entries: SOFFDB, SOFFHTTP and SOFFPHIO:
More background can be found in OSS note 2571570 – Where are documents physically stored with Business Communication Services?. And in OSS note 1634908 – Reduce the number of entries of table SOFFCONT1.
Reconfiguration of GOS (generic object services) to content server
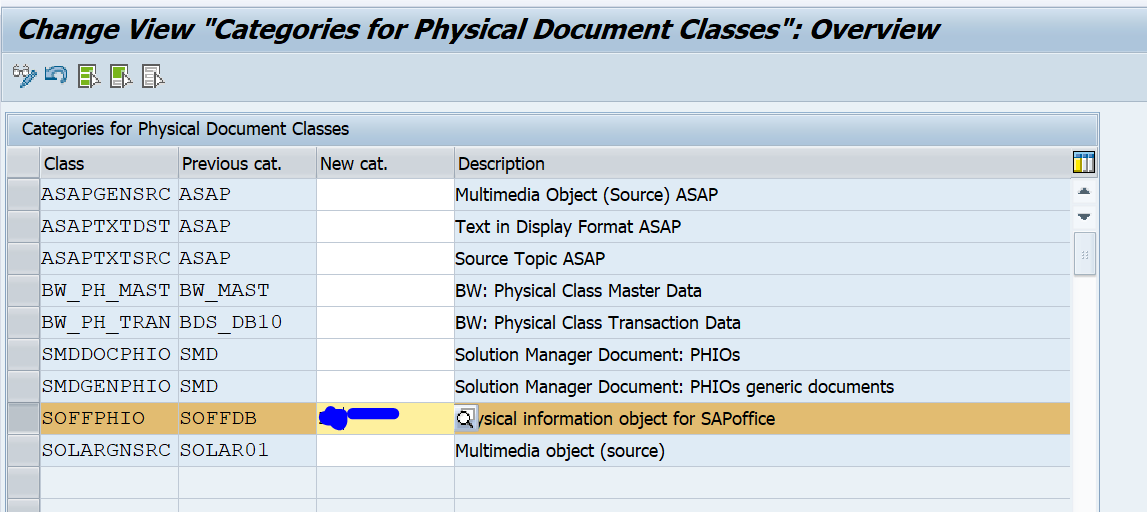
Goto transaction SKPR08 and assign the content server category to class SOFFPHIO:
More background can be found in OSS note 530792 – Storing documents in the generic object services.
Other settings
There are more settings to be done or validated. It might be that these settings are already done in your system. If not, make the settings.
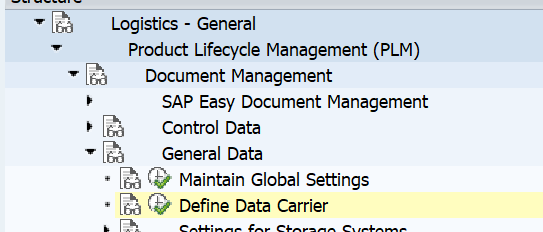
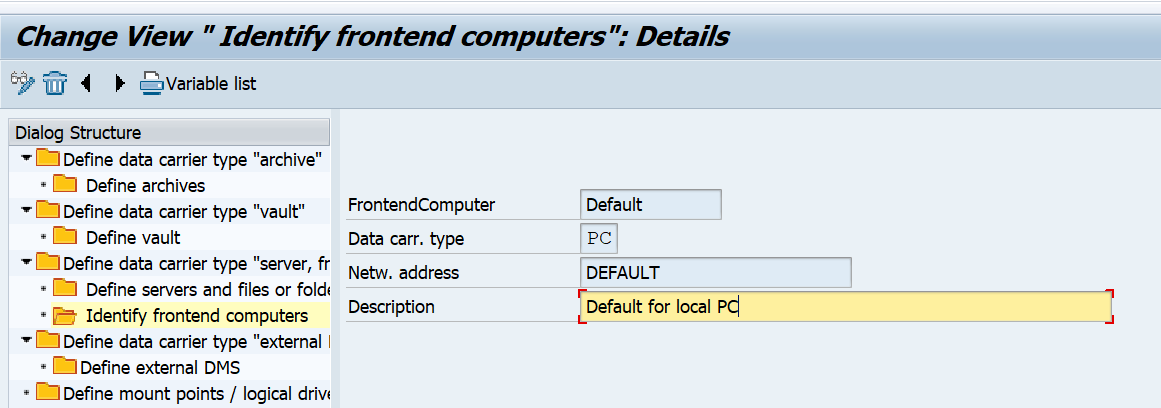
First define the Data carrier in customizing:
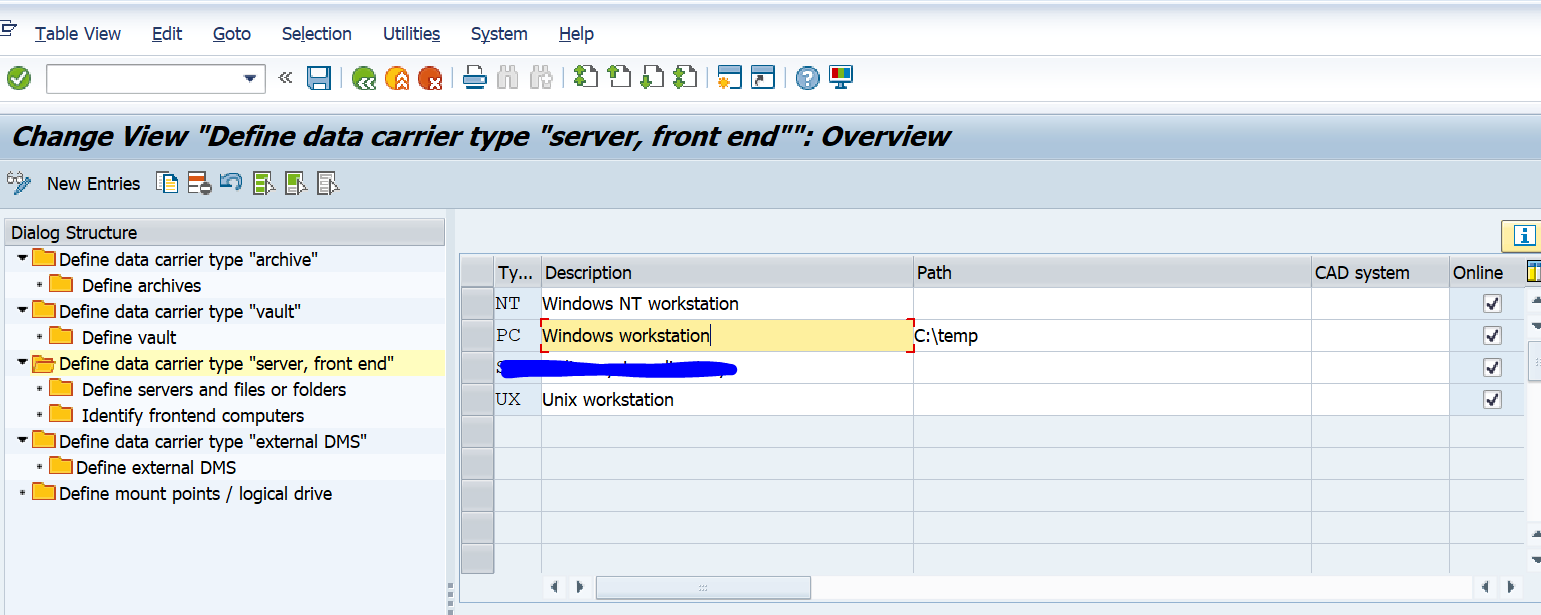
Make sure the entry for Data Carrier for front end has the type PC defined with a temporary storage path:
Please make sure that the end user has full rights to this directory. Some companies shield a lot. Without write and delete rights a temporary file cannot be stored here and the function will not work.
Now check that the default entry for data carrier is present. If not present use the Create Default Entry button to create it:
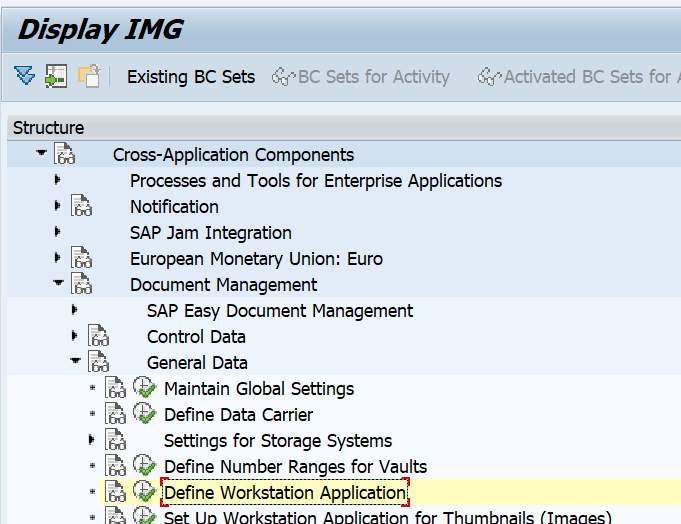
Now check the workstation application settings in the customizing path below, or directly via transaction DC30:
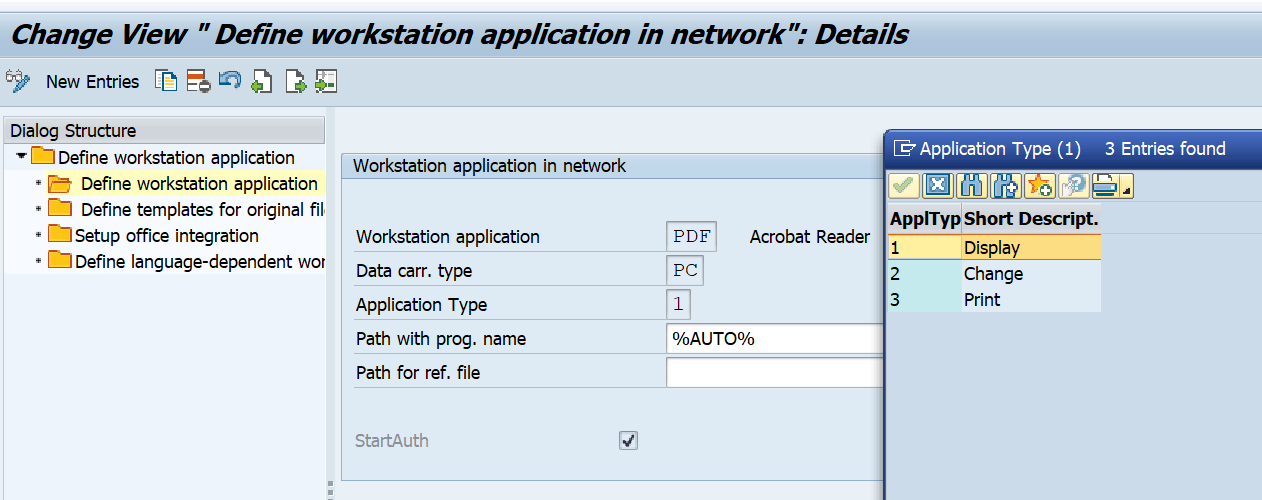
Search for the application type PDF and make sure the entries for 1 (display), 2 (change) and 3 (print) are maintained:
%AUTO% means it will take over the value from windows default to open PDF file.
Repeat this check for the popular formats DOC and DCX (Word), PPT and PPX (powerpoint), XLS and XLX (excel), ZIP (compressed files).
Testing the setup for SAP office
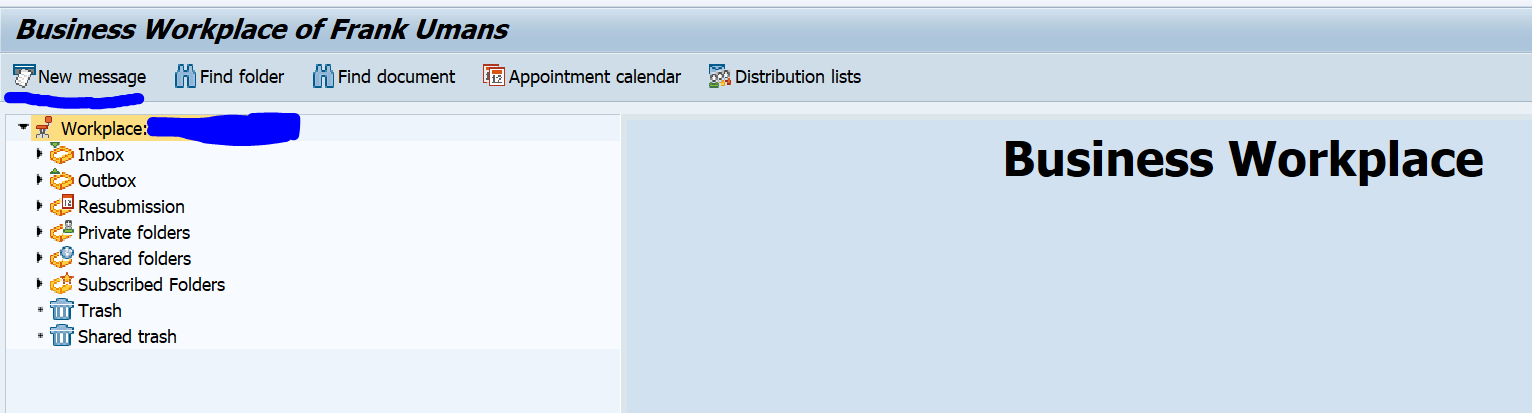
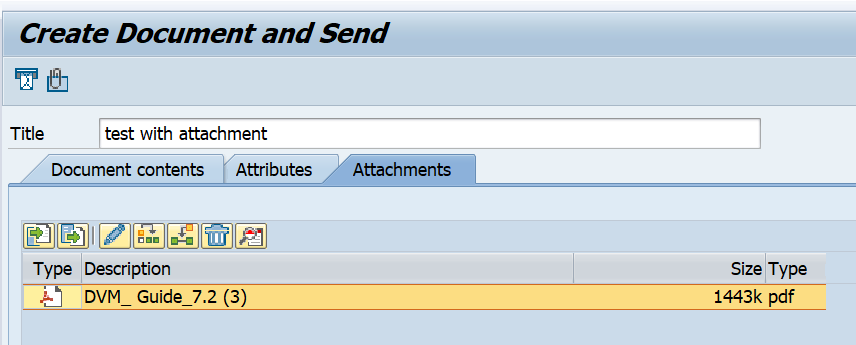
To test the setup for SAP office goto transaction SBWP to create a new message:
Create a document with attachment:
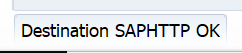
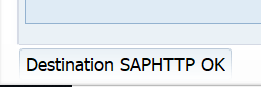
During upload you will see in the left bottom side the Test HTTP destination and destination test ok:
This means the document will be moved to content server. If this does not come, it is not ok.
If all is uploaded and you have filled out a receiver: hit the send button.
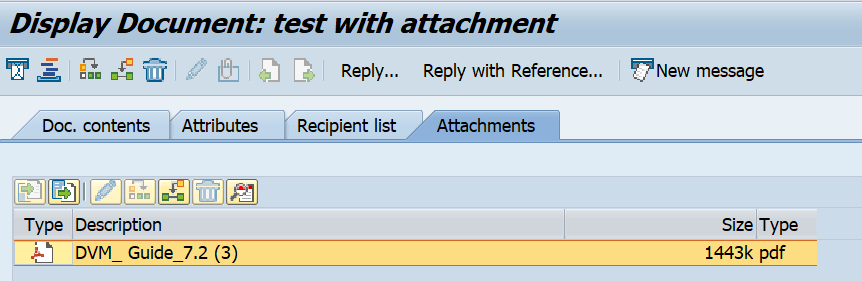
Now go back to SBWP and select the outbox. Double click on your message you just created and go to the attachment tab:
The document opens now.
You can ask your basis team to stop the content server. If that is stopped the document will not open (you get a HTTP error). This proves that the attachment is stored in the content server.
Testing the setup for GOS
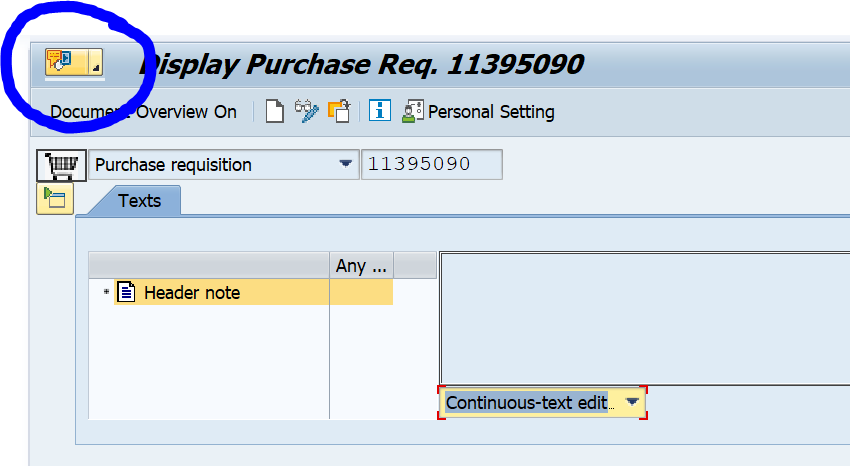
To test the setup for GOS goto one of the transactions supporting the GOS setup. In our example we will use purchase requisition change (transaction ME52N). Select a purchase requisition and open the GOS box top left:
Select Create… and then option Create Attachment and upload a file.
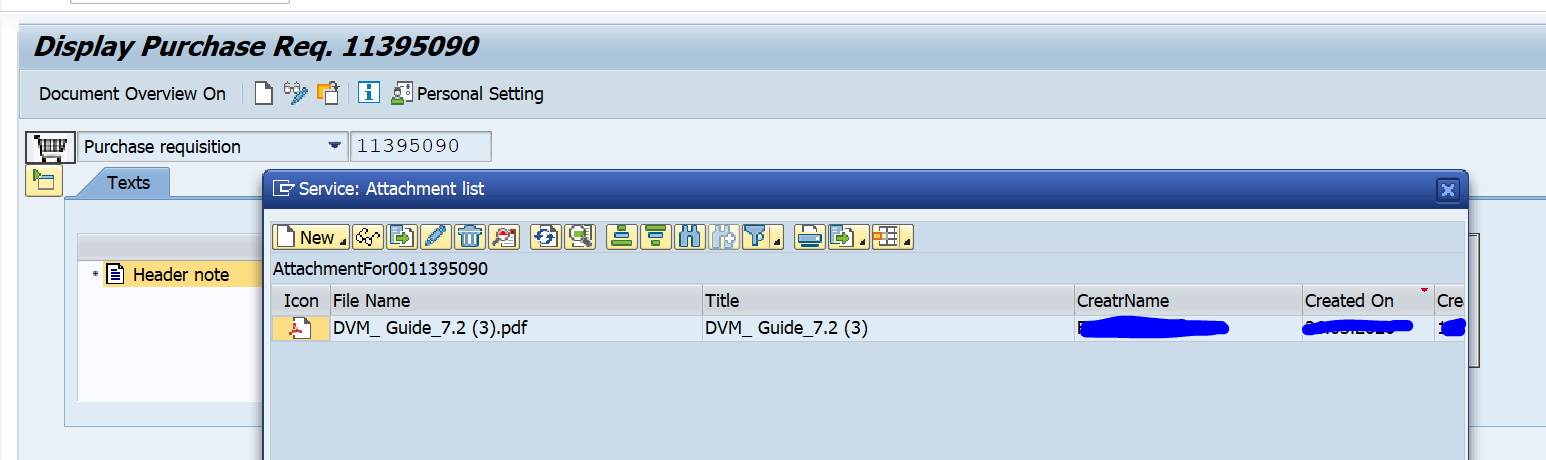
Now select attachment list:
Open the document. Ask you basis team to stop the content server. Now try to open again and you will get an http error proving the document is stored in the content server.
Migrating existing documents
To migrate existing documents from the database to the content server, you can use program RSIRPIRL. The use of this program is explained in OSS note 2459712 – How to use report RSIRPIRL. For GOS documents: better use program RSGOS_RELOCATE_ATTA.
More background is written in this blog.
Regaining storage space
Depending on your database the moving of attachments from database to content server will immediately free up storage, or only after database table reorganization.
OSS notes
Extra OSS notes: