Workflow tips & tricks

SAP workflow is used for many different business scenarios. This blog will give tips and tricks for the basis part of SAP workflow.

Questions that will be answered in this blog are:

  • How can I send a reminder email to the workflow owners?
  • How to check how many items in the inbox a user has?
  • How to delete the items in the inbox of a user?
  • How to delete the items in the outbox of a user?
  • How can I terminate workflow(s) as administrator?
  • How do I execute general workflow activation?
  • Where can I find more FAQ and manuals on workflow?
  • How to solve workflow transport issues?
  • How can I add a general task to a transport?
  • How can I setup forwarding of workflow as admin?
  • How can I check if a user has setup a substitution?
  • How can I restart workflows?
  • What to check in case of delays in workflow?
  • How can I trigger workflow processing again after a system crash?
  • How to solve the Workflow error “maximum number of 10,000 nodes reached” error?

Workflow FAQ note

SAP has created an excellent FAQ note: 2214571 – Collection Note: Workflow troubleshooting guides, FAQs and important notes. This is a good starting point for find solutions to workflow issues.

Sending reminder email to workflow owners

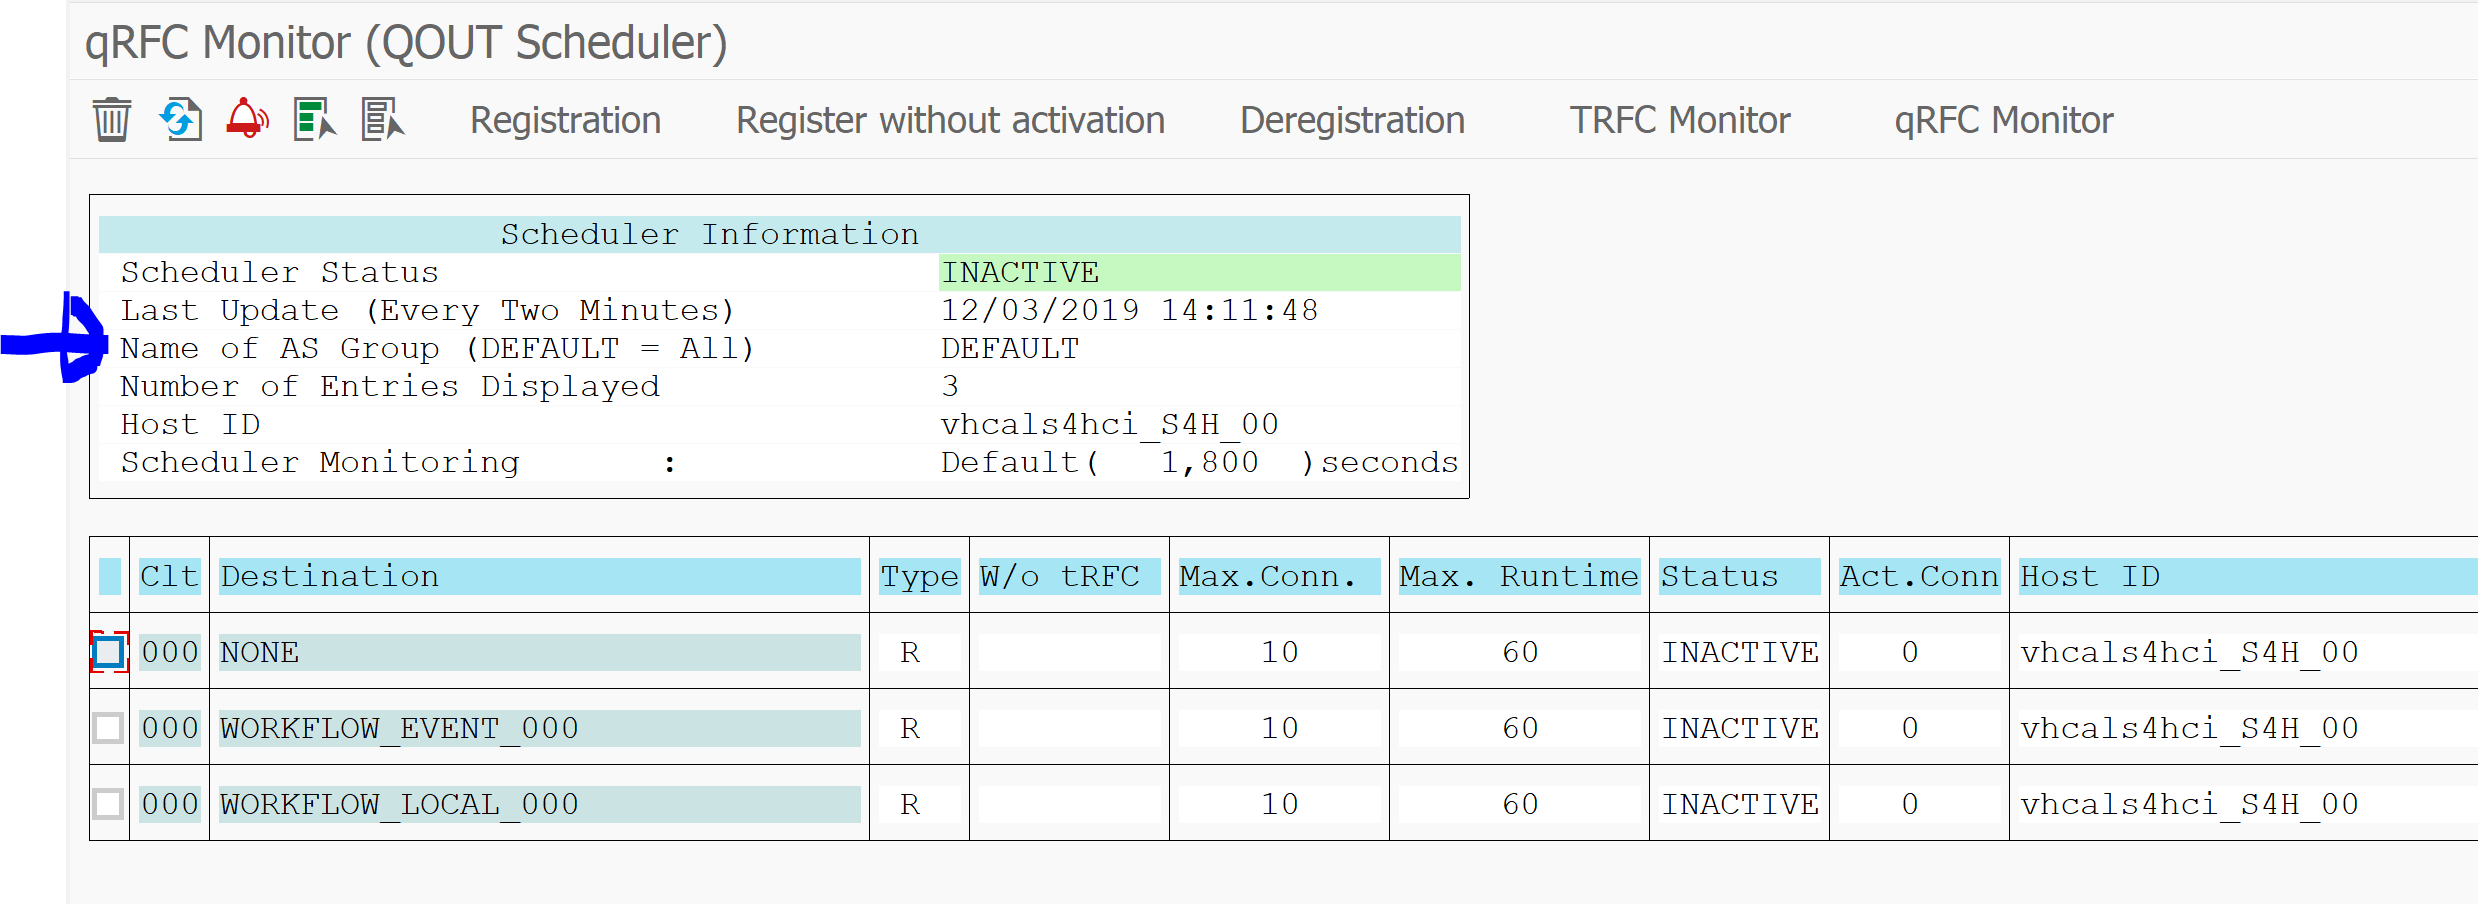
Program RSWUWFML2 can be used to send reminders to workflow owners that they still have open workflow items:

It is important to know that only reminders will be send in mail if the workflow owner user ID’s mail address in maintained in SU01.

Important explanation OSS note:

Important bug fix OSS notes:

Changing the message subject of the reminder mail

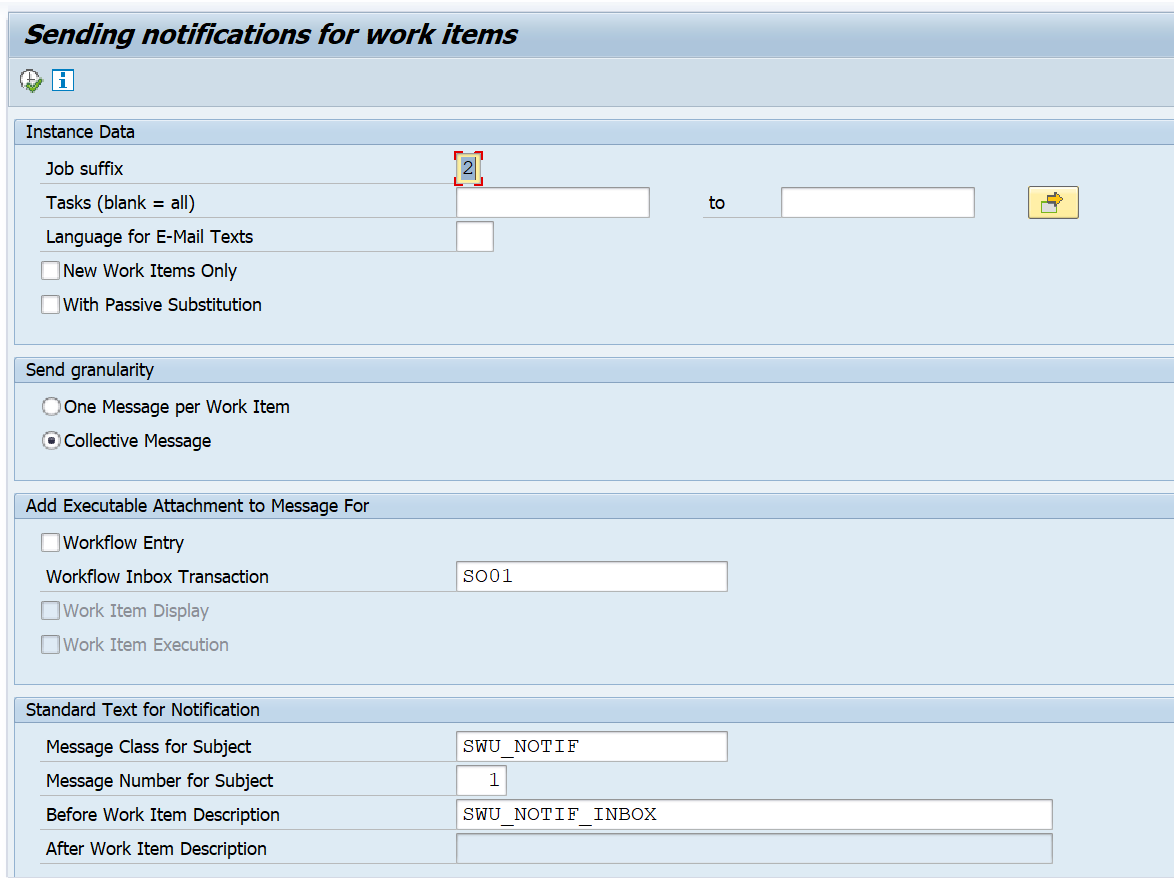
To change the message subject of a mail, create a new message in SE91. Example is class Z_CUSTOM message 010 with text: “Gentle reminder of workflow”. Now put in field message class for subject field the name of your class (Z_CUSTOM) and the message number in message number for Subject:

Changing the body of the message of the reminder mail

Goto transaction SE61 and select text type Text in Dialog. First the default text SWU_NOTIF_INBOX:

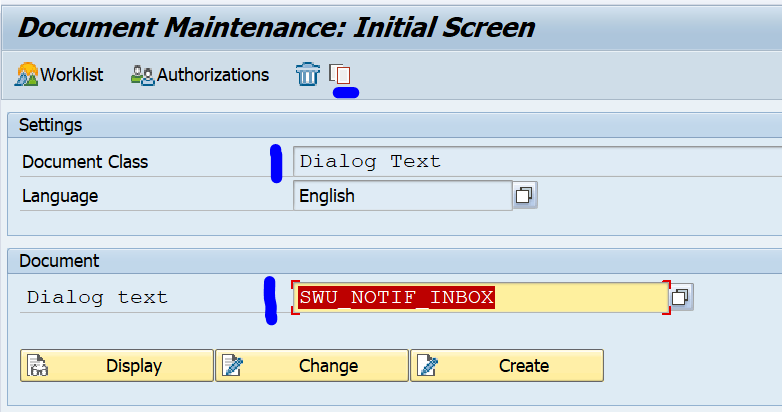
Now use the copy button to copy the text to a Z text. For example Z_SWU_NOTIF_INBOX. Change the text as per you requirement and activate the text.

Now you can use this new text in the workflow reminder mail program:

SAP workflow inbox

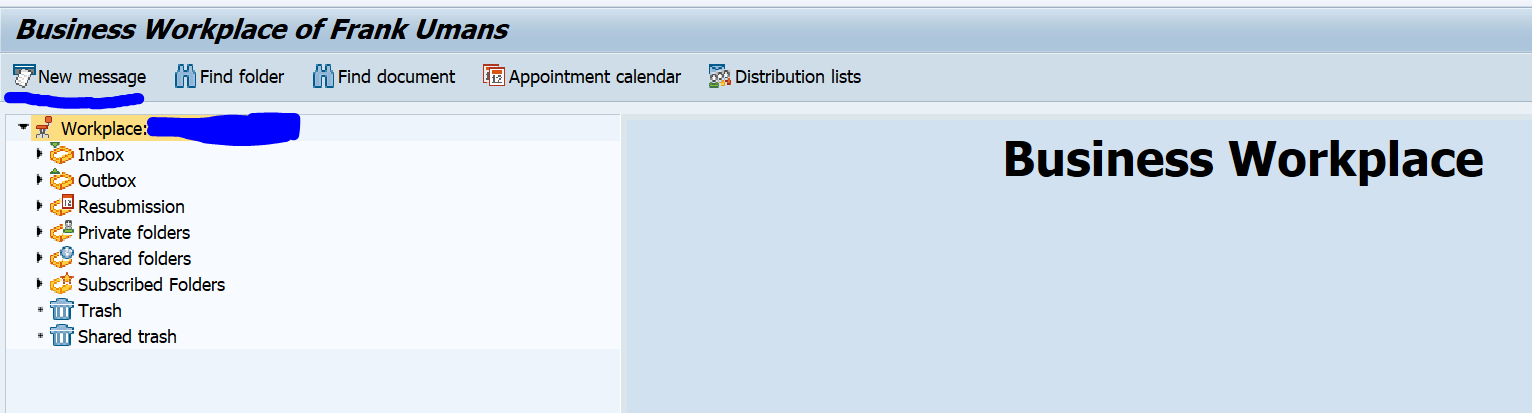
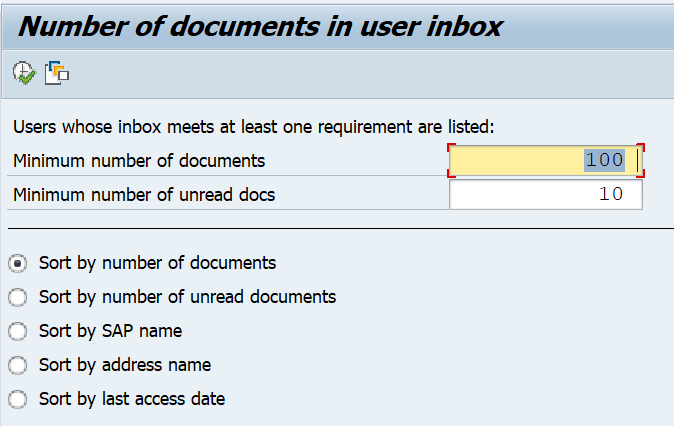
Using transaction SOY5 or via program RSSOINBO you can get an overview of the amount of workflow items per user:

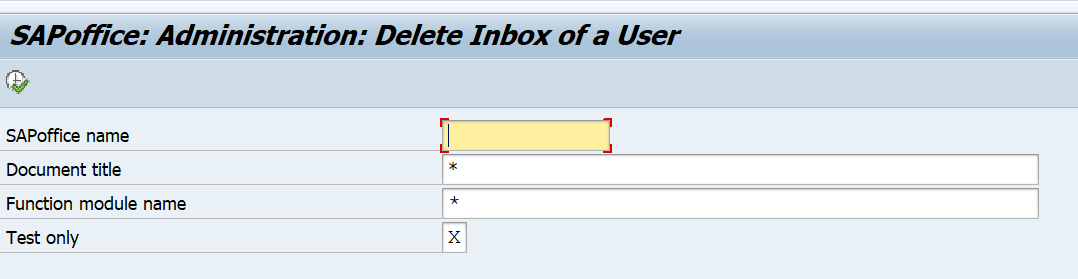
Via program RSSOINBD you can delete the inbox of a user:

Removing work items from user inbox

There are many ways to remove work items from and end users inbox: 2382266 – How to remove work items from user’s Inbox.

Removing work items from user outbox

To delete expired items from the users outbox, run program RSSOEXDA: 2774728 – Remove entries from user Outbox.

Changing priority of a work item

To change priority of a work item in SBWP follow the instructions in OSS note 2863528 – How to change the priority of a work item from SBWP.

Terminating workflows as administrator

Start transaction SWIA:

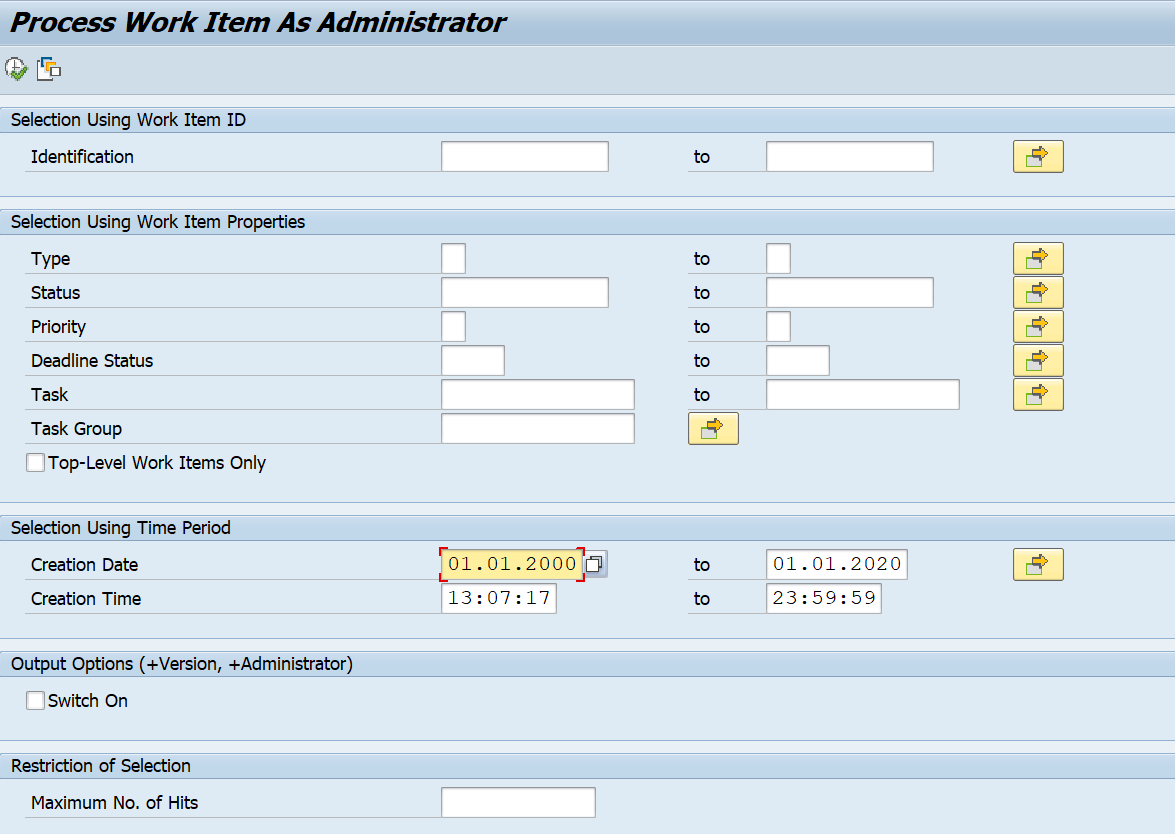
In the second screen select all the items you want to terminate and use menu option Edit / Work Item / Logically Delete. The workitem will now to status CANCELLED. Then they can be archived (see blog).

See also OSS note 2422812 – How to delete workflow item from inbox and OSS note 1705866 – “Logically Delete” for a large number of work items.

For execution of mass logical deletion in SWIA, you must select all items and in the command area enter ADMC as command and press enter:

Or select all and choose menu option Edit/Work Item/Logically Delete.

Please note: mass cancellation is possible. Mass completion not. Only via ABAP code (read this blog for the custom code which performs this). See OSS note 2650820 – Mass complete work items manually.

Workflow administrator determination

Determination of workflow administrator is explained in OSS note 3205526 – Determination of Workflow Administrator.

Restarting workflows

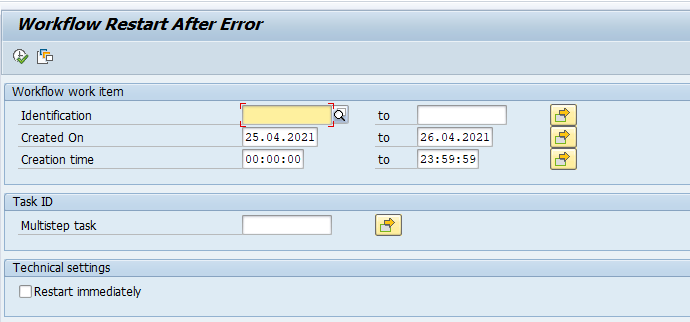
Transaction SWPR can be used to restart a workflow:

When there was a system crash transaction SWPC can be used to continue workflows:

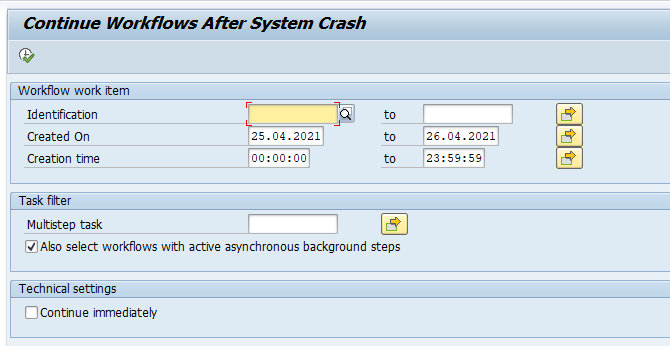
Bug fix note: 3270257 – Multiple selection value help does not work for input field “Multistep task” in transaction SWPC.

Reprocess agent rules

Agent rules can be reprocess with transaction SWI1_RULE.

How to find top level ID for a workflow item?

To find the top level for a workflow, follow the instructions in OSS note 3277360 – How to find the Top-Level work item ID of a workflow.

Reducing size of workflow tables

Workflow tables start with SWW. They can grow very large in a productive environment. For analysis see blog. For deletion and archiving see blog.

For workflow from idocs specifically, read OSS note 1813141 – How to delete unnecessary workitems of IDoc processing.

Specific note: 2847116 – SWF_TRC_CONT table huge growth.

Deleting workflow trace can be done via program RSWEQDELETE (see note 2162503 – Deleting trace records from Workflow tables).

Basic workflow activation in a new system

For activating workflow in a new system or after an S4HANA upgrade, please read this dedicated blog.

Delays in workflow

When you are experiencing delays in workflow, read OSS note 2146408 – Delay in executing a Workflow. Also check OSS note 888279 – Regulating/distributing the workflow load for load balancing on workflows.

Transport issues with workflow

Workflow development objects can give some issues in transports, since not all objects are immediately put into a transport upon development.

If you have set a workflow task to general and want to transport it, use program RHMOVE30 to put it into a transport. For more background read this SAP blog.

Substitution and forwarding

Using transaction SBCS_EXTCOM you can setup forwarding for a user ID towards different user ID as admin. This might be needed in case of illness of a user:

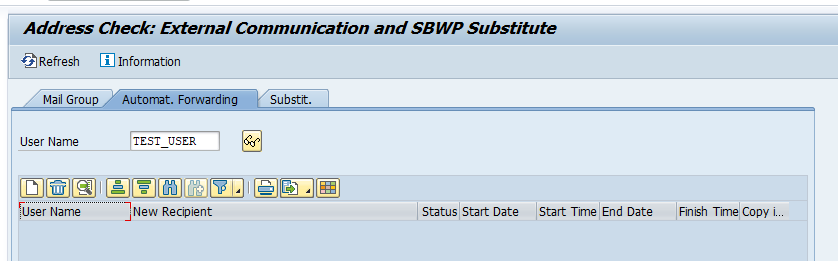
In the third tab of this transaction you can see if a user has setup a substitution himself.

See also OSS note 3289193 – Email notifications to substitutes.

Workflow error “maximum number of 10,000 nodes reached”

If you get this error, increase the value Maximum node number in transaction SWPA:

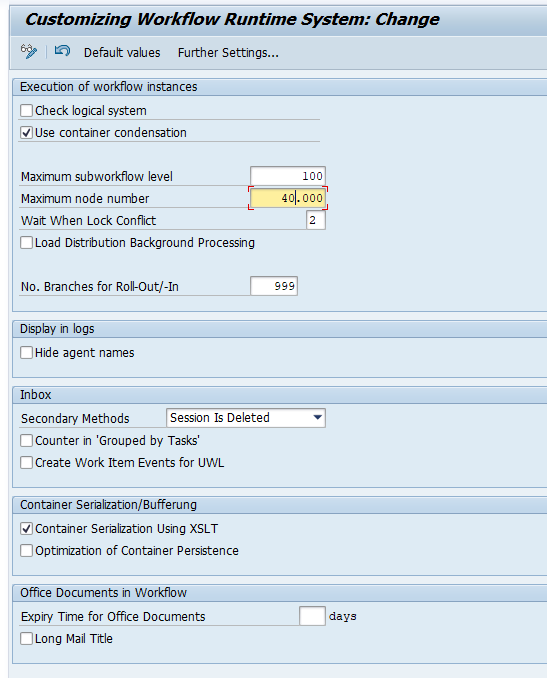
Do not just increase, but read OSS note 2397114 – Workflow error “maximum number of 10,000 nodes reached”, which advices to check the workflow definition, before increasing this value.

Use report RSWP_CHANGE_MAX_NODES to solve your immediate issue.

Workflow delegation and substitution

SAP workflow has options for delegation and substitution (for example when person is on holiday). Read more on this in the SAP wiki for substitution.

Workflow and system copy

After a system copy, check the workflow configuration again. See OSS note 3227538 – Workflow background steps are not getting completed after system copy.

Data archiving: store files in SAP content server

With data archiving you reduce the database size of SAP and increase the performance by reducing the amount of records in the SAP tables. The data archiving process write files with the archived data. These files must still be stored securely, since on file level any admin can delete the files and you might loose valuable business data.

This blog explains the setup of storage of data archiving files by using SAP content server as storage medium.

Questions that will be answered are:

  • How do I setup the link from SAP netweaver ABAP stack to the SAP content server?
  • Which settings do I need to make in the archiving objects to store the archiving file to SAP content server?
  • How do I store the files in the SARA transaction?

General tips and tricks for SAP content server can be found in this blog.

Setup of SAP content server 7.5 information can be found in this blog.

How to setup archiving technically can be found in this blog.

How to run archiving can be found in this blog.

Linking the SAP Netweaver ABAP stack to SAP content server

First we need to maintain a special protocol in customizing using this path:

Create a new protocol:

This protocol can now be assigned to the SAP content server you want to use for storing the data archiving files. Go to transaction OAC0 to link the protocol to your content server:

If the field protocol is not visible immediately there, click the button Full administration first.

Data archiving object specific linking

After the steps above to make the general connection to content server available, the content server needs to be explicitly mentioned in each data archiving object. For any data archiving object (start transaction SARA first and select the object), click on the customizing button:

In the popup screen now select Technical Settings in Archiving Object-Specific Customizing:

At the bottom fill out the content server repository and decide if you want to start automatically or immediately:

Remark 1: the F4 search help does not work here! Key in the value directly and check using the check button. Then save the data.
Remark 2: always tick the option Delete Program Reads from Storage System. This forces that the archive file is securely stored first, before the deletion run is allowed to start. 

Use of archive routing

If you have a lot of archiving data and a lot of years of archiving done, it can be needed to set up a second or third content server.

With the use of Archive Routing you can determine in which content server to store which archive files.

On the SARA screen push the customizing button and select Archive Routing:

Now set up a rule:

And the conditions of the rule:

This setting does NOT work for the CHANGEDOCU object. To achieve the same for CHANGEDOCU, you must switch to the licensed SAP ILM product.

Storing archive files in SARA

After the configuration is done the new button Storage system appears on the screen in the SARA transaction for this specific object:

Storage system

If the button does not appear: check the technical settings above, and remember: this is to be repeated for each object.

Storing files that have been written by the Write phase of the data archiving process can now be stored by pressing the Archive Files button:

Select the file(s) to store:

Now a batch job starts (per file!) to store the archive file into the SAP content server.

After correct storage of the file, the file can be selected in the delete phase.

SAP content server 7.5

SAP has released content server 7.5. Content server can be used to store attachments, documents and archiving files outside of the SAP database.

Questions that will be answered in this blog are:

  • Where can I find more information on SAP content server 7.5?
  • How to upgrade to SAP content server 7.5?
  • What is the support on my SAP content server 6.5 installations?

SAP content server 7.5

The main OSS note for SAP content server 7.5 is 2786364 – SAP Content Server and Cache Server 7.5 (and higher). This is a major different technology setup: there is no Apache or Microsoft webserver needed any more. The content repository setup itself does not change.

For installation you can follow the instructions from the main OSS note, or follow the steps from the SAP blog on content server 7.5 installation.

Upgrading from 6.5 to 7.5

As mentioned before the technology has changed on how data is put into content server and how it is retrieved, but the data structure itself is the same. Note 2786364 – SAP Content Server and Cache Server 7.5 (and higher) is also describing the migration process. Your database (most of the times MaxDB) remains as is. But you have to install new 7.5 content server. Then you migrate the configuration. You stop the old 6.5 server and start up the new 7.5 server. You test that all works via the content server check programs from this blog (you might need to perform changes in transaction OAC0). SAP recommends after successful migration to clean up the old 6.5 as soon as possible to avoid issues (like an overzealous admin starting it up again…).

Support of SAP content server 6.5

In the main OSS note on SAP content server 6.5 (1983930 – Availability of SAP Content Server 6.50) there is no direct indication of end of support date. SAP content server 6.50 is part of the Netweaver 7.40 stack. The support of this stack ends by 31st of December 2020.

See also OSS notes 761387 – SAP Content Server support information and 719971 – SAP Content Server release strategy.

Before raising SAP message, first read OSS note 3345452 – SAP Content Server – required information for analysis on the information SAP needs for a quick solution to your issue.

Changes to test programs

The content server test programs (for example RSCMST) can respond differently with the new content server. SAP is updating these. For more information see the blog on content server tips & tricks.

Content server license

For using content server from SAP using MaxDB no special licenses is needed. See OSS note 2553449 – Does the SAP Content/Cache Server require a separate license?.

New SAP JCO 3.1 version

SAP has released a new SAP JCO version 3.1. JCO is the workhorse for JAVA programs and other external programs to call RFC enabled function modules and BAPI’s to SAP ABAP systems.

Questions that will be answered in this blog are:

  • Where can I find information on the new JCO 3.1 version?
  • What is the end of support for the current JCO 3.0 version?

New JCO 3.1 version

The main OSS note for JCO version 3.1 is 2786882 – SAP JCo 3.1 release and support strategy. Documentation for JCO 3.1 is available publicly on the SAP site. Or download the PDF of the JCO 3.1 standalone connector directly via this link. General implementation information on both versions is still on the SAP wiki page.

End of support for current JCO 3.0 version

SAP has updated the main note for JCO version 3.0: 1077727 – SAP JCo 3.0 release and support strategy. In this note the current end of support date for JCO version is set to October 31st 2020.

JCO installation issues

OSS note 1953762 – Hints for frequent installation errors with SAP JCo 3.0 release describes the most frequent errors with installation of SAP JCo 3.0. Most of the hints will be identical for SAP JCo 3.1.

Latest version

Latest JCO version now is 3.1.9. See OSS note 3446411 – SAP Java Connector Release 3.1.9.

Storing SAP office documents in content server

When you are storing a lot of SAP office documents, you will find that table SOFFCONT1 is growing to a large value. Out-of-the-box SAP stores SAP office documents in that table. This blog will explain how you can route the storage of these documents from database to a content server. If you no longer need the SAP office documents, you can also delete them (read this blog on the deletion).

Questions that will be answered are:

  • Which settings do I need to make to route SAP office documents to the content server?
  • Which settings do I need to make to route GOS attachments to the content server?
  • How can I test if the documents are stored correctly in the content server?

Check current settings

Start transaction OAC0 and open the entry for content repository SOFFDB:

Here you can see documents are written to SAP table SOFFCONT1.

Reconfiguration of SAP office to content server

First check with transaction OANR that the number range is defined properly:

Goto transaction OAC0 and alter the settings for SOFFDB to your content server settings:

Also set up a new content server:

Now goto transaction AOCT to change the category settings for 3 entries: SOFFDB, SOFFHTTP and SOFFPHIO:

More background can be found in OSS note 2571570 – Where are documents physically stored with Business Communication Services?. And in OSS note 1634908 – Reduce the number of entries of table SOFFCONT1.

Reconfiguration of GOS (generic object services) to content server

Goto transaction SKPR08 and assign the content server category to class SOFFPHIO:

More background can be found in OSS note 530792 – Storing documents in the generic object services.

Other settings

There are more settings to be done or validated. It might be that these settings are already done in your system. If not, make the settings.

First define the Data carrier in customizing:

Make sure the entry for Data Carrier for front end has the type PC defined with a temporary storage path:

Please make sure that the end user has full rights to this directory. Some companies shield a lot. Without write and delete rights a temporary file cannot be stored here and the function will not work.

Now check that the default entry for data carrier is present. If not present use the Create Default Entry button to create it:

Now check the workstation application settings in the customizing path below, or directly via transaction DC30:

Search for the application type PDF and make sure the entries for 1 (display), 2 (change) and 3 (print) are maintained:

%AUTO% means it will take over the value from windows default to open PDF file.

Repeat this check for the popular formats DOC and DCX (Word), PPT and PPX (powerpoint), XLS and XLX (excel), ZIP (compressed files).

Testing the setup for SAP office

To test the setup for SAP office goto transaction SBWP to create a new message:

Create a document with attachment:

During upload you will see in the left bottom side the Test HTTP destination and destination test ok:

This means the document will be moved to content server. If this does not come, it is not ok.

If all is uploaded and you have filled out a receiver: hit the send button.

Now go back to SBWP and select the outbox. Double click on your message you just created and go to the attachment tab:

The document opens now.

You can ask your basis team to stop the content server. If that is stopped the document will not open (you get a HTTP error). This proves that the attachment is stored in the content server.

Testing the setup for GOS

To test the setup for GOS goto one of the transactions supporting the GOS setup. In our example we will use purchase requisition change (transaction ME52N). Select a purchase requisition and open the GOS box top left:

Select Create… and then option Create Attachment and upload a file.

Now select attachment list:

Open the document. Ask you basis team to stop the content server. Now try to open again and you will get an http error proving the document is stored in the content server.

Migrating existing documents

To migrate existing documents from the database to the content server, you can use program RSIRPIRL. The use of this program is explained in OSS note 2459712 – How to use report RSIRPIRL. For GOS documents: better use program RSGOS_RELOCATE_ATTA.

More background is written in this blog.

Regaining storage space

Depending on your database the moving of attachments from database to content server will immediately free up storage, or only after database table reorganization.

OSS notes

Extra OSS notes:

Activate SAP GUI for HTML via integrated SAP ITS

For users that do not use the SAP GUI regularly, you can use the SAP GUI for HTML as an alternative. The end users will then access the SAP system via the GUI shown in the web browser. This way the end user does not need to install the fat client on his laptop or desktop.

Questions that will be answered in this blog are:

  • How to activate the SAP GUI for HTML?
  • How to change the theming?
  • How to monitor the ITS behind the SAP GUI for HTML?

Activation of SAP GUI for HTML via integrated ITS

In transaction SICF activate the SAP GUI for HTML node /sap/bc/gui/sap/its/webgui:

Look and feel of the SAP GUI for HTML

OSS note 1508958 – Look and Feel in the WEBGUI explains the different themes for SAP GUI for HTML. OSS note 2540597 – Supported Themes for SAPGUI for HTML explains the support of different theme versions per netweaver version. Note 1656975 – How to set the theme for SAPGUI for HTML? explains how to set the theme.

Monitoring the SAP GUI for HTML via ITS tools

The SAP GUI for HTML is using SAP ITS (internet transaction services) to render the HTML pages. Transaction SITSPMON is the monitoring transaction for ITS:

If you have issues with the ITS web gui, this note explains which information to download from SITSPMON and add to the ticket: 3010580 – SITSPMON: How to send ITS Support Information in a Support Incident. For this function also apply OSS note 2948114 – SITSPMON: Improvement of Support Information Tab.

Health check feature

Apply the OSS notes mentioned in 3031743 – WebGUI Health Check feature to activate the Health check tab:

Known issues

If you get a popup stating Transaction SMEN is locked and you are redirected to the logoff page, please check OSS note 2874027 – Transaction SMEN is locked in direct webgui.

Known limitations

SAP GUI for HTML has known limitations. These limitation vary per SAP netweaver and S/4HANA version. The main OSS note is: 314568 – SAP GUI for HTML functionality / Limitations / Sp. Behaviour. This note has a reference to the restrictions of SAP GUI for HTML per version.

For ABAP developers there is a specific OSS notes on which developments are possible ,and which ones not, for Webgui as in comparison to SAP GUI: 3024355 – Webgui HTML Viewer: Restrictions compared to SAP GUI for Windows.

Full release notes are published in OSS note 2658822 – Release notes for SAP GUI for HTML (short WEBGUI).

Kernel updates

The SAP GUI for HTML is very sensitive for issues in the SAP kernel. When applying a kernel update, test the use of SAP GUI for HTML carefully for the functions your business needs. More on kernel patching strategy can be found in this blog.

Upload and download of files with the WEBGUI file browser

For upload and download of files with ITS webgui, you need to use the WEBGUI file browser. How to use this is explained in OSS note 2249454 – ITS Up/Down: Using the WEBGUI File Browser. See also: 2636752 – WebGUI File Browser: option in file save dialog to save to native file system.

Other OSS notes

New service handler CL_HTTP_EXT_ITS_2 replacing CL_HTTP_EXT_ITS. See OSS note 2860209 – SAP GUI for HTML: New Service Handler.

ITS support info might be needed by SAP. For this read note 2199237 – ITS: How to download ITS SupportInfo file.

Internationalization: time zone settings

The SAP system can deal with multiple time zones. This blog will explain the settings.

Questions that will be answered are:

  • How can I check my current time zone settings in my SAP system?
  • How can I check and update time zone customizing settings?
  • If there is a time zone or day light saving change, in which note can I find which settings I should change?

Check the current time zone settings

The active time zone of your system can be checked via transaction STZAC:

Time zone customizing

Detailed time zone customizing settings can be made via transaction STZBC:

Changes that are needed to time zone settings (for example new change for daylight saving) can be found in the central OSS note 198411 – Current data and information about time zones. For daylight saving, read this special blog.

Background information

More background information can be found on the SAP wiki on time zones.

Timezone settings in HANA database

For Timezone settings in HANA database, read OSS note 1791342 – Time Zone Support in SAP HANA.

S4HANA embedded livecache activation

In S4HANA you have a choice to activate the embedded livecache for SCM functionality. Or to keep your current SCM livecache in a separate system.

This blog will describe the steps to activate the SCM livecache embedded in S4HANA.

Questions that will be answered in this blog are:

  • How to activate the embedded S4HANA livecache technically?
  • How to monitor the embedded S4HANA livecache?
  • How to activate the embedded S4HANA livecache functionally?

Installation

First read the embedded livecache OSS note: 2593571 – FAQ: SAP HANA Integrated liveCache.

Then determine via OSS note 2074843 – Version Matrix for HANA integrated liveCaches, which exact version to download and install.

Then follow all the manual installation steps described in OSS note 2407589 – Manual installation of liveCache for S/4HANA.

Installation will take few hours, up to a few days (depends on your experience).

Technical checks

When you start LC10 transaction, like you are used to on an SCM server, you will be re-directed to DB50 or DBACOCKPIT transaction:

In DBACOCKPIT you can see the 3 schemas for Livecache:

And you can see all livecache related technical parts:

Functional activation

After the technical activation the functional activation has to be done in customizing for advanced planning and scheduling:

And separately for global ATP:

Functional testing

After the activation you can check to see all works by creation of new material in transaction MM01. The new tab Advanced Planning should be available now:

PP/DS optimizer

The PP/DS optimizer still needs separate server and installation.

See this blog and OSS note 1686826 – Installation help for installing SCM Optimizers.

FIORI cache refresh

After update of a FIORI app UI5 code you will sometimes face issues that the browser or server still holds components from the old app version. This issue is there for both custom developed and for standard SAP UI5 apps. The root cause is the caching at multiple levels to assure highest performance. There are caches on frontend browser, gateway server and backend server.

Questions that will be answered are:

  • What do I need to do on the browser for refresh?
  • How do I clear the caches on the gateway frontend server?
  • How do I clear the caches on the backend server?

When to perform all the cache refreshes?

The below full procedure of cache refresh at all levels is only to be performed:

  • When upgrading or applying support pack of SAP_UI component
  • When facing severe distortions on the UI that can’s be solved after browser cache

Background: the server cache refresh will invalidate all caches for end users. This means that all end users need to get the download the FIORI app again. Each FIORI app is between 5 to 15 MB large and takes time to download and render on the front end. This will take 10 to 60 seconds, during which the end users gets a full white screen.

Avoid cache refresh to keep happy users.
Only mandatory at support pack or upgrade.

Browser cache refresh

After an update of the UI code best to clear the browser cache. In Chrome also: open the application in chrome and use key combination ctrl + shift + R to perform a hard reload.

Or run in Private or Incognito mode.

Best browser for testing is Chrome.

Gateway and backend server cache clearing

Use the following sequence to clear all caches:

1. Execute /IWBEP/CACHE_CLEANUP transaction in ECC system (or other backend system) as well as Gateway system (this is program /IWBEP/R_MGW_MED_CACHE_CLEANUP) .

2. Execute /IWFND/CACHE_CLEANUP transaction in Gateway system with checkbox checked (this is program /IWFND/R_MED_CACHE_CLEANUP).

3. In the gateway system, you need to do the below steps:

  • Go to transaction SMICM
  • Click on ‘Goto’ menu bar button
  • Select option ‘HTTP Plug-In’ Select option ‘Server Cache’
  • Select option ‘Invalidate Globally’

4. Execute reports /UI2/INVALIDATE_GLOBAL_CACHES, /UI2/INVALIDATE_CLIENT_CACHES, /UI5/APP_INDEX_CALCULATE in front-end gateway system.

For the last program (/UI5/APP_INDEX_CALCULATE) you can do a delta or full for all or for a specific application.

Note on the cache cleanup: 2319491 – How to clean up the cache after applying changes that affect SAP Fiori apps.

Background

More background on caching can be found in OSS note 2626394 – Troubleshooting Fiori Apps Cache issue – how to information.

Other interesting OSS notes:

Bug fix notes:

qRFC tips & tricks

This blog will give tips and trick on the basis part of qRFC (queued RFC).

Questions that will be answered are:

  • How to assign a specific server group to qRFC?
  • How to correct host ID in SMQS?
  • What to do with the scheduler error RES_LACK?
  • What to do when inbound entries in SMQ2 stay in status RETRY?
  • How to check performance of qRFC?
  • How to check consistency of qRFC?
  • How can I activate the application log to detect manual actions performed on qRFC?
  • How to monitor qRFC?
  • In which table is qRFC header data stored?

Assigning specific server group for qRFC

In RZ12 you have defined a specific server group. In SMQR or SMQS you can assign that server group with menu option Edit / Change AS group:

Check also note: 3159931 – SM58 tRFC failed with “Error when opening an RFC connection (CPIC-CALL:”.

How to correct host ID in SMQS?

After a system copy the host ID in SMQS might be still pointing to the old system. To solve this, goto SM51 and select menu option Goto / Host Name Buffer / Reset / Entire System. Then go back to SMQS and re-activate the scheduler via menu option Edit / Activate Scheduler. See also OSS note 2377064 – How to correct the host ID in SMQS.

Empty host ID in SMQS

Initially the host ID in SMQS is empty. After the first message is sent, the host ID will be filled. See OSS note 2915187 – SMQS Host ID is blank or empty.

Outbound scheduler in status RES_LACK

If the outbound scheduler SQMS has the status RES_LACK, then the amount of DIA versus BTC processes is not balanced. Follow the instructions from OSS note 1970757 – Outbound qRFC scheduler with status RES_LACK to balance the processes.

Deletion of queued messages

Deletion of queued messages is possible, but should be done with care. After deletion, support can be lost on certain functions. See for example OSS note 2375304 – Deleted queues from SMQ2. You can apply OSS note 2837536 – Customer Connection – Improvement Request 217719 – Authorization check for message deletion in Smq2 / Smq3 to restrict the access to message deletion via special authorization object.

See also OSS note 3561496 – Enhance warning messages for deleting classic Queued RFC queues.

Inbound queues SMQ2 stay in status RETRY

When inbound entries in SMQ2 queue remain in status RETRY, this is normally caused by lack of authorization for launching batch job. This can happen to background user and user reprocessing the jobs. Check the authorization trace to see what needs to be fixed. More background in OSS note 1862256 – Inbound queues (SMQ2) stay in status RETRY.

Queue in the inbound queue scheduler SMQ2 with “Name or password is incorrect (repeat logon)”

When you get this issue a password change of the RFC might be required. Read more in OSS note 2474161 – Queue in the inbound queue scheduler SMQ2 with “Name or password is incorrect (repeat logon)”.

Queue resets via batch jobs

Report RSQOWKEX can be used to reset the outbound queue. RSQIWKEX can be used to reset the inbound queue. The goal is to reprocess messages in error state like SYSFAIL, CPIERR. More details are in OSS note 2552322 – RSQOWKEX and RSQIWKEX. Note 2195856 – Double message execution explains to be careful with using these programs with status RETRY.

These programs can be scheduled in batch mode to automate reprocessing.

Consistency checks of qRFC

Consistency checks of qRFC:

  • You can identify and delete inconsistencies in the outbound queue using report RSTRFCEG.
  • You can identify and delete inconsistencies in the inbound queue using report RSTRFCEH.

Background is described in OSS note 779664 – Consistency check of qRFC queues with deletion.

Deletion of unprocessed LUW’s in qRFC

Deletion of unprocessed LUW’s in qRFC: background is described in OSS note 760113 – Delete unprocessed LUWs in the qRFC.

Application log for qRFC manual processing

In SMQ1 and SMQ2 manual actions can be done, which are normally not logged. Apply OSS note 3031450 – Application log for inbound qRFC monitor such as SMQ2 to get the actions logged in the application log.

Alerting of failed qRFC in EWM systems

qRFC is very important in EWM systems. In EWM systems there is a built in program for alerting on qRFC failures: /SCWM/R_QRFC_QUEUE_ALERT. More on this feature you can read in OSS note 2226372 – EWM – Alerting for Failed Queues.

Issues with destination NONE

When using qRFC with SQMS for destination NONE, you can have unwanted interference with tRFC. See OSS note 1813159 – Hanging LUW´s in SM58 with the function module IDOCS_OUTPUT_TO_R3. Set the registration of NONE with flag ‘w/o tRFC’ on. And make sure the max connections is not set to 1, but much higher.

Issues with performance of qRFC

OSS note 2183108 – t/qRFC processing: general performance verifications contains program Z_RFC_QUEUE_PERF. This program can be run to check for potential performance issues. Output example:

Deleting saved queues in SMQ3

To delete saved queues in SMQ3, follow the instructions in OSS note 2558561 – Delete saved queues in SMQ3.

Monitoring of qRFC

SAP Focused Run can be used to monitor qRFC’s. Read more in this blog.

Storage of qRFC header data

Header data of qRFC is stored in tables TRFCQIN and TRFCQOUT.

Reference OSS notes

Reference OSS notes:

Bug fix OSS notes

Bug fix OSS notes: