Snapshot monitoring enables you to capture snapshot of current performance and usage of work processes. This can be used to analyze performance issues.
Questions that will be answered in this blog are:
- How to setup snapshot monitoring?
- How to analyze the results of snapshot monitoring?
- How can I see SM50 processes running when there are issues?
Setting up the snapshot monitor
Start transaction /SDF/SMON for snapshot monitoring:
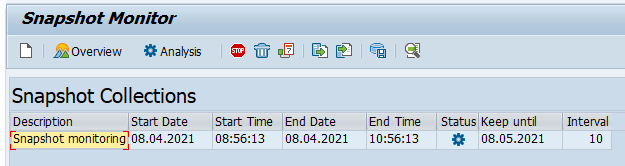
If you don’t have any snapshot monitoring yet, you will reach the schedule screen:
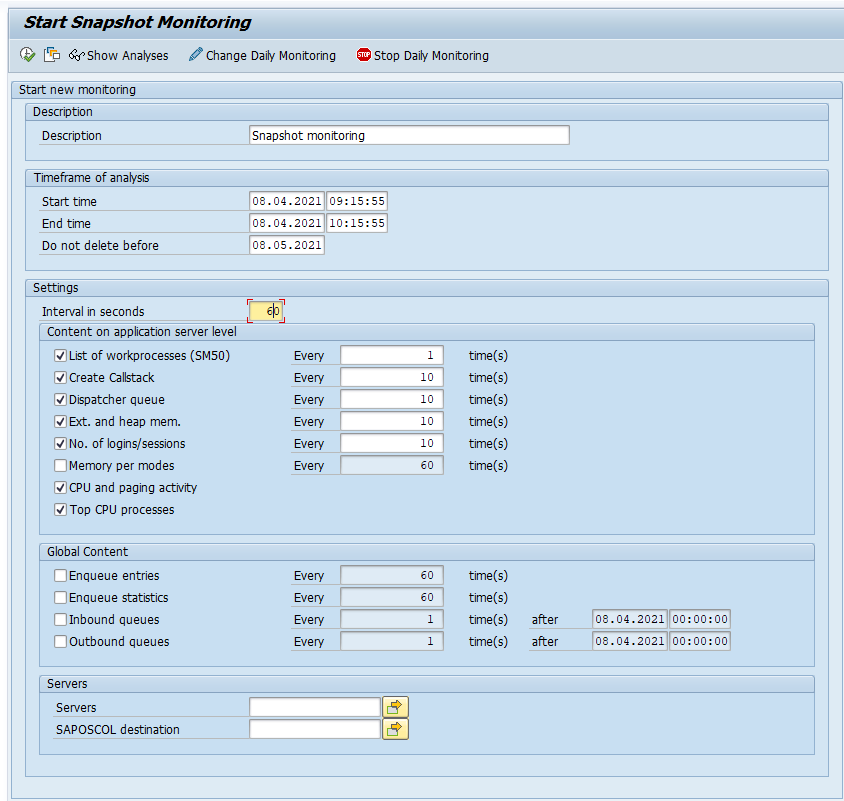
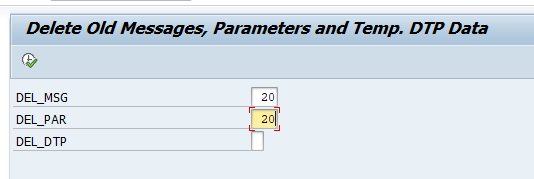
Now you can plan a separate snapshot monitoring run, or set up the daily run:
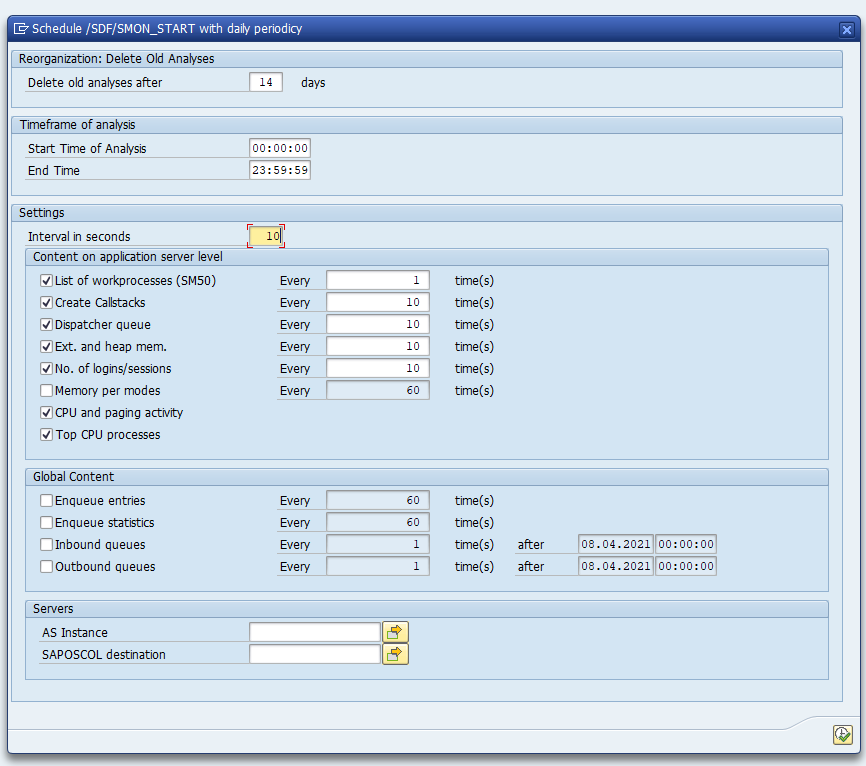
For each run: check to increase the Interval timing!
Analyzing the snapshot monitoring results
With the Analysis button you can analyze the results:


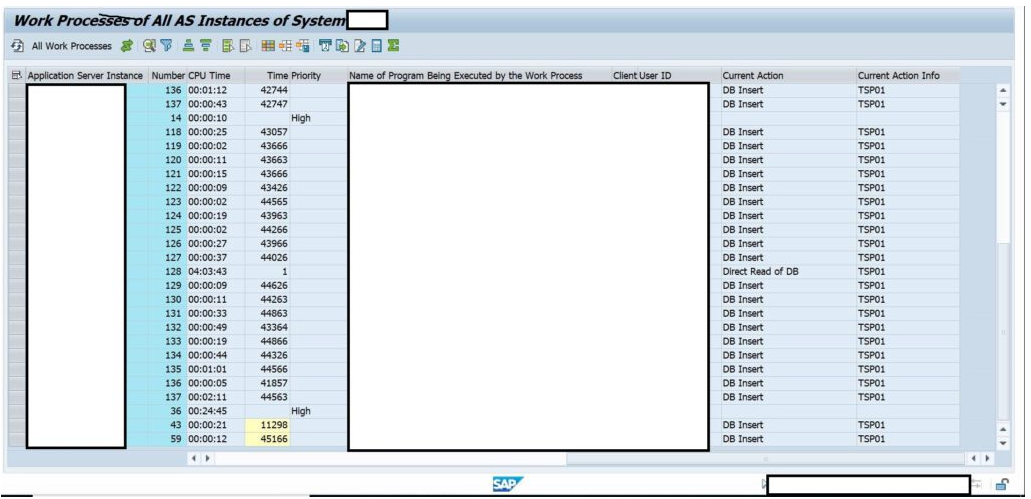
In the snapshot monitor (/SDF/MON) you can drill down:
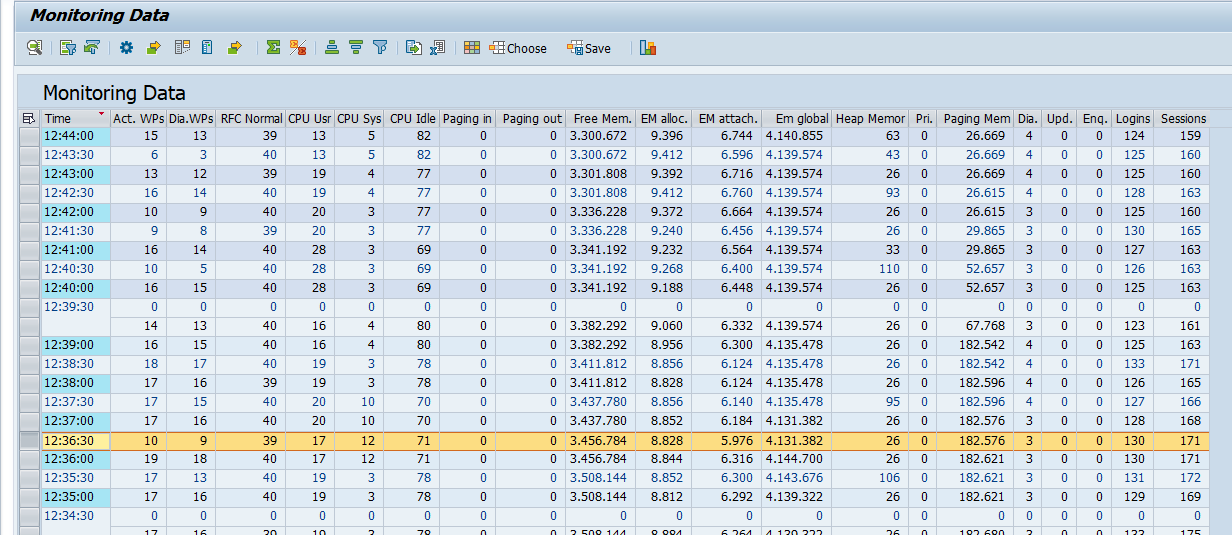
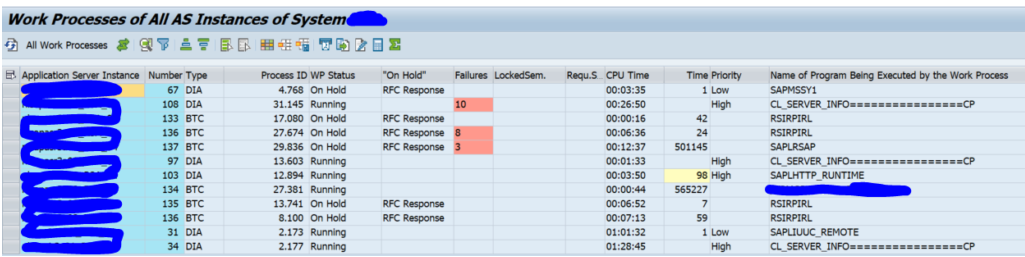
Double clicking at the line shows you the SM50 processes running at that point in time:
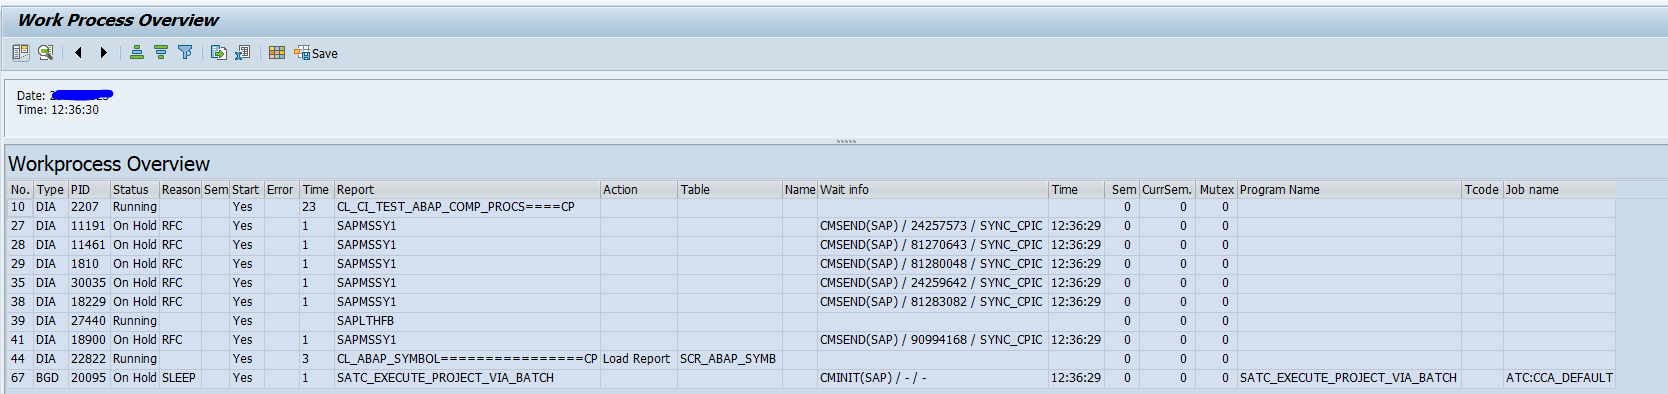
This enables you to analyze issues that occur for example in the middle of the night, and you want to see what is running at that point in time.
Use transaction /SDF/SMON_DISPLAY for a more graphical overview. Read more in this dedicated blog.
References
The tool /SDF/MON has been replaced by the SMON tool in netweaver 7.5 (using tcode /SDF/SMON). You will find notes for both tools.
SAP wiki for snapshot monitoring can be found on this link.
Explanation OSS notes:
- 2229255 – Long RFC response times when you use /SDF/MON
- 2383809 – How to configure /SDF/MON for performance monitoring and analysis
- 2651881 – How to configure SMON for performance monitoring and analysis
- 3007524 – Extended Performance Data Collection
Bug fix OSS notes:
- 2950911 – Different default settings are required for HANA and Non-HANA DB
- 2999163 – sdf/smon only indicates free RFC WPs available for normal priority requests
- 2997465 – WP aggregation list does not work in the GoTo menu of report sdf/mon
- 3318669 – Add Network Roundtrip Time RTT to /SDF/SMON
- 3399054 – Not every X snapshot is displayed in /sdf/smon overview part 2
- 3496195 – /SDF/SMON – “Show entries of same dialog step” provides wrong response time calculation
- 3543773 – Global data is not visible after server filtering